Lecture
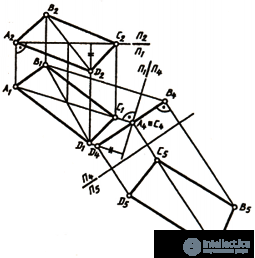
The definition of the true value of a flat figure can be accomplished by converting the drawing by replacing the projection planes. In fig. 146, and given a comprehensive drawing of the rectangle ABCD. None of the projections of the rectangle occupies a particular position.

Fig. 146, a
We solve the problem by successively solving the third and fourth main tasks. Replacing the plane P 2 to P 4 , we bring the rectangle into a particular position, that is, in the form of projecting with respect to P 4 . After completing the second substitution, i.e. replacing P 4 with P 5 , we determine the true value of the rectangle ABC.
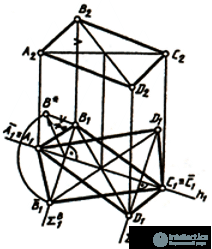
The task of determining the true size of a rectangle can also be solved by rotating around the level line of the plane of this figure before aligning with the corresponding level plane (Fig. 146, b).

Fig. 146, b
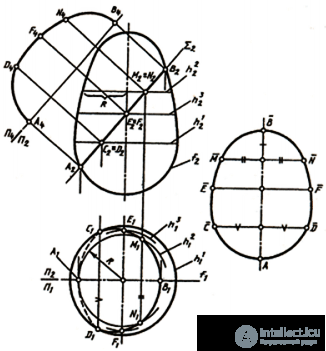
In the series of the problems under consideration, the problem of determining the true value of a figure of a surface section by a projecting plane can also be solved. In this case, one replacement of the planes of the projections is enough (the initial problem 3). In this case, the true value of the sectional figure can be easily constructed by directly measuring the distances of the points of the figure “along the section” and “across the section” (Fig. 147).

Fig. 147
The length of the cross-sectional figure AB is depicted as the true value on the plane P 2 , since it is a segment of the frontal figure of the section plane. The distance between the symmetric points "across the section" is depicted in full size on the plane P 1 since it is the horizontal segments of the section plane Σ.
Comments
To leave a comment
Descriptive Geometry and Engineering Graphics
Terms: Descriptive Geometry and Engineering Graphics