
Lecture
Это окончание невероятной информации про микроволновка.
...
for its replacement.
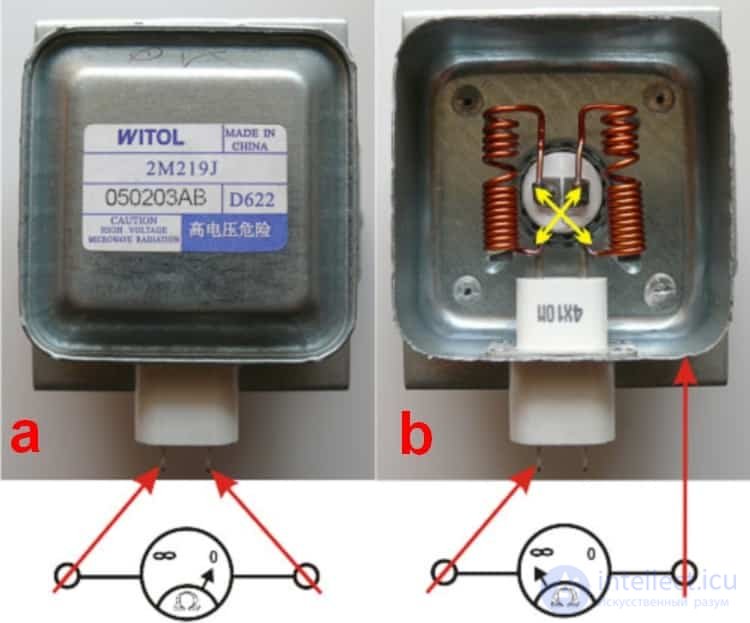
Fig. 6. Checking the magnetron
Important! The magnetron must be replaced with one of the same type. This is because the parameters of the high-voltage transformer and the control circuit are calculated based on the specific model of the microwave generator.
Sparking is observed.
This fault can be caused by the following reasons:
The tray does not rotate.
First of all, it is necessary to check whether the tray is blocked by some foreign object, whether it is correctly installed, or the separator. If everything is normal, then the cause lies in the drive. This can be related to the following reasons:
No response from the control panel.
In modern electronic models, this fault indicates problems with the control module. In products with an electromechanical control system, it makes sense to check the mechanical relays and/or switches, and if necessary, replace the faulty parts.
The display does not work when turned on.
If the power indicator lights up when turned on, but the digital display does not work, then everything points to problems with the control module. It needs to be repaired or replaced.
The fuse blows when the door is closed
A characteristic indicator of faulty door position microswitches. One of them is «stuck» and does not switch, resulting in a short circuit in the control circuit. The repair consists of replacing or cleaning the microswitches.
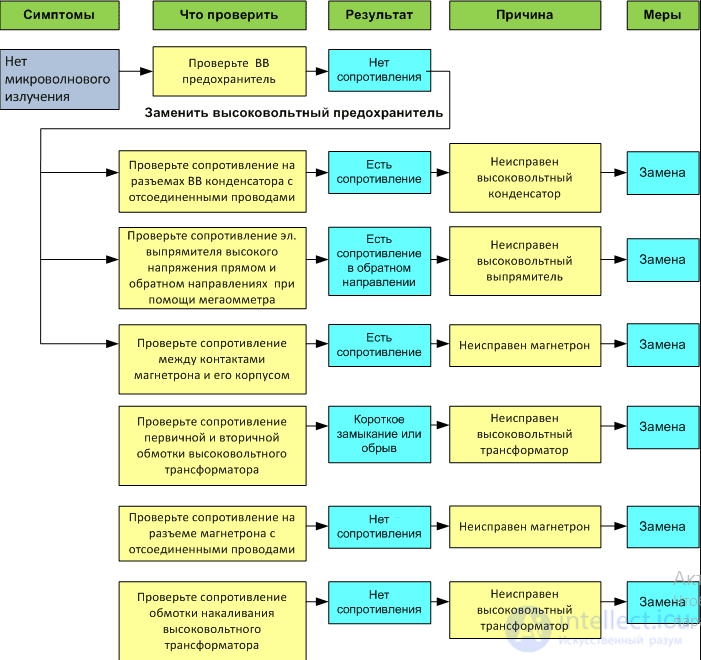
Sequence of actions if there is no heating
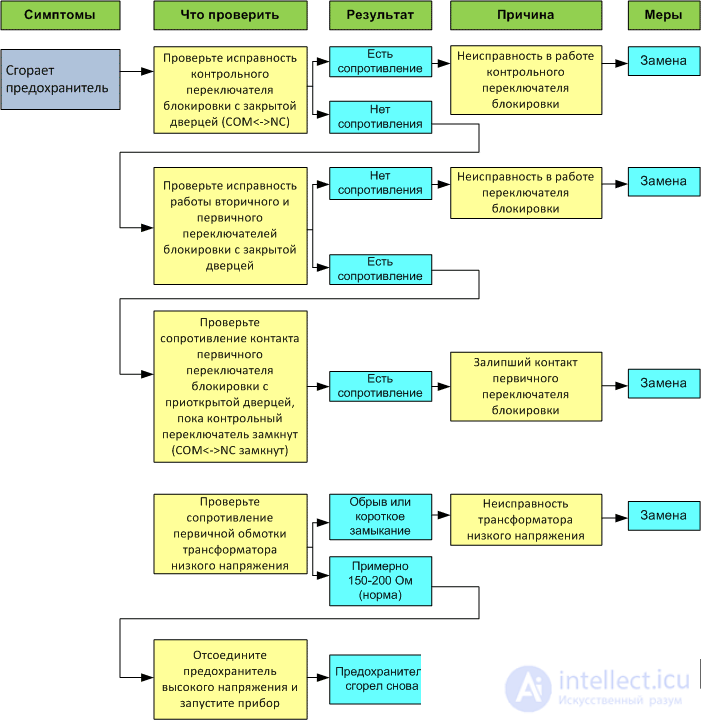
Fuse faults
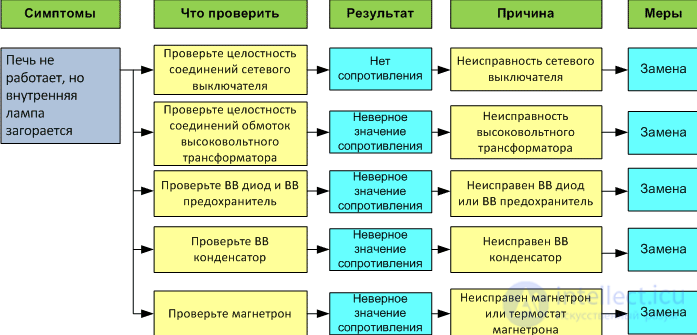
Most models suffer from common problems
As you have already seen above, there can be very many causes of breakdowns and faults in a microwave oven. Most often it is the failure of the magnetron itself, due to improper use of the appliance, namely the use of cookware not intended for cooking in a microwave oven. Also various metal parts that may accidentally end up inside during operation.
Failure of the magnetron can be considered the most unpleasant cause, since replacing this part is not worth the trouble. In this case, it is easier to buy a new oven.
But sometimes there are minor breakdowns that can be easily fixed without having any special tools and without spending a lot of money.
Below, the article will describe one such breakdown, and a way to fix this fault. In the photo is an oven that stopped turning on and does not react to manipulation of the control knobs in any way.
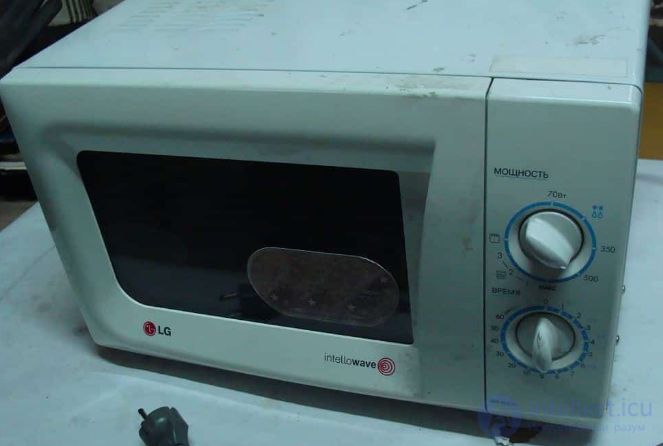
Fig. 7. LG MB-4022G
Before removing the protective cover from the oven, it is necessary to carefully inspect the power cord and the plug itself for any damage, breaks, or cuts. If there are any, then the oven should be disassembled.
For this you will need a Phillips screwdriver.
Turn the oven with its back side towards you, and after unscrewing the two mounting screws, remove the ventilation cover. Next, remove the protective cover.
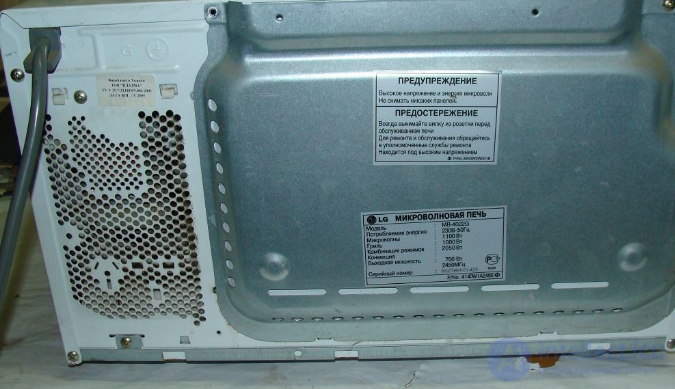
Fig. 8. Removing the protective cover
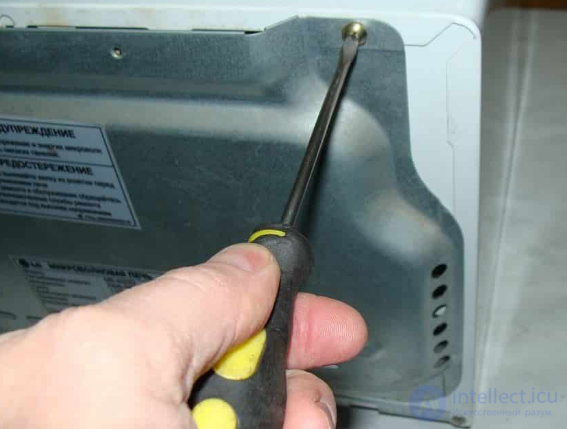
Fig. 9. Unscrewing the small screws
At the back, it is secured by several screws. Unscrew all of them.
When all the rear screws have been unscrewed, move to the side, left side.
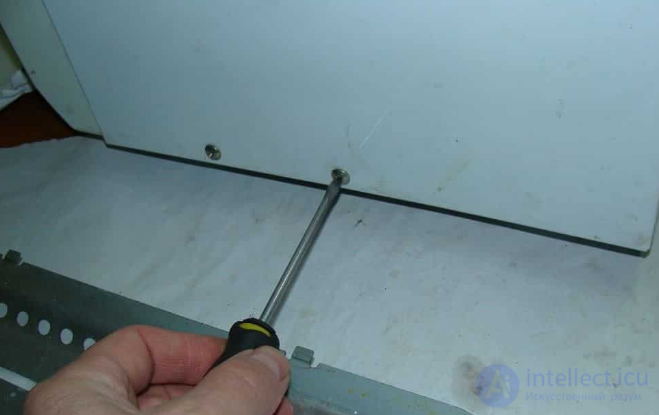
Fig. 10. Unscrewing the left side
There are three mounting screws there, two at the bottom and one in the middle. They should also be unscrewed. As you unscrew the screws, you can observe how the metal edges of the cover move away from the body chassis.
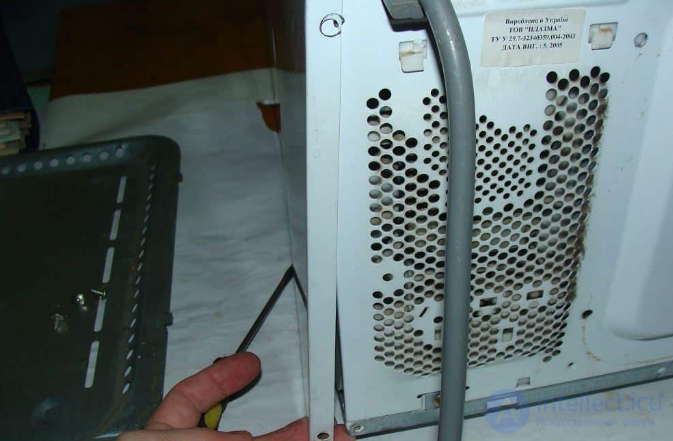
Fig. 11. Continuing to unscrew the screws and remove the covers
Next, lift the cover slightly upward and pull it toward you. In this way, it comes out of the slots located on the front part of the body.
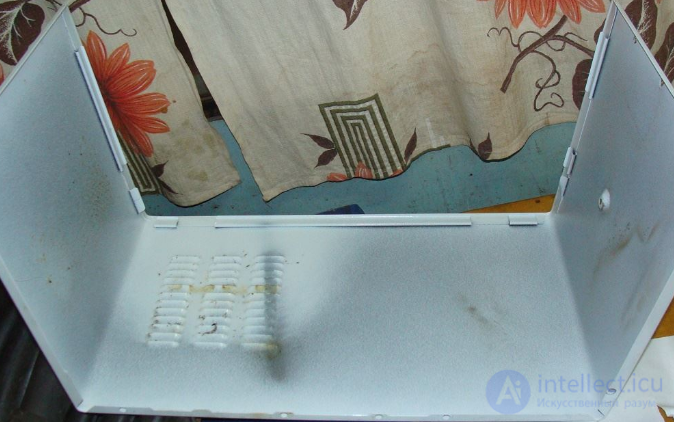
Fig. 12. The cover from the inside
You can notice traces of soot that formed as a result of high temperatures.
The removed cover has given access to the main components of the microwave oven (fig. 13). At the top, you can notice the grill elements – a heating element located in a special housing.
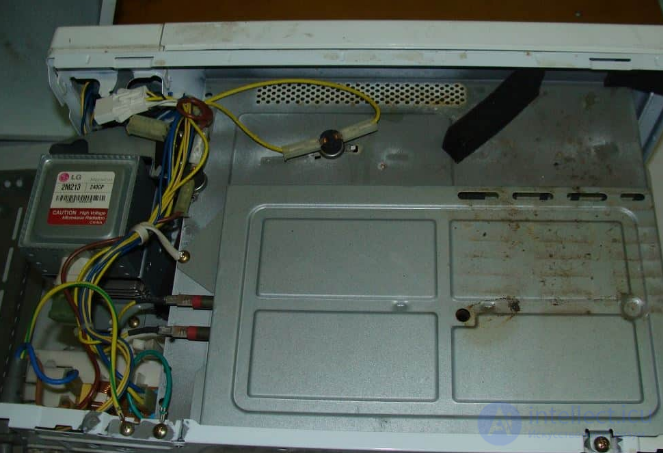
Fig. 13. Internal structure of the microwave oven
On the left is the magnetron itself (fig. 14), namely its upper part.
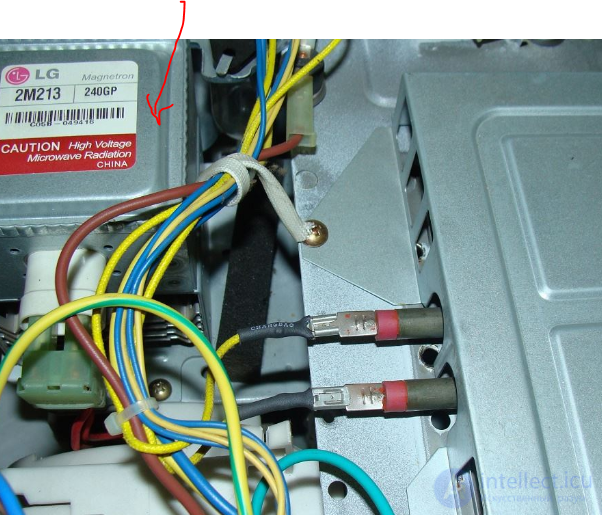
Fig. 14. Magnetron of the microwave oven
At the bottom left – the power filter, from which a bundle of wires and the mains cable extend. Also on the upper part of the chamber, you can notice two temperature sensors. They are attached to the housing and react to changes in temperature. Two wires are connected to each of them.
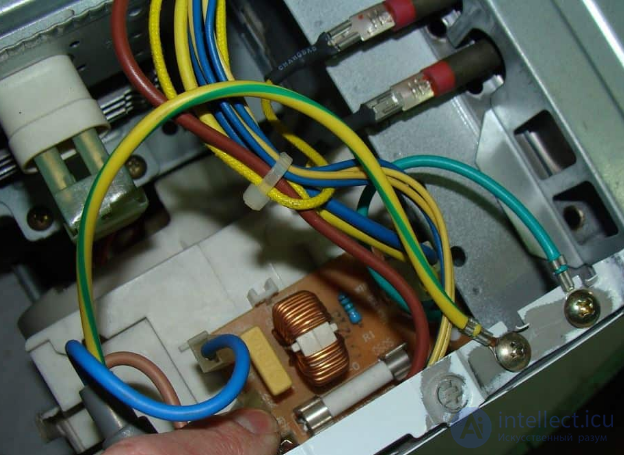
Fig. 15. Power filter and 2 temperature sensors
If you look from the side, other elements come into view here. For example, the power transformer, which has a step-up winding.
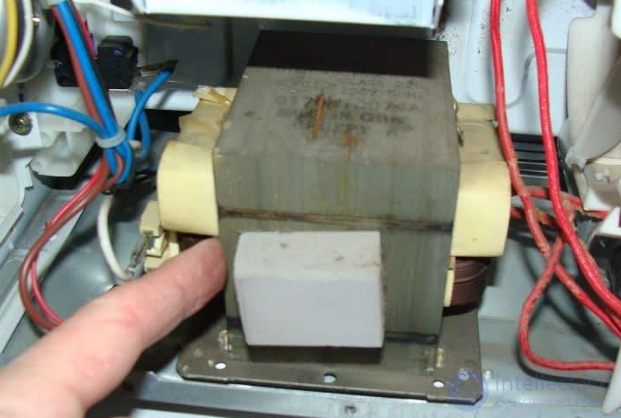
Fig. 16. Power transformer
We also see the magnetron heatsink.

Fig. 17. Magnetron heatsink
And we inspect the power switch.
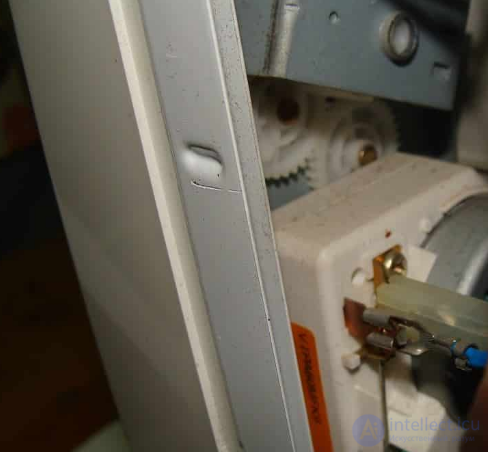
Fig. 18. Power switch
The timer relay with an audible signal, whose role is played by a mechanical bell (Fig. 19).
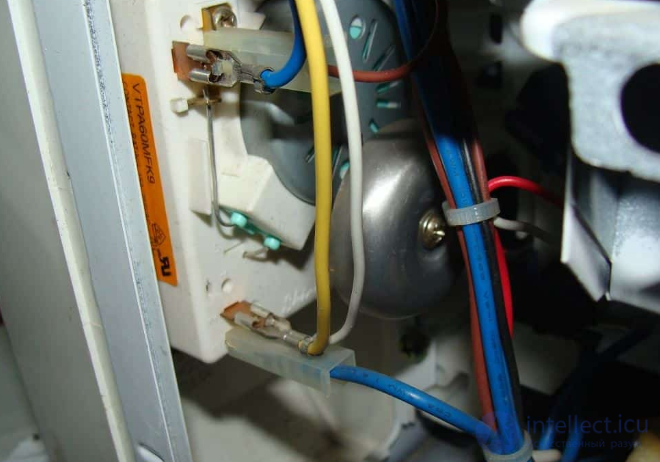
Fig. 19. Timer relay
The magnetron heatsink cooling fan (Fig. 20). It prevents overheating of this important and expensive part.
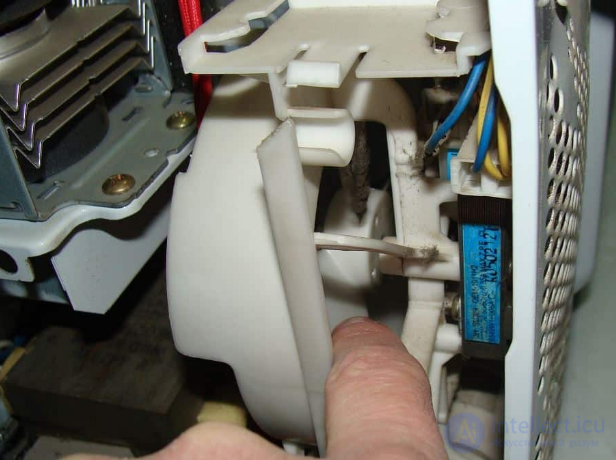
Fig. 20. Magnetron cooling fan
There's almost nothing on the right side (Fig. 21).
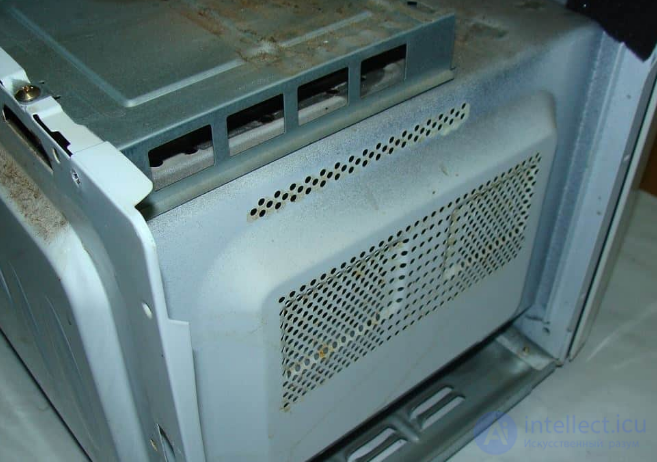
Fig. 21. Right side
Let's start by inspecting the power filter, because the mains cable connects to it first, and from there the board's voltage goes on to the other elements of the oven. Therefore, the place where the voltage «disappears» must be sought starting from where it enters, that is, from the mains cable.
So, on the power filter board we find the terminals where the supply wires arrive, namely the blue and brown ones (Fig. 22).
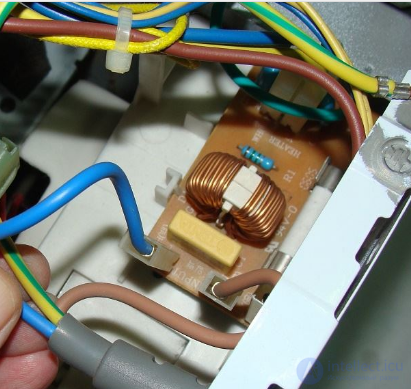
Fig. 22. Supply wires
We plug the power cord into the outlet and measure the voltage at this section of the circuit. The meter shows that the mains voltage — 220 volts — reaches the board. This means the power cord is one hundred percent intact, which tells us that the problem lies further along the circuit.
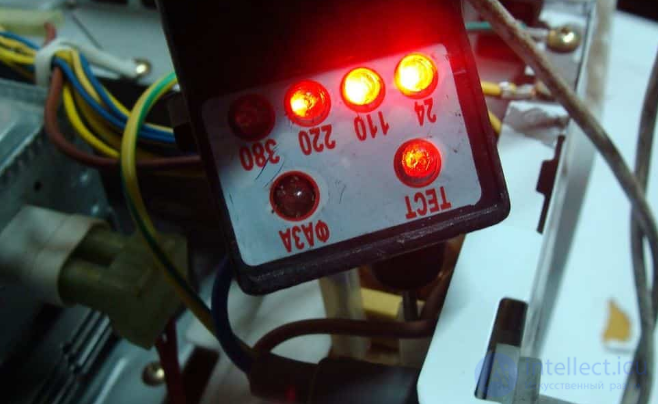
Fig. 23. Measuring the voltage on the circuit section
The power filter board has a fuse installed, which could be the reason the voltage does not pass further.
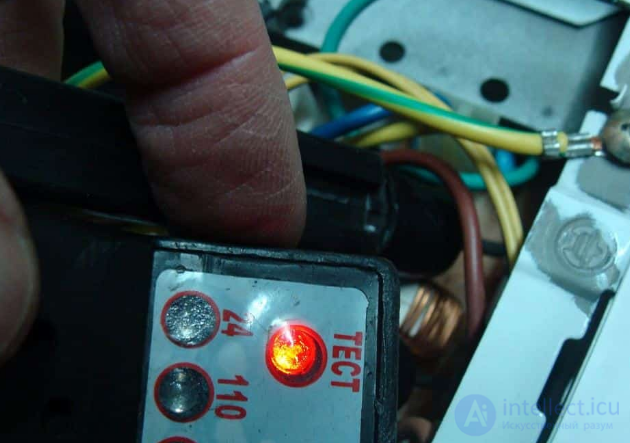
Fig. 24. Checking the fuse
Using a continuity tester we measure the fuse's continuity. This can be done without removing the fuse from its mounting clips, but before doing so the appliance must be de-energized by unplugging the power plug from the outlet.
The meter shows continuity, which means the fuse is intact and the problem is not there.
Next, we pay attention to the brown wire (Fig. 25), through which the voltage continues on and reaches the temperature sensor.
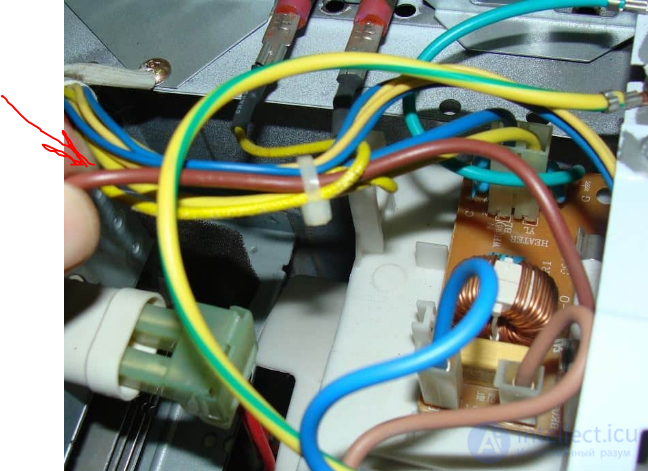
Fig. 25. Brown wire
Here, this device is responsible for disconnecting the microwave oven from the mains if the housing temperature is critical, that is, exceeds 150 degrees. At such a temperature, the bimetallic contacts inside the device's housing open and break the circuit. After the housing cools down, they return to their original position.
Its continuity can be checked with the same tester used to measure circuit continuity (Fig. 26).
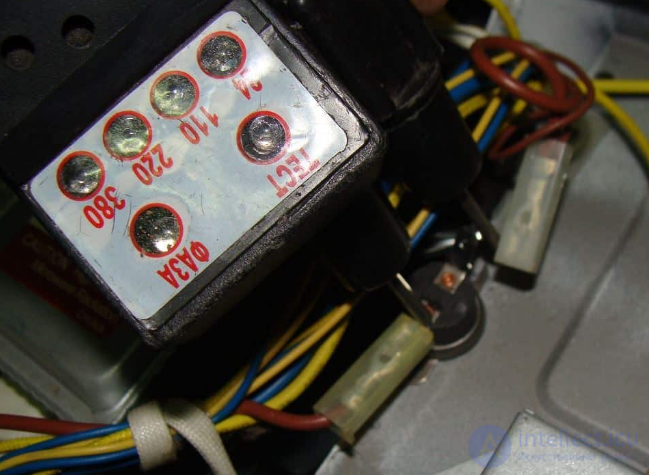
Fig. 26. Checking the temperature sensor
To do this, we remove one end of the wire from the terminal, so the circuit does not introduce false readings. We connect the meter's probes to the sensor's leads and observe the result. As can be seen, the meter shows an open circuit, which means the sensor is faulty.
Now we can consider that the cause of the oven's fault has been found, but the final result will only be known once the issue with the thermal sensor is resolved.
To restore the sensor's operation, a sharp shake or a tap on it with some object, for example pliers or a screwdriver tip, sometimes helps. But even if the device is restored, there is a risk that in the event of critical overheating it will not trigger, and the consequences could be dire.
Therefore, to avoid taking risks, it's better to replace the device with a new one, especially since it costs only about two dollars. It can easily be found in one of the online stores.
The photo shows the thermal cutoff's markings.
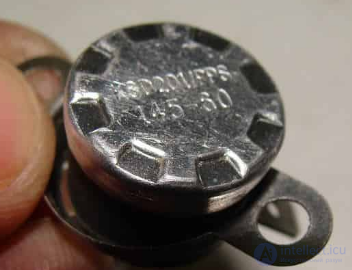
Fig. 27. Thermal cutoff markings
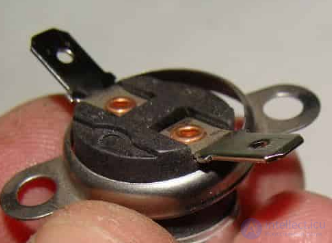
Fig. 28. Temperature sensor: view from the back side
This thermostat is a bimetallic KSD 201.
The markings indicate that it trips at a temperature above 145 degrees and resets when the temperature drops below 60 degrees.
Removing the sensor is not difficult (Fig. 29); it's enough to pry up one of the mounting tabs with a screwdriver, and it comes off easily. Before removing it, you need to disconnect the wires. If, when installing a new sensor, you swap the wires, it will not affect its operation in any way.
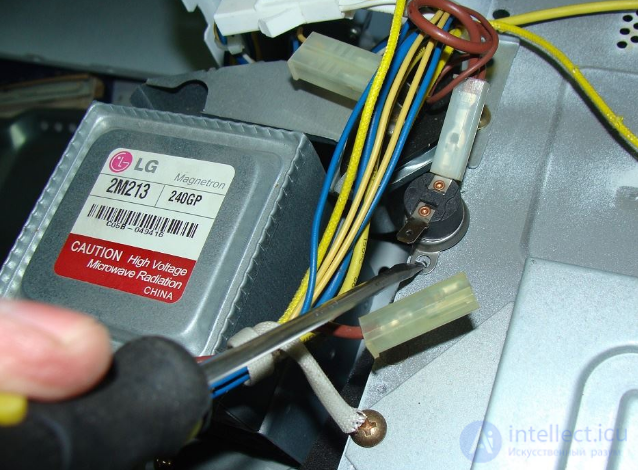
Fig. 29. Removing the sensor
After purchasing this device, we install it back in its original place and connect the wire from the filter board to it. We don't connect the second wire yet. The sensor head must sit snugly against the chamber housing. We connect the meter to the thermal sensor's leads and check its continuity.
Now the meter shows continuity (Fig. 30), which means it is intact. Next, we connect the second wire and check the quality of the connection by tugging on it.
Fig. 30. Checking the continuity of the new sensor
Now we plug the power plug into the outlet and use a voltage tester to check whether voltage reaches the sensor. To do this, we connect one probe of the meter to the blue wire on the power filter board, and the other to the sensor – the near end – to which the brown wire arrives.
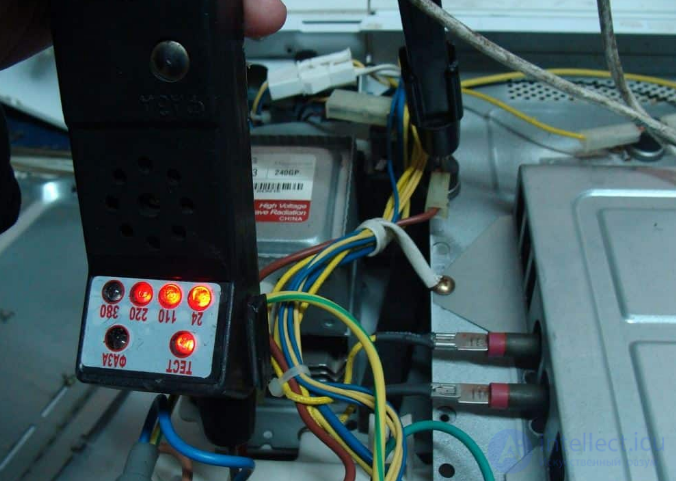
Fig. 31. Checking whether voltage reaches the sensor
If the result is positive, and in the photo (Fig. 31) it indeed is, then we measure the voltage at the sensor's output (Fig. 32). The meter shows that it is also present, as in the first case.
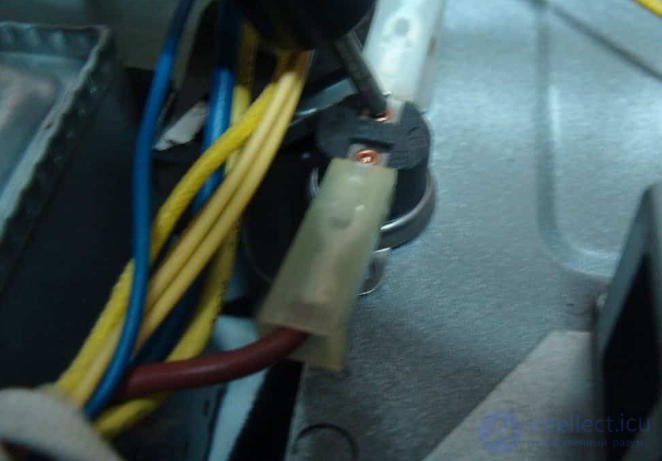
Fig. 32. Measuring the voltage at the output of the multicooker's thermal sensor
Now we can consider the sensor successfully replaced.
Although this is not advisable to do, without putting on the protective cover, we apply power to the oven, and setting the minimum temperature, we turn the device on.
The oven has started and is running (Fig. 33).
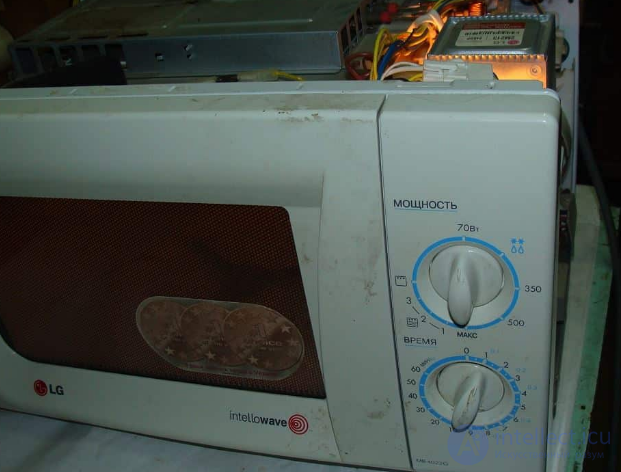
Fig. 33. Checking the microwave oven's functionality
We quickly turn off the device and put the protective metal cover back on.
The housing cover must be installed in reverse order, that is, by inserting its front part into the slots and securing the rear part with screws.
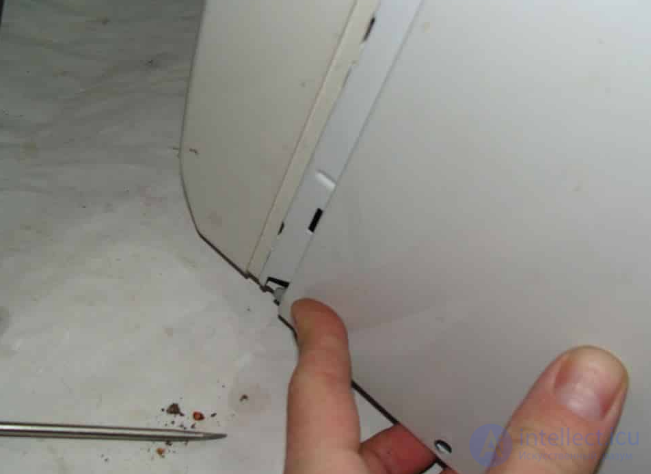
Fig. 34. Putting the cover back on
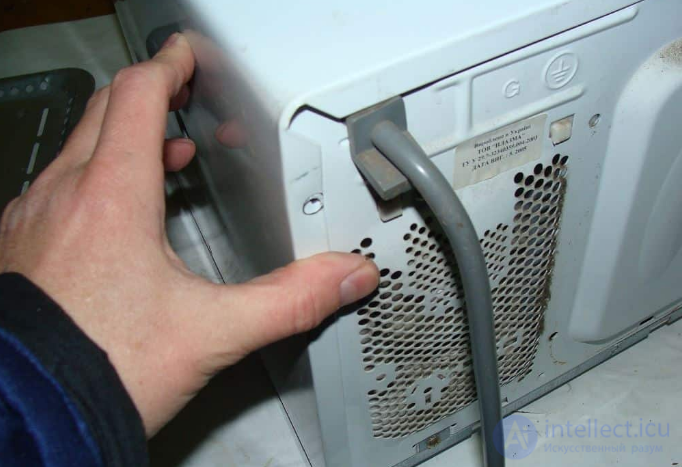
Fig. 35. Continuing the assembly
For a final check of the device's operation, we plug it into the mains. We place some food inside in a glass jar and start the oven with the timer relay knob.
The oven is working, the food is heating up and giving off steam.
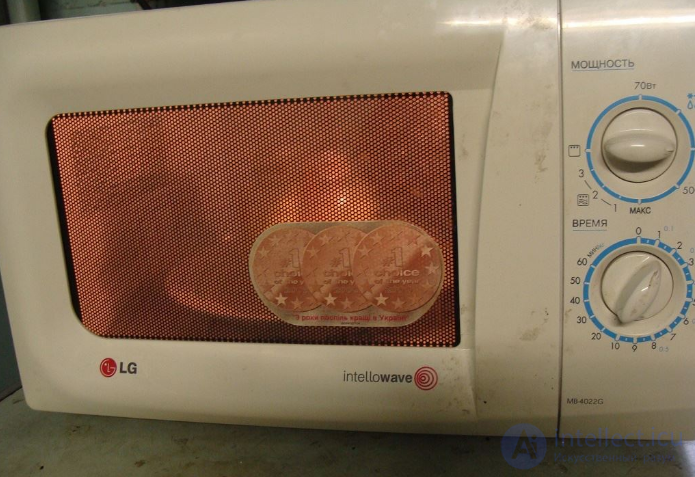
Fig. 36. The multicooker is in working order
The problem has been fixed, and it turned out to be not difficult or expensive at all!
A perfectly legitimate question upon reading this: is it worth keeping such a dangerous device at home? There is no such thing as absolute evil, just as there is no absolute good. In the pace of modern life it is sometimes very hard to do without a microwave oven, and the absence of fat hydrolysis is a weighty argument in its favor.
The author worked professionally with microwaves for many years. There have been no health consequences: I was always extremely careful, and my individual sensitivity turned out to be low. There is a microwave oven in the household, an inexpensive one. It mostly sits unplugged; it gets switched on very rarely and irregularly, when there is simply no doing without it.
This is exactly how household microwave ovens should be regarded: as an unavoidable but sometimes useful evil. Rather like a can of insecticide spray or a propane torch – sometimes you need them and there's no substitute, but they are not things for playing around or amateur experiments. And most importantly – check the microwave for shielding quality and microwave leakage no less than once every six months.
In the US, about 80 years ago, a monument was erected to the victims of car accidents with the inscription: «8,000,000 Americans killed for not one cent». And yet we still drive. And we can no longer not drive. It is only necessary to strictly observe safety rules, and they must be adequate to the actual conditions and the demands of life.
Часть 1 Microwave Oven Repair: Algorithm and Example of Fault Finding
Часть 2 Sealed containers, such as plastic bottles, cups with screw-on lids,
Часть 3 Algorithm for troubleshooting a microwave oven - Microwave Oven Repair:

Comments