
Lecture
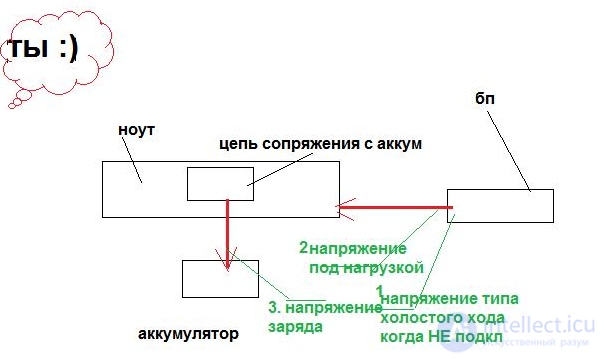
Before starting to repair a laptop's power system, it is necessary to carry out a thorough diagnosis of the device. This is a mandatory step that helps identify the true causes of the fault and avoid unnecessary actions that could worsen the problem. Diagnostics help determine exactly what is causing the malfunctions in the laptop's power supply — whether it is insufficient voltage, current issues, or faults in individual components. The figure below shows the main causes of voltage and current disruption that can lead to battery charging problems. It is important to note that in some cases the voltage may be sufficient to power the laptop, but not sufficient for correct battery charging. Such a discrepancy is often related to damage to the power circuits, battery wear, or malfunctions in the control modules. Only after identifying and eliminating the root cause of the fault can you proceed to repair or replace power system components. Moreover, the voltage may be sufficient for powering the laptop itself but not for charging.
The first models could last without charging for only a very short time, and the nickel-metal hydride batteries used had a host of drawbacks. Today, the vast majority of laptops use lithium-ion batteries with a built-in charge controller, power circuits, and a controller on the motherboard.
A battery fault manifests itself in that it discharges very quickly, or the laptop incorrectly displays the charge level. In such a case, manufacturers and retailers recommend purchasing a new battery. But since the cost of the original component is quite high, you can try to correct its operation yourself. Depending on the degree of damage, you either need to replace the battery cells, or it will be enough to perform a reset of the laptop's battery controller.
Note that the battery controller is an electronic device and can also fail. If this happens, the battery will not work at all. In that case, none of the tips below will help — repair of the controller at a service center or battery replacement is required. However, if the battery works at least somehow, it means the controller is functional. It simply shows incorrect charge values, charges or discharges the battery too quickly, and this can be dealt with.
It is precisely this last possibility that we want to discuss in more detail in today's article. You will learn in which cases the controller needs to be reset, and we will also tell you about possible ways to do this yourself at home.
First, it's worth clarifying what a battery controller actually is. It is a small chip built into the battery itself, monitoring its operating state as well as the charging and discharging process. It interacts with the power controller on the laptop's motherboard, and also transmits the necessary system information to the operating system. We hope the scheme is clear to you. We tried to describe everything in simple terms, but if you want to know the technical details, look them up online.
When this small chip stops working correctly, it may be necessary to reset the controller. This procedure is also popularly known as battery calibration. Generally speaking, there are only two situations where this might be needed: incorrect charge display and replacement of battery cells.
Incorrect charge display refers to a situation where the laptop's operating system, even after a long charging period, shows that the charge level is less than 100%, or the charge drops sharply and the laptop shuts down not after the several hours it's supposed to, but much sooner. Many people start thinking that the battery has gone bad, but this is not always the case. The problem very often lies in its controller, which simply displays the charge incorrectly.
Replacement of battery cells refers to the fact that some workshops and service centers may offer a so-called battery repacking, that is, replacing the internal cells that have failed. After this, it is necessary to reset the controller so that all the new cells are recognized and can be correctly utilized. Although, if after replacing the cells something is not working correctly, you have every right to make a claim and demand that the shortcomings be fixed.
Now let's look at how to reset a laptop's battery controller. We'll cover both software and manual methods.
On some sites you may see a recommendation to use the Battery EEPROM Works program. This is indeed a very powerful and advanced utility that in some cases can literally revive a battery. But there is one big BUT! To use it, you need to know a lot and be able to understand electrical circuits, as well as have the necessary adapters, which are not always easy to find for sale. We will not recommend this program for use on home devices, since it is very easy to irreversibly ruin the battery. So what will suit you then?
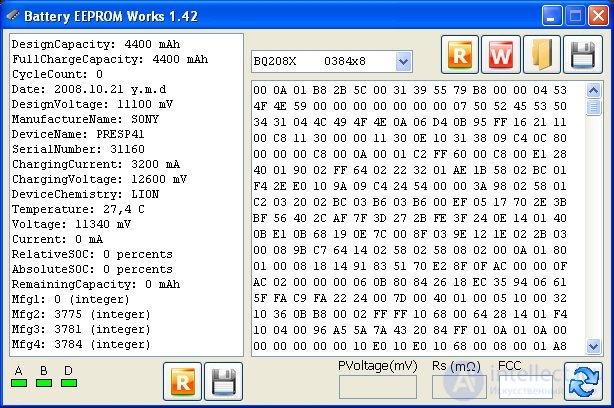
The Battery EEPROM Works program window
Almost every manufacturer has built-in power management utilities. It can be downloaded from the support site, on your device's driver download page, and in some cases the utility may either come pre-installed or be recorded on the accompanying driver disc. Select the reset or calibration function and follow the on-screen instructions exactly. Most often the utility discharges the battery to zero, after which it charges it to 100%. The controller will remember the extreme charge level readings and will start working as it did right after purchase.
Different software provided by the manufacturer may be used for different laptops. Let's look at some popular models:
However, if you still want to perform a full controller reset, you will have to study working with the Battery EEPROM Works program. But keep in mind that you do this at your own risk, so it's worth experimenting only if you wouldn't mind throwing the battery away in case of failure. This utility allows you to:
After this, the battery is considered «new». Correcting the actual charge value can help if the controller shows it incorrectly and the laptop shuts down quickly even though the battery can still work. This is also required to be done after replacing battery cells with new ones. Once again, we remind you — first study how to use this program, since it allows you to do a great many things.
If for some reason you can't find or install a power management utility, the battery reset or calibration can be performed manually. How exactly?
In 99% of cases, such simple actions will help bring the battery back to life. But if even this does not help, buy a new battery, or connect the laptop directly to the outlet, removing the battery in the process.
The issue could also be damage to the power circuit or connector. If the problem lies here, the board's traces need to be restored, and a full board replacement may be required – this cannot be done without diagnostics.
If you haven't found the problem here either, then the cause lies directly in the laptop's battery.
Let's note the standard battery problems.
Of course, after identifying the cause of the problem it is better to consult a specialist to fix it. But you can also try to rehabilitate the battery yourself.
First, let's perform a series of simple actions:
If the charge in the system tray is at the minimum level – connect an external power source.
Wondering how to check the battery on a laptop? There are many different utilities for diagnosing battery operation and determining its level of health. By the way, they sometimes also help extend the service life of the power cell.
Let's look at several popular and quite effective programs. But it's worth remembering that the causes of malfunctions are quite varied, and a program won't always be able to fix them. Often these utilities let you extend the battery's service life by reducing the load.
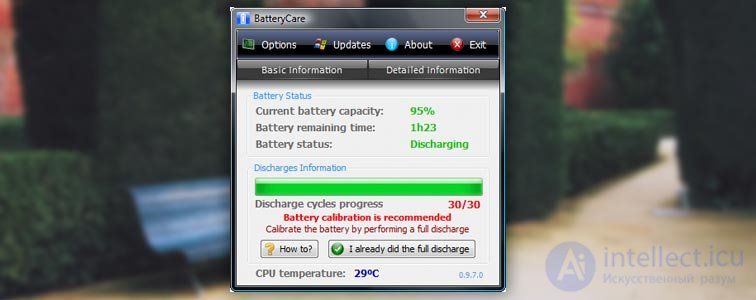
BatteryCare – monitors battery condition, is quite simple to use, and doesn't slow down the system. It shows detailed information about battery operation, for example, by how many percent the capacity has decreased, based on the original specifications. You can also find out the number of full battery charge cycles and the calibration date. The utility also shares tips for reducing charge consumption. The program is free and updates automatically. I think it's worth downloading for anyone who hasn't done so yet.
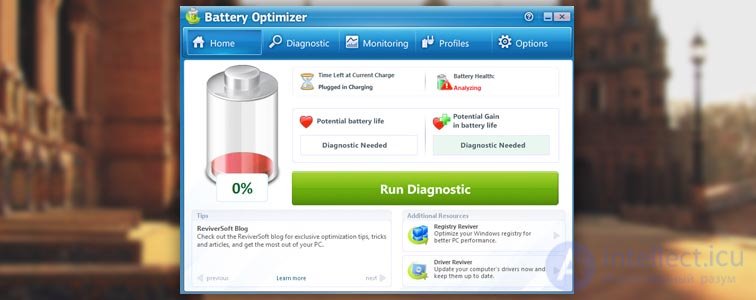
Battery Optimizer – also a fairly well-known program for optimizing battery operation and maximizing its service life. The utility differs from similar ones with a convenient feature – it can tell you by how many percent you can increase battery life if you change certain system services. The changed settings are saved to a personal profile, after which they can easily be opened at any time. The utility performs extended monitoring of battery operation, estimating the loss by comparing it to the battery's rated capacity. It has a fairly simple and convenient interface, and doesn't require any special knowledge to use.
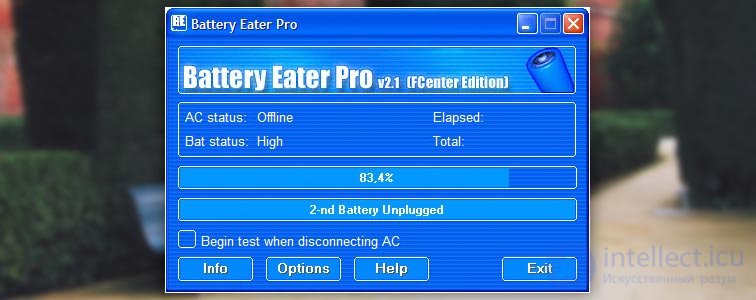
Battery Eater – tests battery condition and shows the actual capacity. The program is useful when buying a used laptop, letting you find out within a few minutes what condition the battery is in and how much longer it will last.
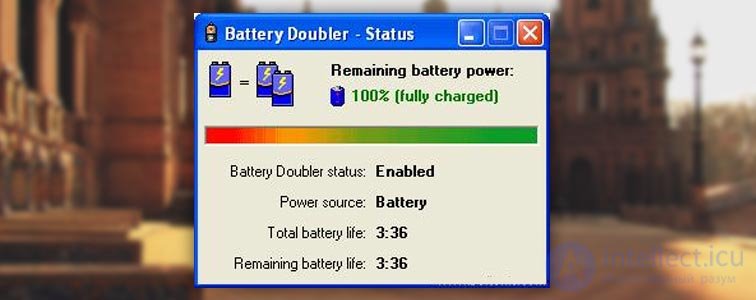
Battery Doubler – another similar utility. It reduces power consumption by disabling unnecessary processes, letting the computer run up to twice as long.
If problems arise with the battery, you shouldn't immediately go to the store for a new one. It's quite possible to restore it. Of course, the battery's capacity is designed for a certain number of cycles, but there are recovery methods.
Let's look at solutions to the most common problems.
Sometimes the battery simply stops receiving a charge. The laptop sees the battery, the charge level is shown in the system tray, but nothing changes when connected to an external power source.
Let's reset the battery settings in the BIOS to their original values. To do this, follow these steps:
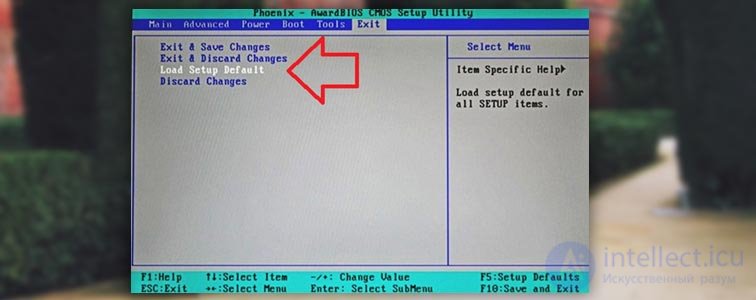
The method worked if you see a system notification that the battery is charging.
Charging occurs, but doesn't reach logical completion – the battery doesn't charge fully. Another symptom of the "ailment" – the device's battery life on a single charge is greatly reduced. The laptop holds a charge several times shorter than before.
This is where the utilities we discussed earlier come in handy. Check the battery condition using one of them. We need to find out the following characteristics: the rated battery capacity (also called nominal), the maximum capacity level the battery currently reaches, and the percentage of battery wear. Accordingly, the higher the number, the greater the need to replace the power cell. If the percentage is insignificant, the battery is most likely not the main cause of reduced battery life. Let's move on.

The problem could lie in some program you recently installed. It may run quietly in the background and significantly increase the load on the processor and Wi-Fi, thereby blocking the transition to power-saving mode. To check for such utilities, open the task manager by pressing Ctrl+Shift+Esc and analyze the background programs running. Disabling unnecessary utilities can increase battery life.
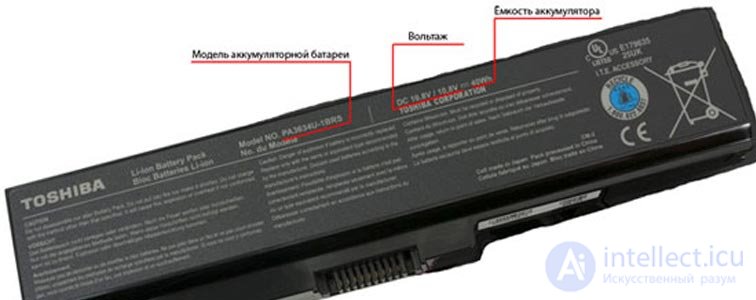
The cause may lie in the incompatibility of the purchased battery with the charge controller. Batteries can be the same size, but differ in other specifications. Try resetting the BIOS settings. If this doesn't help, compare the markings on the old and new batteries – they should not differ.
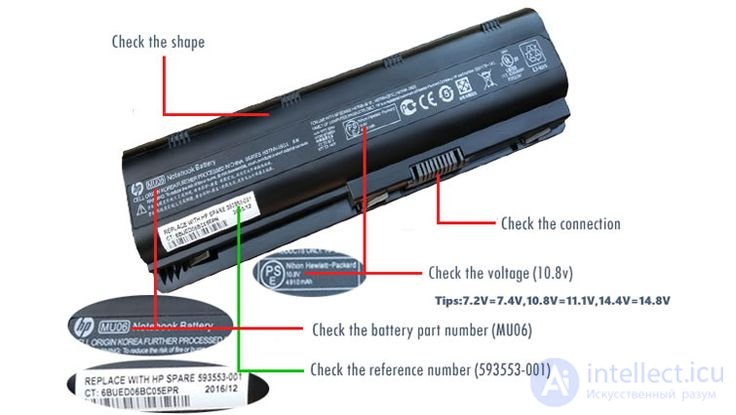
So there's no need to panic at the first signs of battery failure. And even more so, there's no need to immediately look for money for a new battery – by the way, it doesn't come cheap. Try using our recommendations and follow the steps described. Try running diagnostics and restoring the battery's functionality using special utilities or by resetting the system settings. Check various options and analyze the causes of the malfunction. Perhaps it's not so bad after all. If you don't neglect the rules for using the device, the battery will last a long time. By the way, batteries quite rarely fail so abruptly – problems more often arise in the software, or the cause is the power supply/connector. Try all the methods, and only then replace the battery with a new one.
Repairing Compal-platform motherboards with a "not charging" battery or "won't turn on" fault, especially after liquid spillage, often causes difficulties for technicians. Let's look at the typical power and charging circuit used in Acer laptops, using the LA-6552p platform as an example. This motherboard is installed in Acer 5552 and Emachines E442 laptops. Other motherboards containing the ISL 6251 charge IC are built on a similar principle and have minimal differences.
We will examine, in parallel, the typical connection circuit for the ISL6251a charger and the parts of the laptop's circuit related to startup and battery charging.
Connection circuit for the ISL6251 charge IC:
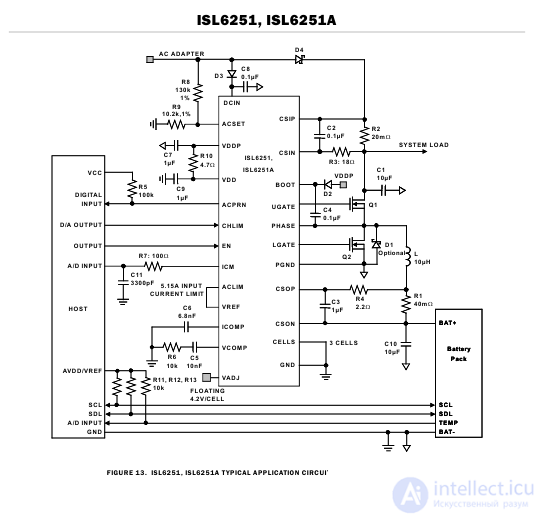
In this circuit:
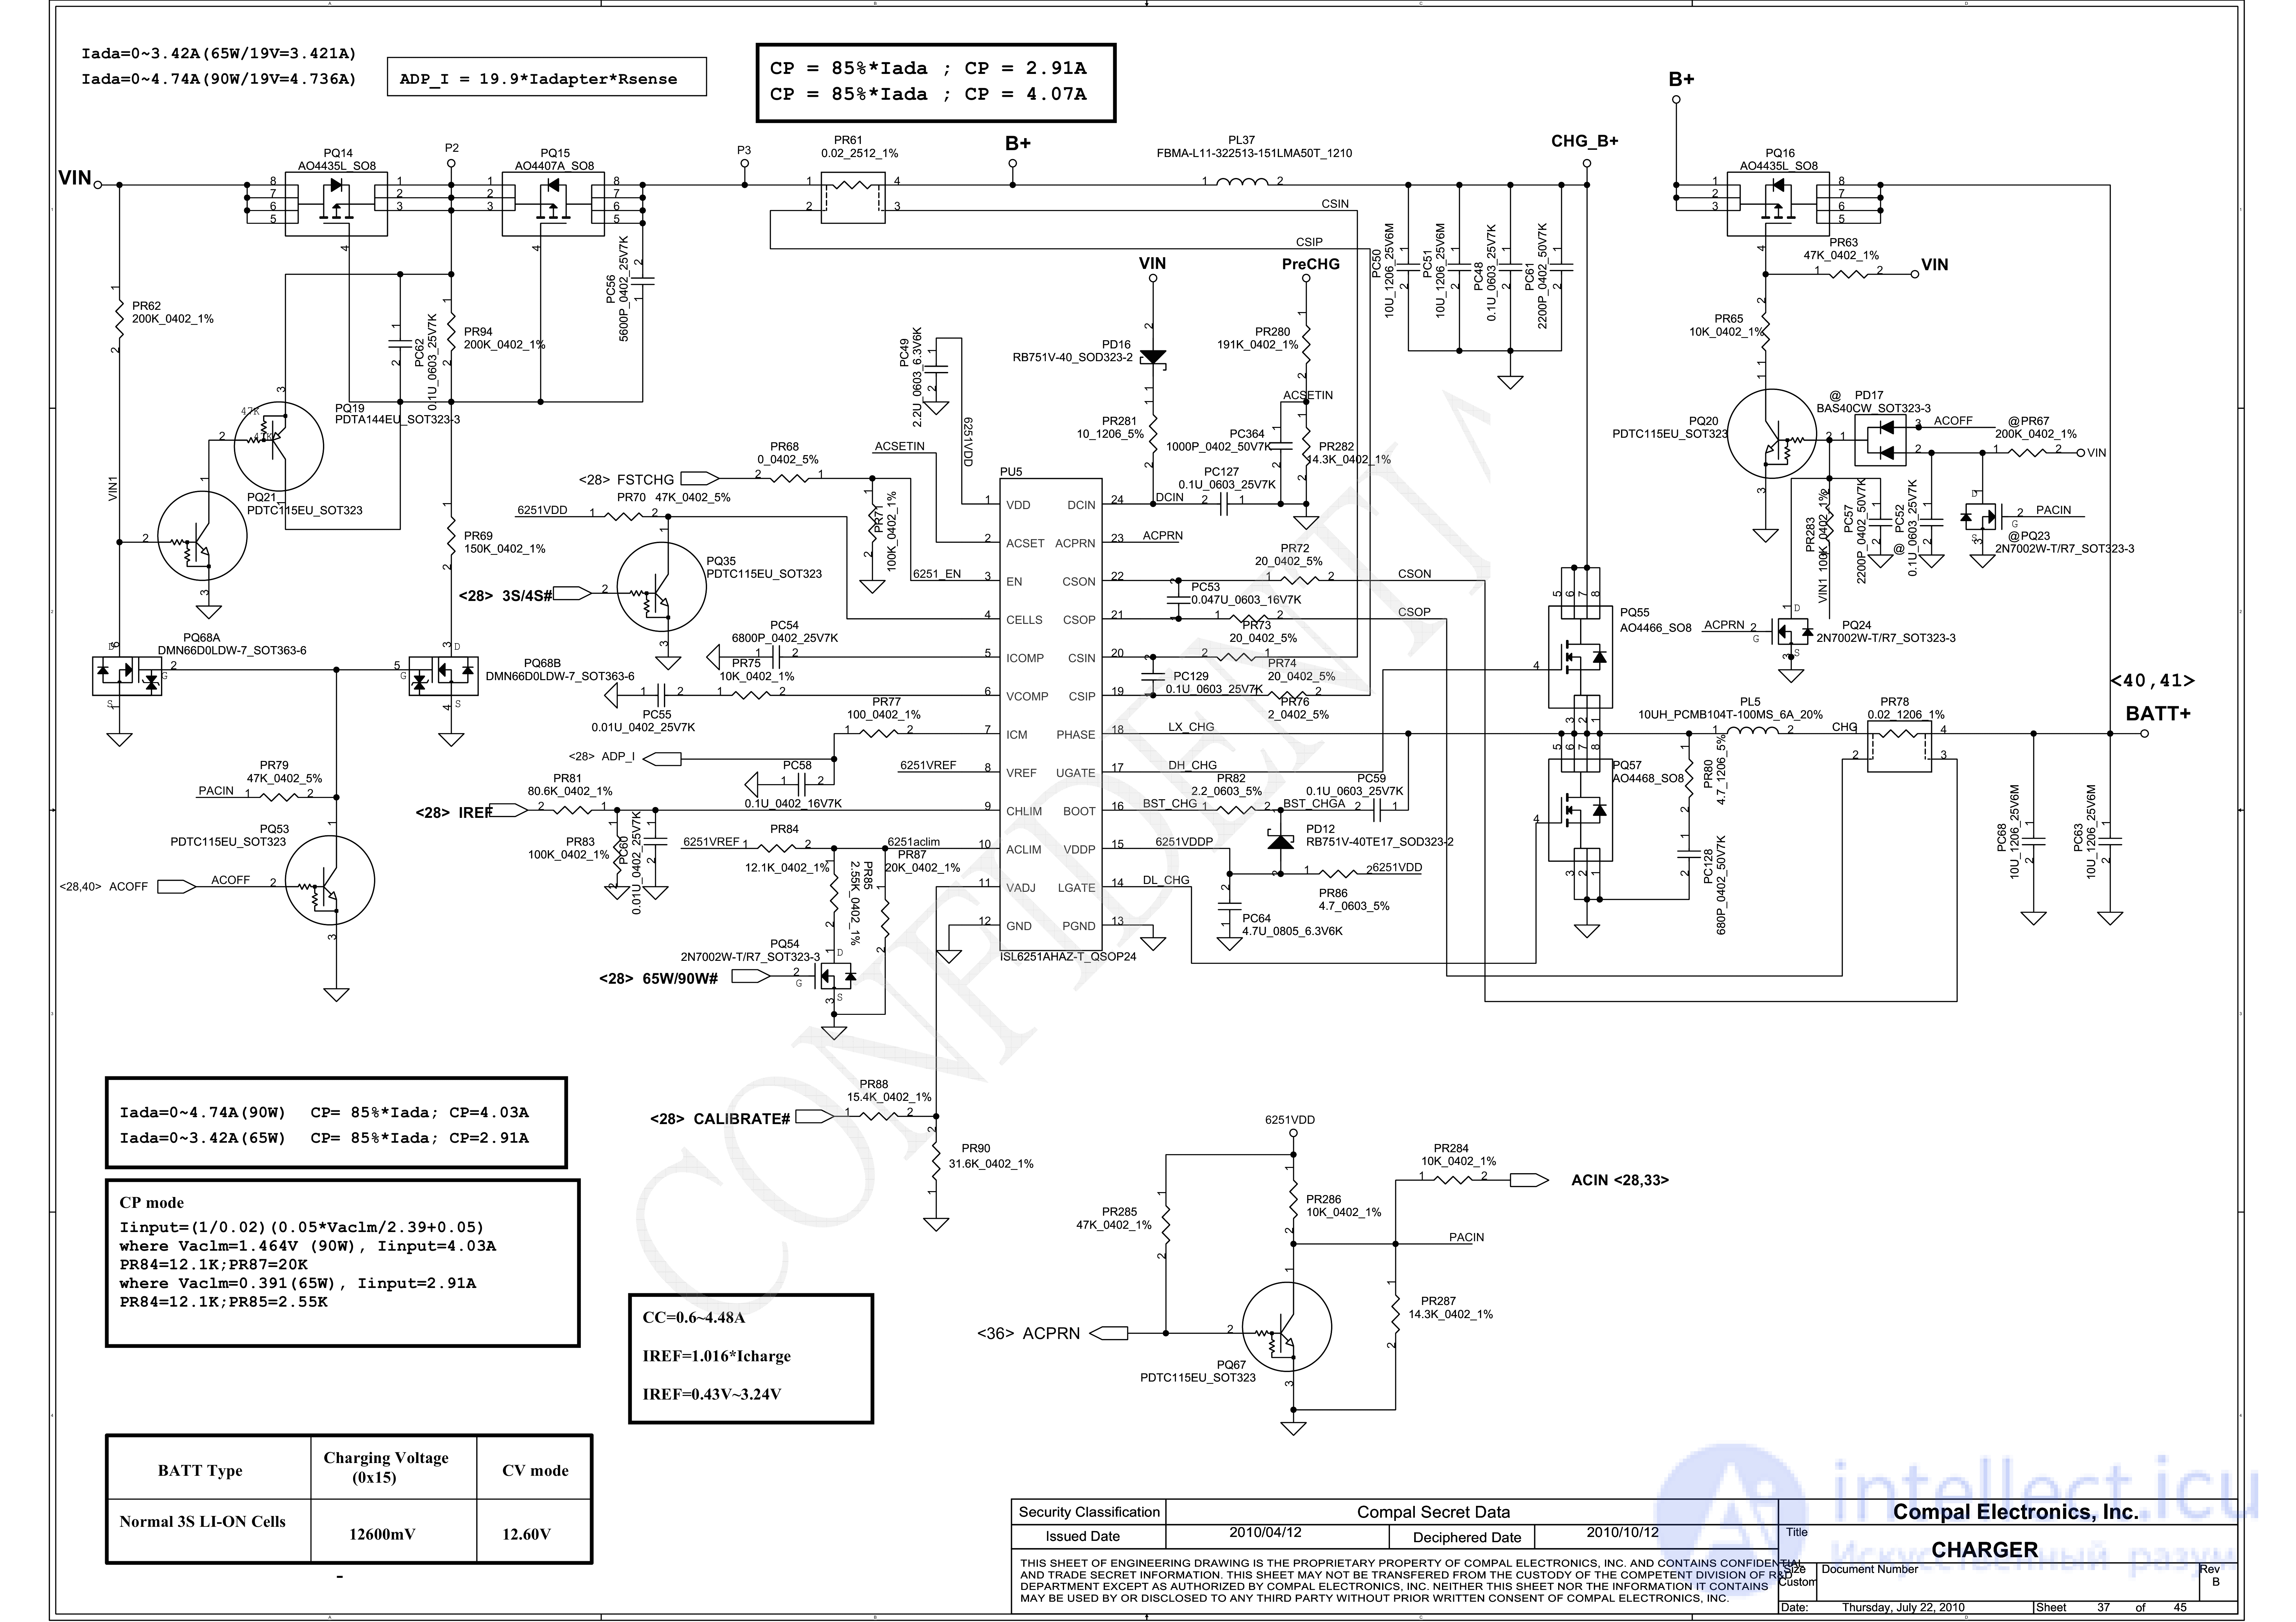
+19V power arrives at pin 24 of the charger IC, DCIN, from the power connector via diode PD16 and resistor PR281 (the circuit's input voltage is designated VIN). If you replaced the IC, check whether the resistor is intact. Inside the IC, on pin 1 VDD, a +5V supply voltage is generated, which then passes through PR86 to pin 15 VDDP and powers the rest of the IC's nodes. We check for the presence of +5V on pin 15.
On pin VREF there should be a reference voltage of 2.39V generated by the charger.
ACSET input — the charger detects the 19V supply voltage, which the divider formed by PR280 and PR282 steps down by a factor of 14. For this, the voltage on ACSET must exceed 1.26V, which corresponds to 18.0V at the input. Upon detecting normal power, the charger pulls ACPRN low — sending a signal to the multicontroller.
The multicontroller exchanges data with the battery controller and, when charging is needed, sets a high level on the charger's EN pin, enabling it to charge.
On the CELLS pin, the multicontroller sets a voltage depending on the number of cells in the battery, thereby telling the charger what voltage to supply to the battery. The charger produces the BATT+ voltage for charging the battery (typically 12.6 V).
The CSIN and CSIP pins are connected to the power source's current sensor — resistor PR61, while the CSON and CSOP pins are connected to the charge current source. If the current is exceeded, the charger turns off battery charging.
Thus, for the battery to charge, the charger must be powered (DCIN = 19V, VDD and VDDP = 5V, VREF = 2.39V), it must detect power (ACSET >1.26V), and the multicontroller must give it the EN signal.
Oscillation should start on transistors PQ55 and PQ57; the currents on PR61 and PR78 must not exceed the maximum allowed values. It should be noted here that besides the resistors PR61 and PR78 themselves, PR74, PR76, PR72, and PR73 can also burn out, which can cause the charger to measure currents incorrectly.
For the laptop to work, the input field-effect transistors PQ14 and PQ15 must turn on. They are turned on by transistor PQ68B, which is in turn turned on by a high level of the PACIN signal. Transistors PQ68A, PQ21, and PQ19 form an interlock — a low level on the gate of PQ68A reliably keeps PQ14 and PQ15 off. This can also happen if the multicontroller raises the ACOFF signal.
Now let's see where PACIN comes from. From the schematic we can see that it comes from 6251 VDD through resistor PR286. In addition, PQ67 must be off, which requires the charger to detect the presence of external power (ACSET pin) and pull the ACPRN signal low.
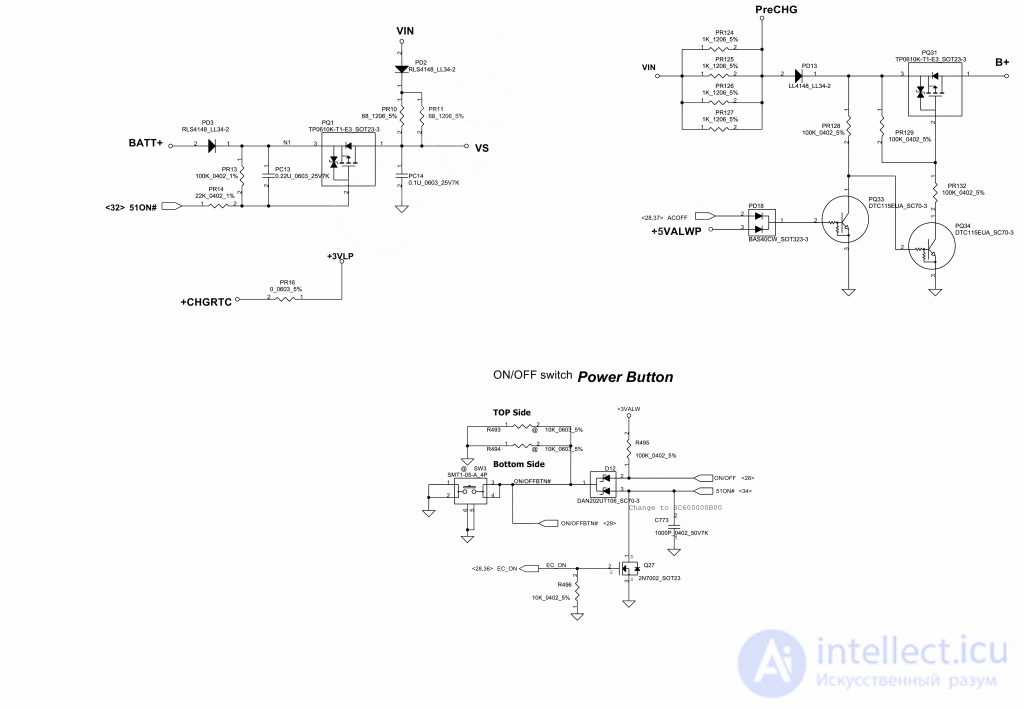
On this platform, standby voltage generation occurs only when powered from the adapter. The standby voltage signals here are called +3ALWP and +5ALWP, generated by the RT8205 chip.
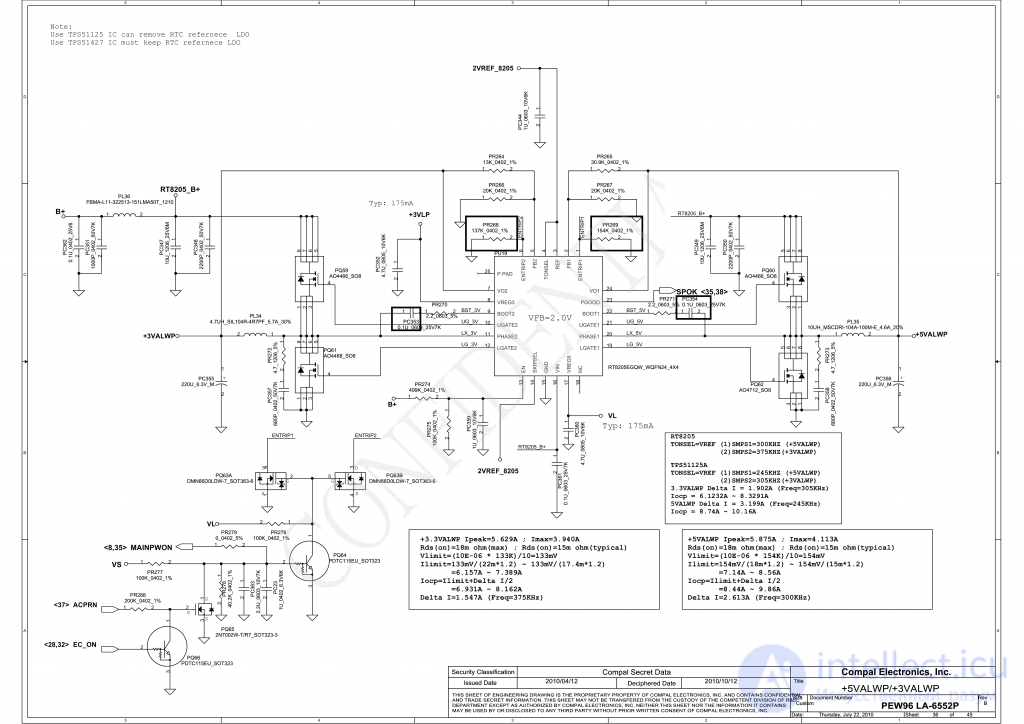
Let's consider the operation of the laptop without a battery, since when repairing the motherboard the technician usually does just that, powering the board from a lab power supply. After connecting the adapter, VIN and PreCHG appear. Through resistor PR128 it reaches the base of PQ34, turning it on, which in turn turns on PQ31, supplying PreCHG to B+. Since no nodes are running yet, there is no consumption on B+, so through resistors PR124-PR127 the capacitors connected to B+ get charged
When the B+ voltage reaches a level sufficient to start the RT8205, the voltages +3VLP and VL appear. Then, if startup is not blocked by transistors PQ63A, PQ63B, the voltages +3ALWP and +5ALWP appear. For startup to occur, PQ64 must be turned on. For this, there must be voltage VS, and ACPRN must be at a low level. VS is taken from VIN through resistors PR10, PR11.
When powered from the battery, VS is absent and appears when the power button is pressed. Thus, when powered from the battery in standby mode, the RT8205 generates only +3VLP and VL.
Many Compal platforms have similar circuits. Some may use operational amplifiers to form ACSET and other signals. In these nodes, a 3V RTC voltage may be used to form the reference voltage; such boards will not start if the clock battery is discharged.
Friends, today we talked about how to reset the laptop's charge controller. We learned that sometimes the problem lies not only in the hardware parts of the computer, but also in the software. Therefore, there is no need to rush to order a new battery right away. We hope everything worked out for you, and no questions remain. Don't forget to share your opinion in the comments.

Comments