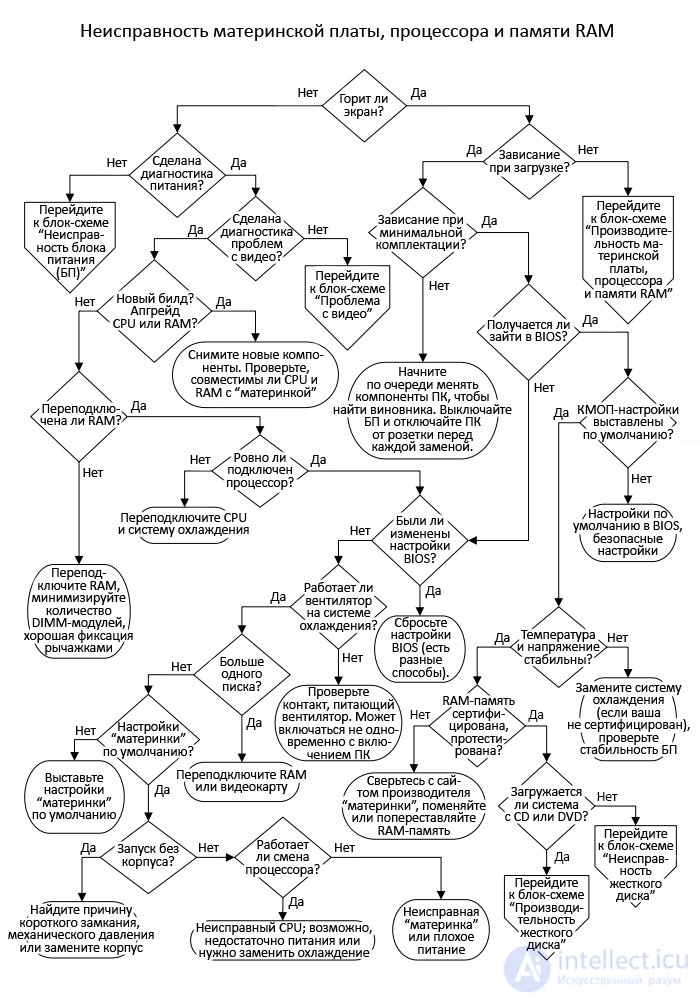
Does the PC start booting? Does it at least get to the stage where the BIOS splash screen appears, or some other sign of life from Windows? If you see only a message that the monitor cannot detect a video signal, that doesn't count, since a monitor can display this message even when it isn't connected to the PC.
Is the system getting power? Do you hear any beeps, the sound of platters spinning up in the hard drive, fan noise, etc.? If there's no power, go to the "PSU Failure" flowchart. That flowchart may send you back here, but only if you find signs of life in the system (in the form of beeps).
If you haven't yet diagnosed a "dead" screen using the "Video Problem" flowchart, do so. And don't skip the obvious steps in it, like checking the power cord or the outlet. You might want to jump straight to the decision point that asks about beeps, but at this stage there's no reason to assume that the beeps and the "dead" screen are related to the same problem.
Is your system a new build? Have you installed any new components recently? If you recently upgraded the PC, turn it off, unplug the power cord, and start connecting the old components one by one (reconnecting the cable and turning on the PC after each connection) to identify the culprit by process of elimination. Also check the motherboard manufacturer's website to find out whether your CPU and memory modules are compatible with the motherboard (by brand and specifications).
Of all the problems that occur after replacing the motherboard or upgrading memory, the most common is improperly installed memory modules. All modern motherboards use some form of DIMM modules (from "dual inline memory module"). All DIMM sockets have retaining levers on both sides, and before installing a DIMM module these levers need to be opened (lowered); once the DIMM module is correctly installed, they should rise and click into place on their own. To seat a DIMM module properly in the socket, you need to press down on it slightly, but if you hold the module unevenly while doing so, you can damage both the socket and the module itself.
Depending on the motherboard and the chipset used on it, the motherboard may pair DIMM modules together to increase their performance. Older motherboards use several banks to increase data transfer speed by "pairing" 64-bit DIMM modules, thereby creating a 128-bit bus for the processor. Newer motherboards more often use an "unganged" mode, which allows multi-core and multi-threaded CPUs to access DIMM modules simultaneously and independently. So the user knows where to insert DIMM modules to fill a bank or channel, the sockets are marked with text or color. Sometimes filling a single bank in a 4-channel system requires 4 identical DIMM modules. The problem is compounded by the fact that some motherboards see multi-sided or multi-rank DIMM modules as if they were several modules plugged into one bank, so in such situations you should consult the motherboard documentation. In all cases, the DIMM modules must match each other exactly — have similar specifications and be from the same manufacturer. If you mix different speeds, some motherboards simply won't be able to boot, while others will reset all the memory to the speed of the slowest DIMM module.
Although DIMM modules are designed to the same standards, the timing signals are so finicky that memory that hasn't been tested and approved for a specific motherboard may simply not work. With each new generation, memory speed increases while voltage drops (the first versions of DDR4 operated at 1.20 volts, but later this figure dropped to 1.05 volts), so don't even try changing BIOS settings based on what you remember from working with another PC. Generations of DDR memory are not backward compatible, and motherboards support only one type of module. DIMM modules of the DDR4 type can have up to 284 pins, whereas DDR3 and DDR2 have up to 240 pins, and the original DDR has up to 184 pins. If your PC is more than 12 years old, it may have outdated RIMM memory installed (from "Rambus inline memory module"), and empty RIMM sockets must have CRIMM modules installed in them (from "Continuity RIMM"). And I can't remember the last time I saw SIMM modules (from "single inline memory module"), but they were 16-bit, so 32-bit processors required two matching modules.
The processor can also be connected incorrectly, but this problem is harder to spot than with DIMM modules. Whereas a DIMM module can be plugged in or removed in a second, the massive cooling systems on modern high-performance processors are attached to the motherboard using powerful clamping springs not designed for frequent use. Since the number of electrical contacts on a CPU has grown to a thousand or more, Intel has almost abandoned placing contacts on the CPU in favor of placing them on the socket — that is, in favor of LGA technology (from "land grid array"). AMD still equips some CPUs with a PGA package (from "pin grid array"), but uses LGA on some as well.
CPUs in an LGA package are easier to connect to the socket so that they sit as tightly and evenly as possible, whereas on CPUs with older packages the contacts (pins) can easily bend, causing the CPU to remain unconnected even though everything may outwardly appear fine. If possible, inspect the edges of the socket using a bright flashlight and a small mirror. If the cooling system completely blocks your view, you can either remove it (to check and reconnect the CPU) or continue checking other faults while keeping in mind that you never finished this test (otherwise you might end up throwing away a processor that could actually be fully functional). When the CPU is removed, inspect its underside for discoloration, as well as signs of melting and overheating. Also check the socket (LGA) or the CPU (PGA) for bent or broken contacts.
Does the screen light up, does the PC turn on, but everything freezes as soon as the OS starts loading? In some cases, the causes of a PC freezing at the start of boot differ from the causes of freezes during normal operation, which are covered in the "Motherboard, CPU, and RAM Performance" flowchart. Go to that one if this flowchart never resolved the boot problem, even after going through it thoroughly.
Does the system freeze when you leave in the PC only the components necessary to start booting? That means the PSU, the motherboard, the processor (CPU), a minimum amount of RAM, and a GPU (which can be either a discrete video card, a video processor built into the motherboard, or one of those modern chips that combine a CPU and GPU). However, on the first attempt you can leave the main hard drive in the system, although turning on a PC without a hard drive should produce a "no boot device found" error rather than a frozen BIOS screen on a "healthy" PC.
If you heard a pop or smelled smoke before the freeze occurred, try to find the faulty component visually or by smell before disassembling the PC. If the system boots, or at least gets past the freeze point, when only the essential components are connected, you can try swapping components one by one. Don't forget to turn off the PSU and unplug the power cable from the outlet when swapping expansion cards. If the freeze returns after installing a particular component, that component is the culprit. But also make sure the problem is really in the component and not in the motherboard slot or power connector, by trying to plug the component into a different slot or connecting a different power cable.
Can you use hotkeys to enter the BIOS (CMOS setup)? The most common keys that let you do this are F2 and Delete , but older PCs used many different combinations, including pressing several keys at once (in particular, Ctrl and Alt ). Most BIOSes usually indicate with blinking text at the start of boot which keys to press, but some major manufacturers don't do this, to keep owners from changing the settings (and to create an extra headache for anyone trying to repair the computer). Still, the correct hotkeys can always be found online by specifying the brand and model of your PC. If you can't get access to the BIOS settings, apply the same diagnostic approach as for a "dead" screen before continuing.
Did you change the BIOS settings (CMOS settings) or perhaps reflash it (i.e., replace it with a newer version) right before the problem appeared? If you tinkered with the memory timing settings to increase system performance, get rid of random freezes, or overclock the system, then there's a chance your new settings are what's preventing booting. If you can't access the BIOS, the only solution is to reset the settings so that the BIOS applies default settings for safe operation on the next power-on. Check your motherboard's manual, because resetting settings can be done in different ways, and the wrong reset method can even damage the motherboard.
Some motherboards have a jumper or button that clears the non-volatile memory within a few seconds, but you need to turn off the PSU beforehand. In some cases, the settings can only be reset by finding and removing the motherboard battery, turning off the PSU, and leaving the system in that state for a good hour or two. On other motherboards you need to remove the battery and then short the motherboard's battery connection contacts. Reset procedures vary greatly depending on whether the BIOS settings are stored in battery-backed CMOS (this is the old technology from which these settings got their name), EEPROM memory, or settings built into the chipset. If none of these methods helped, look for a video tutorial on YouTube.
Another possible cause is a "dead" CPU. All modern processors need an active cooling system with a fan mounted on top of it. However, older PCs can be found with cooling systems that have no fan, but they were equipped with far less powerful CPUs. Check whether the fans mounted on the motherboard are working properly. In addition, fans may be present on the chipset (one of the chipset's components, the so-called "northbridge," handles communication between memory, graphics systems, and the CPU, and can therefore get very hot) and on the GPU built into the motherboard. The cooling fan must be connected to the correct power connector on the motherboard so that the BIOS can monitor its readings as well as turn it on/off. Depending on the BIOS settings, the CPU fan may not activate at the same time the system powers on, because at that point the CPU hasn't heated up yet. Although many CPUs are able to shut themselves down to prevent self-destruction from overheating, if you installed a new CPU and powered on a PC that has no cooling system at all, you may have to say goodbye to that CPU.
If the active cooling system's fan isn't spinning, replace it (then clean the cooling system and CPU, and reapply the thermal interface material) and hope for the best. When disconnecting the cooling system, try not to bend it, and after releasing the retention mechanism, begin gently twisting it back and forth to break the grip of the thermal interface material. If you don't trust the motherboard's power connector, it won't hurt the CPU if you simply power the fan from the power supply via a Y-splitter adapter. As a result, the fan will turn on immediately and run continuously. Just make sure the fan can handle the voltage. Also keep in mind that if you replace a fan controlled via pulse-width modulation (a PWM fan) with a fan that's always on and controlled by DC voltage, the PC's background noise will be louder.
Make sure the geometry of the bottom of the cooling system is in full contact with the exposed part of the CPU or the top of the CPU heat spreader. Also apply manufacturer-approved thermal paste or thermal tape before installing the cooling system. Don't overdo it with the thermal paste, or you risk making a big mess. The thermal interface layer is only needed to fill the microscopic gaps between the processor surface and the cooling system. Don't improvise with the thermal interface material. If it wasn't included with the processor, motherboard, or cooling system, buy it at a computer and electronics store. Installing a cooling system can be very difficult and time-consuming, but it's not a process you should do carelessly. If you press the cooling system too hard toward the processor while trying to seat it properly, you can damage the processor. Be patient, carefully study the mechanical mounting hardware, make sure you don't accidentally hit vulnerable and awkwardly placed motherboard components, and make sure your cooling system isn't too large and fits properly on the motherboard. If a cooling system is certified to work with a particular CPU, that doesn't mean it's certified to work with your motherboard.
When the system powers on, do you hear more than one beep? You should hear a single short beep, not a long, continuous beep, which may indicate that the required additional power isn't connected to the video card. Keep in mind that very old PCs produce diagnostic beeps using a system speaker ("beeper") rather than a built-in piezoelectric speaker, so in that case you won't hear anything unless the system speaker is connected to the 4-pin block (it's enough to connect to the 2 side contacts) for the speaker on the motherboard.
If you hear a continuous sequence of beeps, the problem is probably faulty RAM (or a stuck key on the keyboard during PC boot). If it's a repeating sequence of beeps, the problem could be either RAM or the video card. Many other codes are no longer used because they relate to components that the average user most likely won't be able to replace anyway. In general, whether there are beeps or not, in this situation I always reseat the video card or RAM, paying particular attention to the locking levers on the memory sockets.
If your motherboard, which requires only a single DIMM module to boot, has more than one DIMM module installed, try inserting each of these modules into the motherboard's first slot one at a time. Read your motherboard's documentation about how to properly install memory — about how it uses "paired" and "unpaired," single- and double-sided DIMM modules (this no longer necessarily means the chips are literally located on both sides), as well as about alternate banks. It's also worth trying known-good RAM from another PC that uses the same technology. If the RAM currently installed doesn't meet the motherboard manufacturer's requirements or isn't on that manufacturer's approved list, it may well be the culprit, even if it worked fine before. Incorrectly chosen RAM can be the cause of problems such as periodic freezes or even the inability to boot at all.
You can try cleaning the DIMM slots with a soft cloth or a blast of air from a can of compressed air. Just make sure there are no threads, hairs, or dust left in the slot after cleaning, because it takes very little insulating material to ruin a contact. This is rare these days, but if your PC uses tin-plated (silver-colored) contacts that touch gold-plated contacts, corrosion may appear on them over time due to a constant electrical current even when the power is off (this happens because of the use of dissimilar metals).
Check your motherboard's documentation to see whether it has any jumpers or switches for system settings. Aside from the CMOS settings jumper, these are hardly used anymore (their functionality has essentially been moved into the CMOS settings), but they were widely used on early ATX-type PCs, and some are still in use today.
Running a motherboard outside of a case is a common practice that helps avoid a lot of problems related to odd grounding, unintended short circuits, and accidental mechanical impacts. In addition, when the PC is in that state, it's much easier for you to reconnect or swap out the processor if needed. I usually do this kind of repair by placing the motherboard on a cardboard box, then putting an antistatic bag or foam between the motherboard and the box. When doing this kind of repair, don't step away from your workstation, because when you come back you might find the cardboard box engulfed in flames! If your motherboard boots when "bare" and with the same PSU that's in the case, then you most likely have a geometry problem. If you regularly do PC repairs and testing, it's better to have a dedicated PSU for such tests.
Make sure some standoffs aren't higher than others (this puts unacceptable mechanical stress on the motherboard). Also check that there's a standoff under every screw hole. The best way to check this is to count the standoffs and screws, and then make sure that after installing the motherboard you don't have any leftover screws. An incorrectly installed standoff, a loose screw rattling around inside the case, or metal shavings from low-quality materials can cause a short circuit. I've come across "standoff" short circuits that caused the motherboard to emit an endless series of beeps (as with RAM problems), even though none of the motherboard's parts were actually damaged. There's also a possibility that the case's geometry is very poor (for example, after installing the cover it loses its rectangularity and becomes uneven), which places unacceptable mechanical stress on the motherboard, resulting in a break in the circuit. If you can't find the cause of the problem, feel free to try a different case or PSU.
If the system does not power on even when the "motherboard" is already removed from the case, there is one more option. Connect a known-good processor to the motherboard, do not forget to attach a good cooling system and connect the fan – even for such a quick test. I usually use cheap CPUs for this test (in case the culprit is a faulty "motherboard" capable of damaging a CPU). Very cheap CPUs can usually be found on eBay, and these are typically processors pulled from other problem PCs. Use the cheapest (least powerful) CPU from the family your "motherboard" supports. This is another reason to set all motherboard settings to default (Automatic), so you don't need to be distracted by them at this stage of the repair.
If your old CPU works poorly and the fan is not running, you can almost certainly say that this is what caused the processor's failure. If the cooling fan is working, the cause of the CPU fault could be either poor contact with the cooling system, incorrect "motherboard" settings (for overclocking), or poorly regulated power from the "motherboard". Guessing could go on for a long time. If your motherboard is outdated and you have spare money, you can replace both the CPU and the "motherboard" at once. Replacing only the CPU (even if the test showed the motherboard is fine) is risky. Besides, as a rule, such a system will be hard to justify from a price/performance standpoint, unless it's not a new system bought less than a year ago.
If you still have no beeps and no video, then you are possibly dealing with a faulty "motherboard". Next, try the simplest thing – try installing a known-good PSU (if one is available). Then, if you have a digital voltmeter and the relevant experience, you can check the PSU voltage with a probe on the wires at the top of the power connector that connects the PSU to the "motherboard". Again, all this assumes you have already gone through the "Video Problem" flowchart, which should also have directed you to the "PSU Failure" flowchart. Before throwing out broken parts, try running the PC with other (known-good) "motherboards" and equivalents of components that were damaged by the old "motherboard".
If you have changed the CMOS settings, try reverting to the factory settings. Even if you don't remember ever changing any advanced chipset, memory timing, or CPU settings, at this stage it always makes sense to roll the system back to its default settings. This can usually be done from the main CMOS settings menu, in an item like "Restore Default Settings" or "BIOS Default Settings". Default settings are typically set via automatic detection and use the recommended timing figure for RAM. This means that if you were overclocking, stop. At least until the system boots again. It doesn't matter whether that RAM or processor worked while overclocked in your friend's system. You exceeded the parameters recommended by the manufacturer, and that's already a gamble.
Are the temperature and supply voltage stable? The BIOS monitors CPU temperature and reports on various supply voltage levels, and in some cases these readings are used to determine whether to shut down the PC in case of excessive temperature or unstable voltage. These parameters can usually be viewed in the CMOS settings. In addition, they can be accessed through third-party programs directly from Windows. If your processor supports DTS (look it up online if you don't know what it is), make sure the displayed temperature is based on DTS and not on a thermocouple, which may not have good thermal contact with the CPU.
Low voltage levels (less than 3.3 volts) are generated by the "motherboard" based on a higher voltage produced by the PSU. Therefore, if the PSU voltage is stable but the memory voltage fluctuates, the fault lies with the "motherboard". If the temperature is unstable, read the text for the decision point "Is the fan on the cooling system running?" above, which describes solving problems related to reinstalling the cooling system.
Is the RAM installed in your PC certified and tested to work with your motherboard (pay special attention to the brand and model number)? Gone are the days when you could tell whether RAM was compatible with your "motherboard" by the notches on the DIMM module and the tabs on the socket. Achieving high performance from modern RAM requires very precise timing, which not all motherboards can provide. So check your "motherboard" manufacturer's website to make sure the RAM you are using has been tested and approved for use with your motherboard and CPU.
If you have more RAM installed than is needed for booting, you can try connecting/disconnecting different DIMM modules to figure out which one is the problem (i.e. which one is causing the OS to hang during boot). If you have a DIMM module that is compatible with your "motherboard" but runs slower than the already-installed RAM, don't hesitate to try it too – to identify the faulty component by elimination.
Does the system boot from a CD/DVD or a bootable USB flash drive? To run this test, you will need to enter the BIOS and change the boot order, making a CD, DVD, or USB flash drive the first boot device. Otherwise, the BIOS will keep trying to boot from the damaged hard drive (if that is indeed the problem) and will hang again as a result.
If the PC boots from the alternative device, the problem is most likely corrupted data – either in the operating system or in the hard drive's master boot record (MBR). At this stage, you don't necessarily need to immediately try to repair the system or reinstall Windows entirely – you can check whether the hard drive's data is accessible by entering the command line from a bootable Windows disc. If you managed to access some or even all of the data, this HDD can be connected to another working PC (which already has a main hard drive) as a secondary hard drive, and then you can either burn the data to a DVD or copy it to the main hard drive of that working PC. For possible causes of the problems and their solutions, see the "Hard Drive Performance" flowchart.
If the system does not boot from a CD or DVD, go to the "ATA Drive Failure" flowchart. Keep in mind that BIOS in older systems is often finicky about booting from a USB flash drive, so it's better to use a disc with the original OS for the test.
Algorithms for finding RAM (random access memory) faults.
Symptoms and treatment methods
RAM is a system component that fails less often than most others. But spontaneous system restarts with and without a BSOD, crashes of games or software, incorrect results when processing tasks in demanding software – all this and much more can be symptoms of problems specifically with it. In fact, such problems occur quite often and are mostly the result of incorrect settings made by the user themselves, although hardware problems still cannot be ruled out. In this material, we will get acquainted with current memory modules for desktop systems, talk about possible problems in their operation and the reasons for them, and also help with diagnostics. Why else and how can memory malfunctions occur? What should you ultimately do or not do? In answering these questions, we won't rack the brains of beginners – we'll explain everything in simple language for maximum understanding.
Memory testing and diagnostics can be performed using the following algorithm
- 1. visual inspection
- 2. thermal imaging
- 3. mechanical damage (chips, shorts, breaks, oxidation)
- 4. incorrect supply voltage
- 5. internal breakdown, degradation of the chip or chips
- 6. diagnostics using software tools
- 7. temporary replacement of the memory module
The most common signs of a computer RAM defect:
- • The "blue screen of death" appears – one of the most reliable signs of a RAM defect.
- • Malfunctions, and again the appearance of a blue screen while Windows is running. The cause may be not only a RAM defect, but also elevated temperature.
- • Crashes while working with heavy programs or games that intensively use your computer's RAM: for example, Photoshop or 3D computer games.
- • The computer does not start. There may be audio beep codes, by which the BIOS reports memory faults. In this case, test programs won't help; it's better to replace the module.
How to check a computer's RAM for defects?
Here is one of the programs for testing your computer's RAM - "Memtest86+"
In addition to testing RAM, this program can determine the specifications of your computer, such as the chipset, processor, or the speed at which your computer's RAM operates.
This program has two modes of operation: the main "basic" and the extended "advanced".
Their difference lies in the testing time. The basic mode will identify "global" memory problems, while advanced mode performs a more thorough check.
The process of checking a computer's RAM for defects:
- • First, burn the program to a CD (also possibly to a floppy disk or flash drive).
- • Turn off the computer.
- • Remove all RAM modules – sticks, leave just one. Why is this needed? It is better to test the module one stick at a time, since in case of a malfunction, it will not be very clear which of the sticks is faulty.
- • Turn on the computer and make sure it boots from the CD, not from the hard drive.
- • After this, a blue screen appears with the word Memtest – you'll recognize it right away.
- • Wait for at least one complete pass; the test is unlikely to take much time. If there are defects, red lines will appear at the bottom of the screen.
-
What does a memory module consist of?
RAM, from a circuit design standpoint, is a very simple device compared to the rest of a system's electronic components, not counting fans (some of which actually have a simple controller implementing PWM control). What components are modules made up of?
- The chips themselves – the key elements that determine the memory's operating speed.
- SPD (Serial Presence Detect) – a separate chip containing information about the specific module.
- The key – a notch in the PCB so that modules of one type cannot be installed into boards that don't support them.
- The PCB itself.
- Various SMD components located on the PCB.
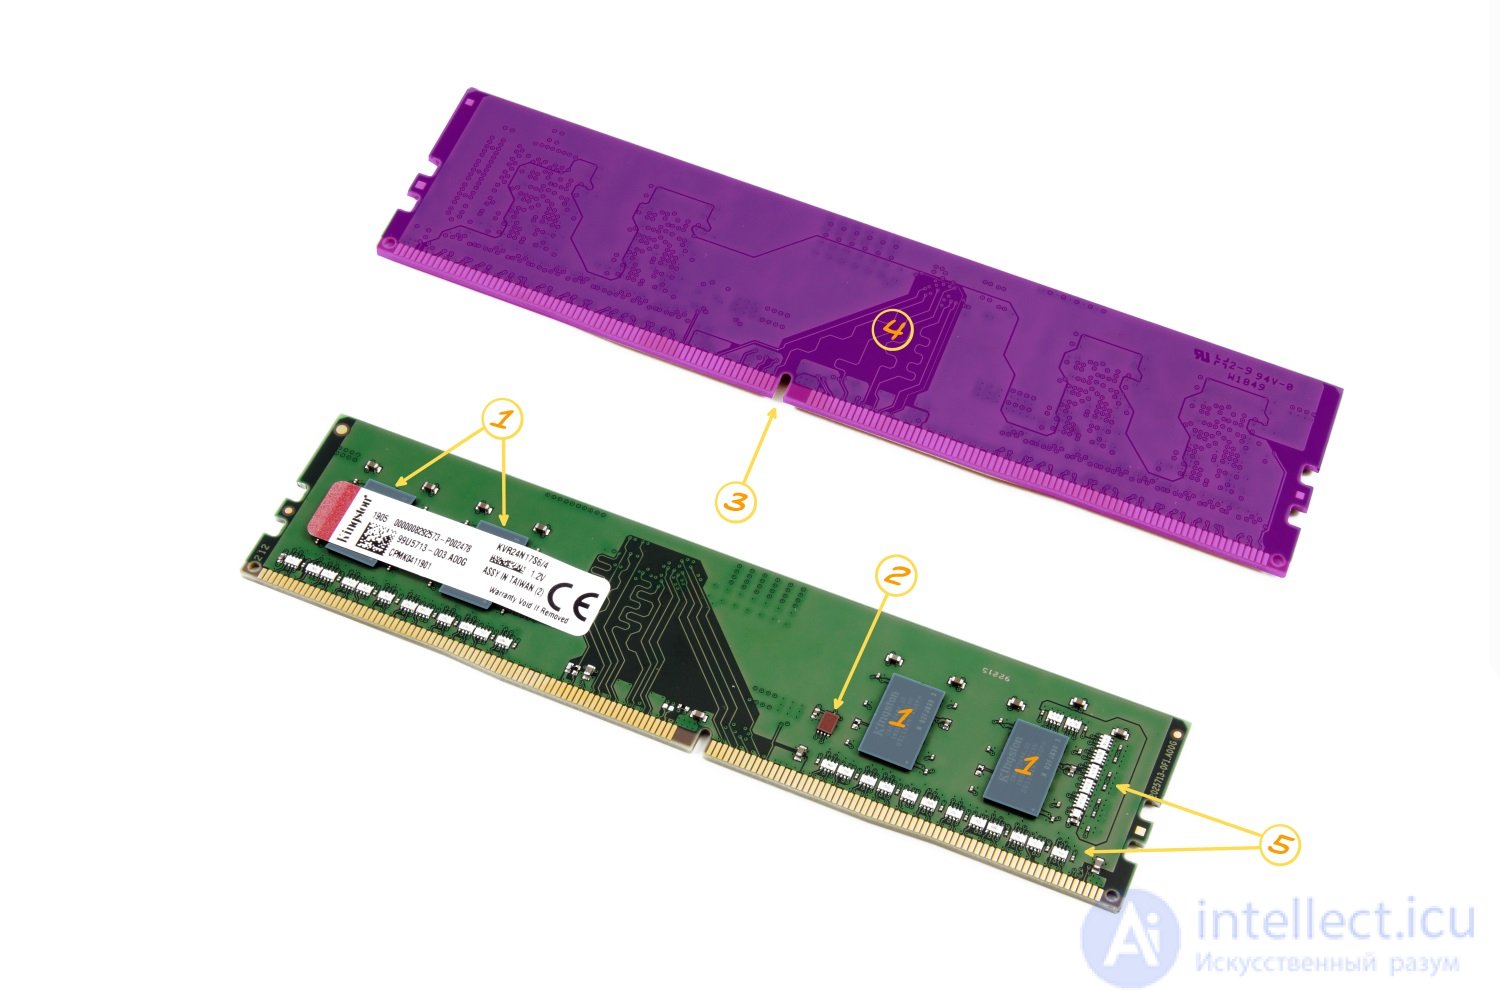
Of course, the set of components is far from complete. But it's enough for the memory to function at a minimum. What else could there be? Most often – heat spreaders. They help cool the high-frequency chips operating at elevated voltage (though not always elevated), as well as when the user overclocks the memory.
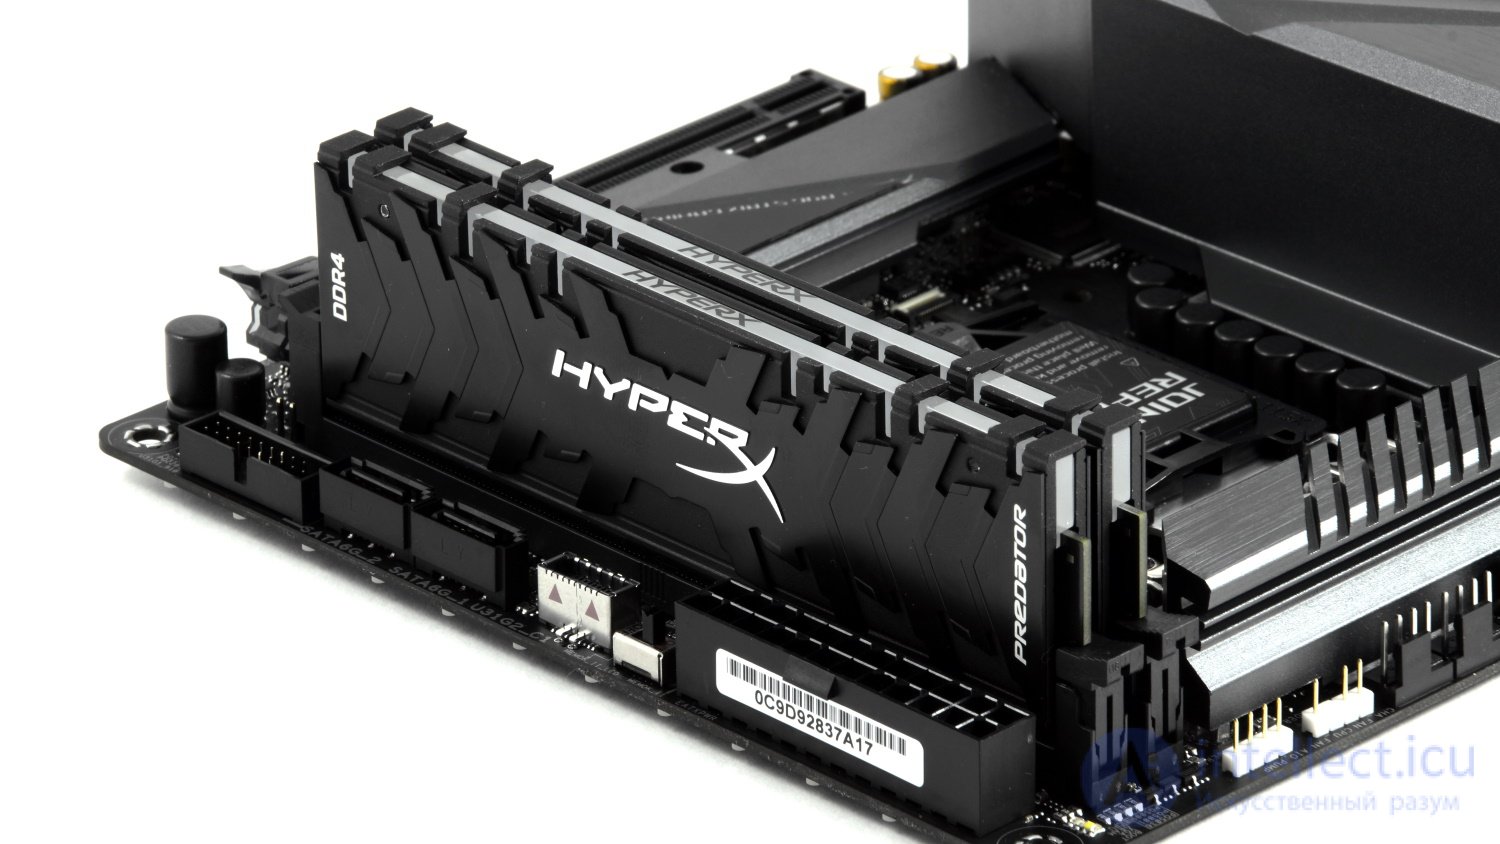
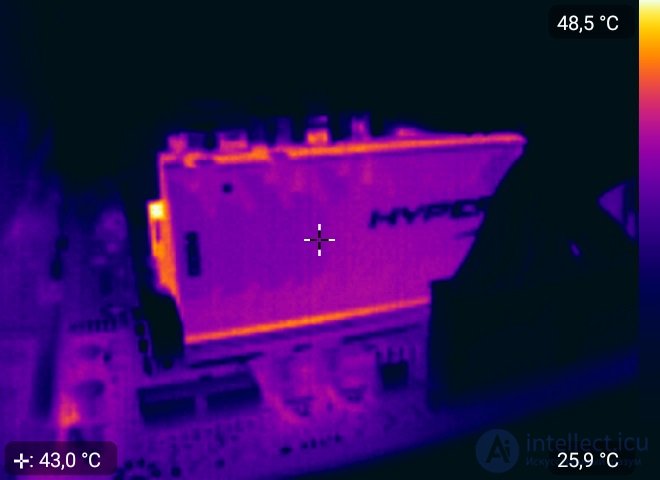
Someone will say that this is just marketing and all that. In some cases – yes, but not with HyperX. Predator modules with a clock frequency of 4000 MHz easily heat the spreaders up to 43 degrees, as we found out in the article about them. Speaking of which, we'll get to overheating a bit later today.
Next – the lighting. Some manufacturers install lighting of a certain fixed color, while others install full-fledged RGB, with the ability to configure it either using switches on the modules themselves, using connecting cables, or via the motherboard's software.
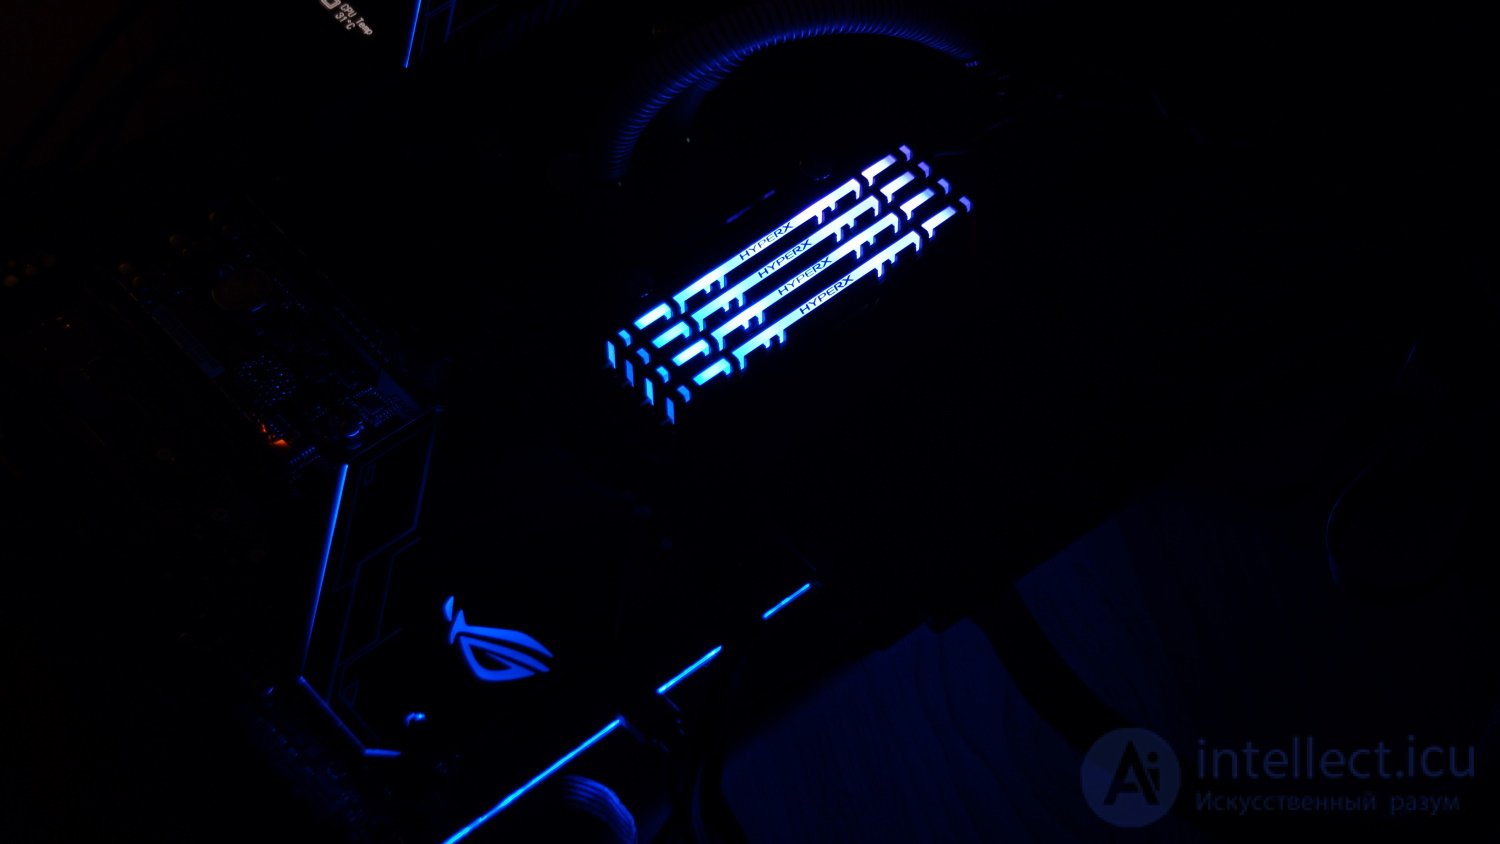
But, for example, HyperX engineers went further – they implemented infrared sensors on the board, which are needed for full synchronization of the lighting.
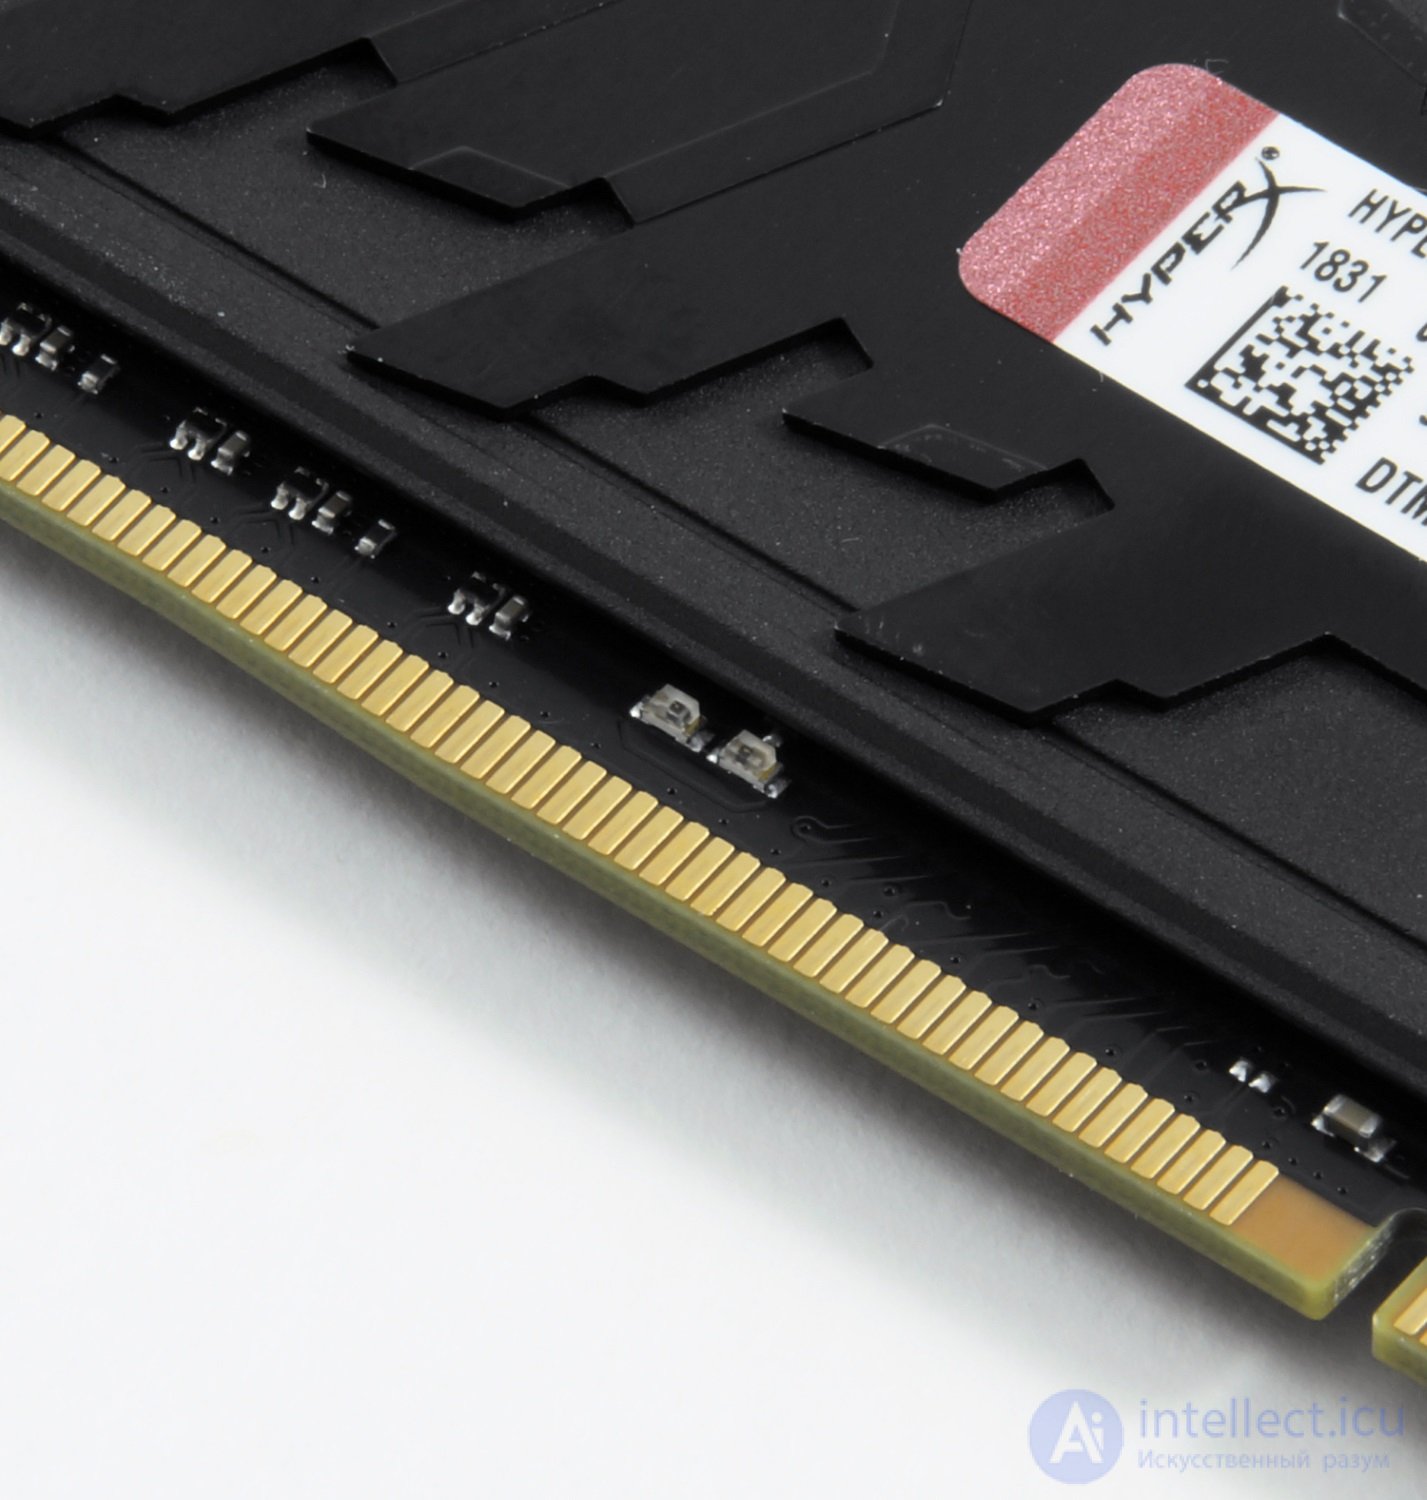
We won't go into detail here – that's not what this article is about, and we've covered it before, so if anyone's interested – check out the video below, and let's continue with the material.
What will be, will be
By choosing budget memory from little-known manufacturers, you get a pig in a poke – such modules might be assembled «in Uncle Liao's basement on a knee» and not even know what quality control is. In other words – problems can occur even on the first power-up. ValueRAM memory from Kingston, of course, is not one of those, even though its price tags are close to the minimum. Given the previous chapter, some users might say that the more components there are, the higher the chance of them breaking. That's logical, and it can't be disputed. But HyperX's confidence in its products (specifically – the Predator RGB modules) is such that they come with a lifetime warranty! But still – what could fail? We're not counting all sorts of LEDs and other similar design elements.
Memory cell damage.
Each memory chip contains a huge number of such cells, into which a colossal amount of information is written and from which it is read. If data is written into a damaged cell, it becomes corrupted, which causes the system or application to malfunction.
Overclocking, incorrect timings and voltage.
Each of us has at some point tried, or wants to try, overclocking memory. Increasing the memory frequency is not possible on all platforms, but if you already have a motherboard that supports overclocking, you may run into certain problems along the way. In today's reality, memory overclocking depends not only on the chips themselves, but also on the memory controller built into the processor and the trace routing on the motherboard. These last two aspects affect overclocking to a lesser degree than the memory chips used. The more you increase the clock frequency of the memory modules, the more likely errors are to appear in their operation. With timings, it's the opposite. Lowering them can lead to unstable operation. Increasing the voltage applied to overclocked memory can help improve stability, but this leads to greater heat generation and a reduction in overall service life, as well as a potential risk of failure at any moment. In general, if the system is running unstably, the first thing to do is to return all settings to factory defaults.
Overheating.
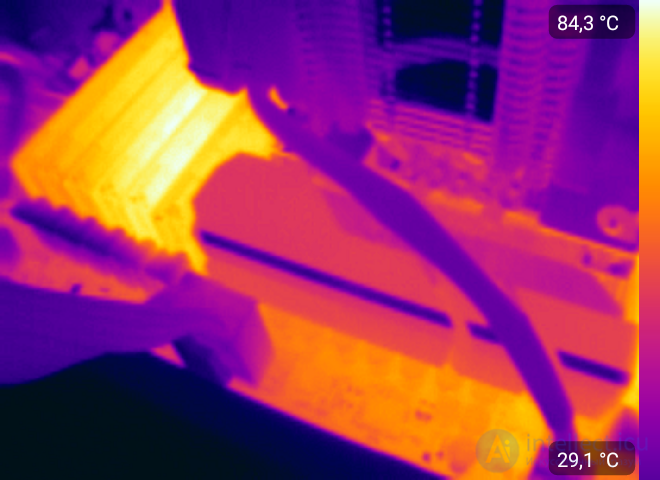
Yes, high memory temperatures can also affect the stability of the system. Therefore, when choosing high-frequency kits, it's worth taking care of their cooling. At a minimum, they should have heat spreaders. The same applies to low-frequency modules that you subject to overclocking. Want to install a set of fast memory into a working system where calculations are performed using it? Don't believe that modern DDR4 with an operating voltage of 1.2 V can get very hot? Take a look at this! The temperature of the chips on modules not equipped with heat spreaders practically reaches 85 degrees, which is the limit for most chips. Impressive, isn't it?
Mechanical damage
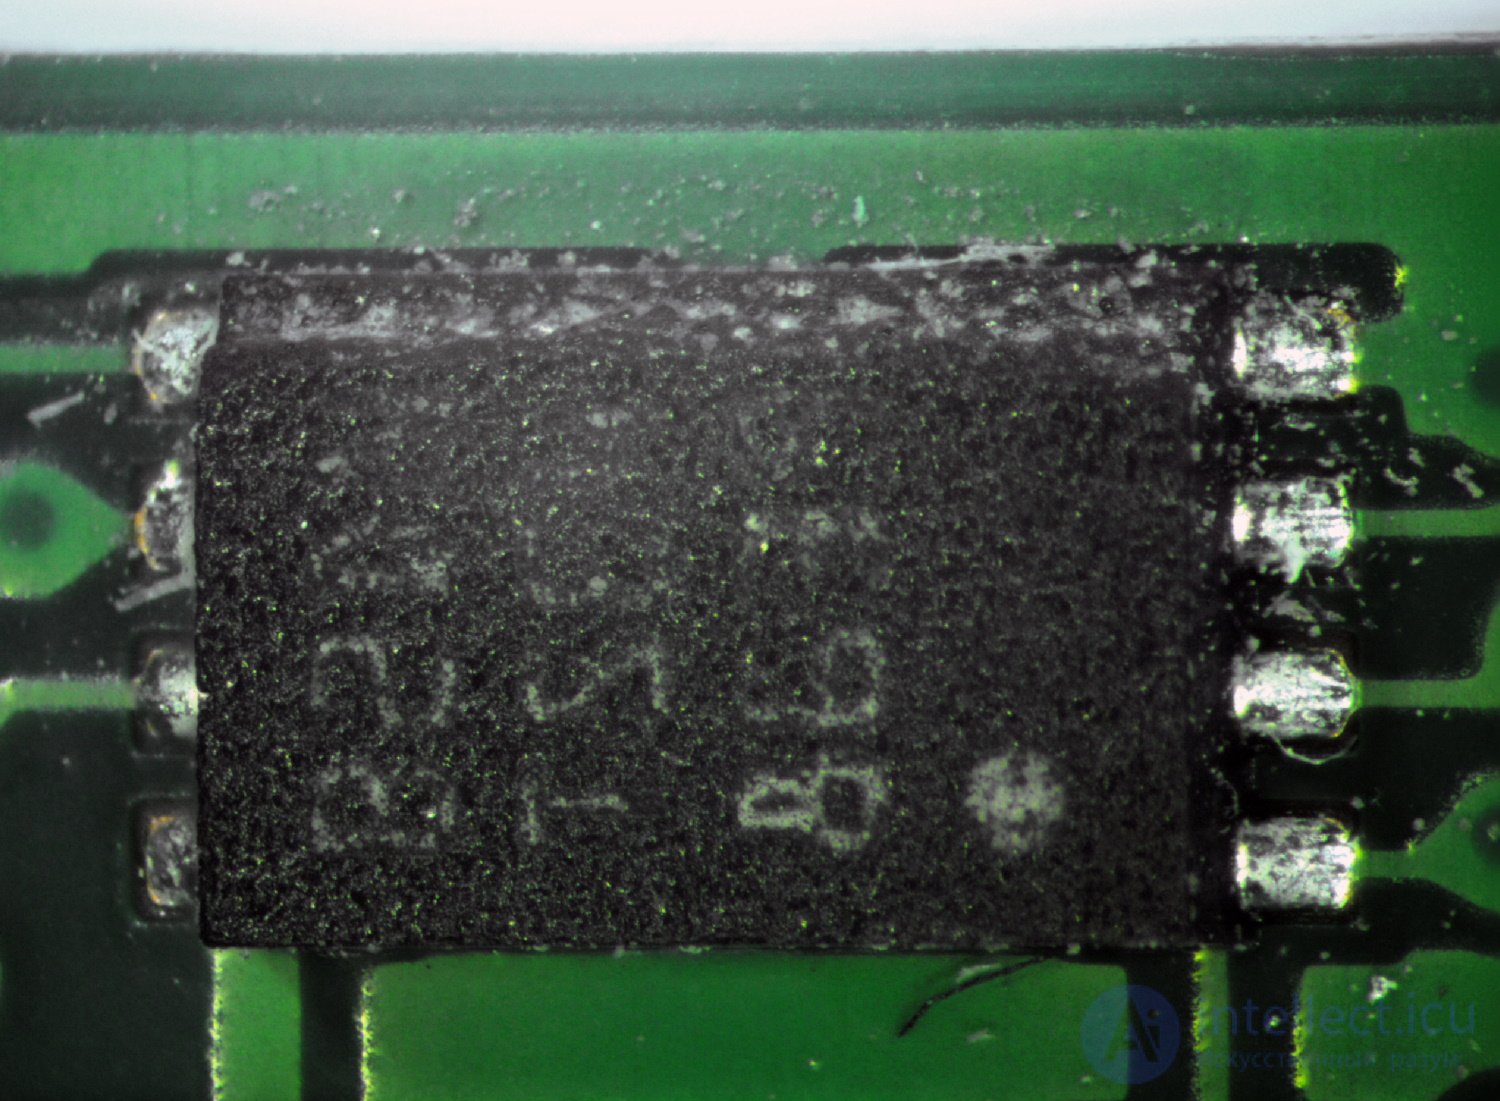
Any careless movement, and you could damage a memory module. Chip off the IC, the SPD, or crack the traces on the PCB. With some types of damage, the memory may still work, but with critical errors. For example, a chipped SPD, as shown in the photo below, rendered the module completely inoperable. Speaking of heat spreaders, they can reduce the probability of mechanical damage to the memory to nearly zero, as long as, of course, you don't spill tea or coffee on it…
Other sources of memory operation problems, but when the memory is not to blame.
It should be noted separately that memory can operate unstably for reasons other than those described above. The problems may also lie in the processor or the motherboard. The memory controller in modern processors is implemented directly within the processor itself. And it can «misbehave» for various reasons, especially during overclocking. It also happens that even if you reset the settings to nominal, a «dead» memory channel, for example, will not come back to life. Accordingly, replacing the module will not help. Physical damage to the processor socket or motherboard (bending or other external/internal impacts) can also be causes of incorrect memory operation. Therefore, we will not stop urging you to check all components separately before going to buy a new memory kit, which may turn out to be a waste of money. And Kingston has gone further, offering a configurator that lets you easily and conveniently find memory modules suited to specific systems! You can find it at https://www.kingston.com/ru/memory/searchoptions.
Qualified Vendors List
Few people know that there are three letters that can simplify the selection of system components – QVL. It stands for Qualified Vendors List, which in Russian sounds like a compatibility list. It includes those components with which the motherboard manufacturer has tested its product and guarantees correct operation. For obvious reasons, not everyone can test hundreds of items. But every self-respecting manufacturer offers a fairly extensive list, in our case, of RAM models.
Blue screens of death, freezes, and reboots – the fault is definitely in…
What is the minimal set of electronic components that a PC/laptop/all-in-one consists of? The motherboard, processor, storage drive, power supply, and RAM. All these components are interconnected, so if one of them operates unstably, it causes failures throughout the entire system. The most correct diagnostic approach is to test each of these components in a different system. This way, by process of elimination, we can identify the «weakest link» and replace it. But it's not always possible to find another system for such actions. For example, not every one of your acquaintances is likely to own a board for testing modules with a clock speed of 4000 MHz or thereabouts. Suppose the problem has been identified and it lies in the memory. You checked it several times in different slots and on a couple of motherboards — and it started working stably. Magic? As they say in the Marvel universe, magic is just unexplained technology, the secret of which, in our case, is very simple. The contacts on memory modules oxidize over time, which makes it impossible for them to work correctly, and when you remove and reinsert them several times, they get lightly polished, after which everything starts working normally. In fact, contact oxidation is the most common cause of RAM failures (and not only RAM), so make it a rule — if any problems arise with the platform, arm yourself with an ordinary eraser and carefully wipe the contacts on both sides. This is especially relevant in cases where problems occur while the memory is operating in its nominal mode, if it had previously worked without failures for months or years.
If the eraser didn't help
What to do next? If the system is experiencing catastrophic failures, then the only option is to test the components on a known-working platform. If the suspicion is specifically on the memory operating in its nominal mode, then you can run several tests. There are free and paid versions of programs, some running from Windows/Linux, and some from DOS or even UEFI.
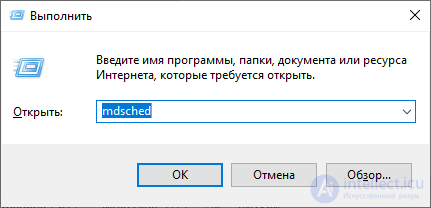
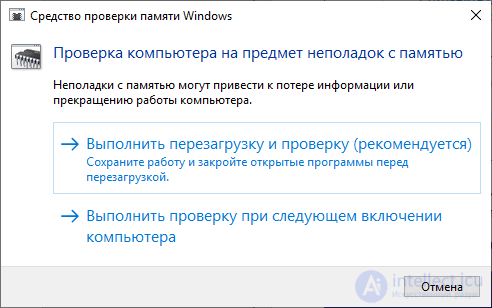
Let's start with what every Windows 7 and newer user has. Oddly enough, the memory test built into Windows works quite effectively and is capable of detecting errors. It can be launched in two ways – from the «Start» menu:
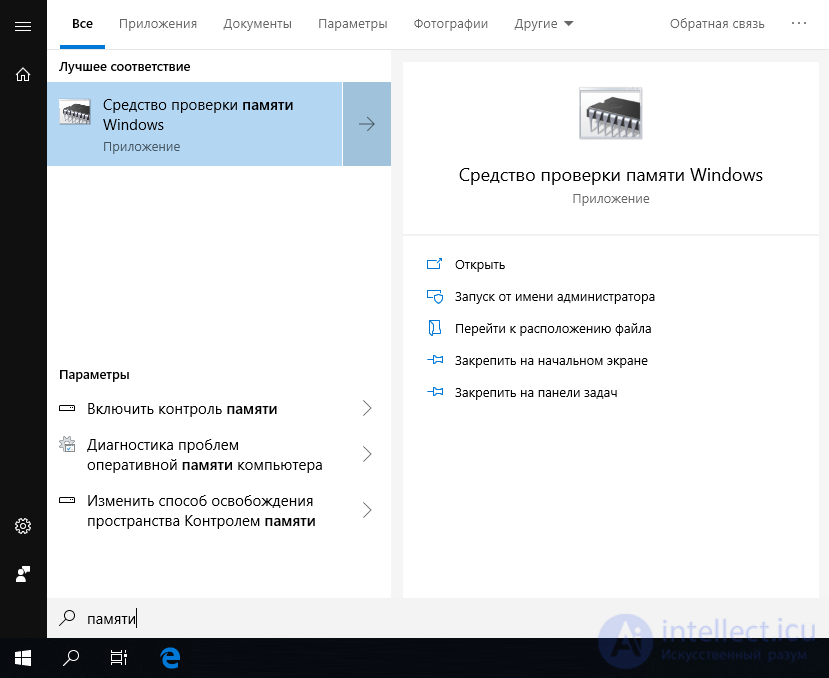
Or via Win+R:
One outcome awaits us:
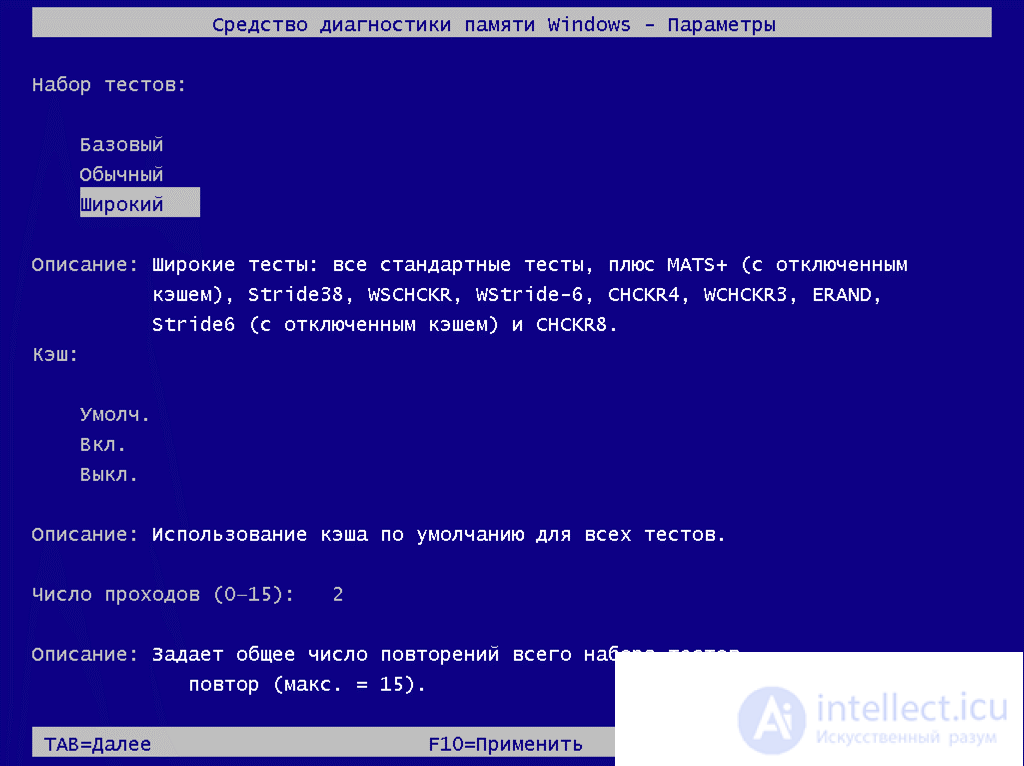
If the basic or standard tests did not reveal any errors, it is definitely worth running the test in «Extended» mode, which includes the tests from the previous modes but is supplemented with MATS+, Stride38, WSCHCKR, WStride-6, CHCKR4, WCHCKR3, ERAND, Stride6 and CHCKR8.
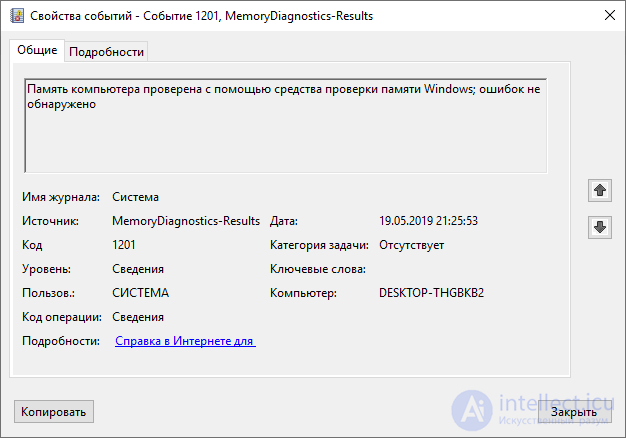
You can view the results in the «Event Viewer» application, specifically – «Windows Logs» — «System». If there are a lot of events, the easiest way to find the log we need is to search (CTRL+F) for the name MemoryDiagnostics-Results.
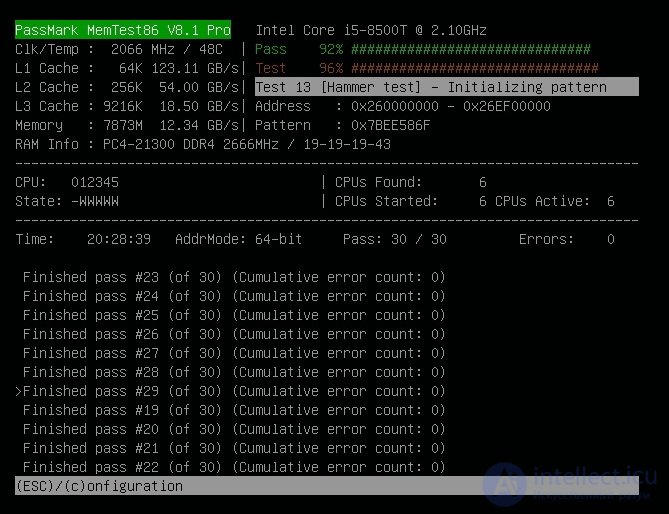
To test memory, it is recommended to use programs that run before the OS loads. This way, we can check the maximum amount of available free memory, which increases the chance of detecting errors, if any exist. A very common program is MemTest86. It comes in two versions – for legacy (Legacy BIOS) systems and for UEFI-compatible platforms. For the latter, the program is paid, although there is also a free version with limited functionality. If you're interested, a comparison table of the editions is available on the manufacturer's official website — https://www.memtest86.com/features.htm.
This program is the best solution for finding memory errors. It has a sufficient number of settings and displays the result in a clear format. How long should you test the memory for? The longer, the better, if the probability of an error occurring is low. But if some memory chip is clearly defective, the result won't take long to appear.
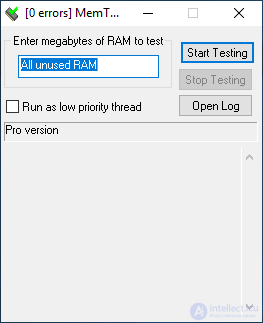
There is also MemTest for Windows. It can be used too, but it makes less sense – it does not test the area of memory allocated to the OS and background-running programs.
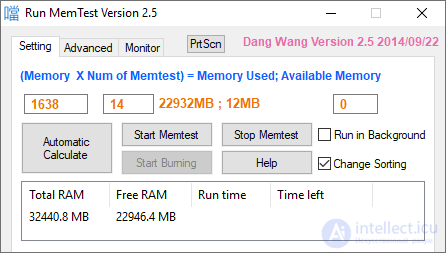
Since this program is not new, enthusiasts (mostly Asian) write additional wrapper shells for it, so that several copies can be conveniently and quickly launched at once to test a large amount of memory.
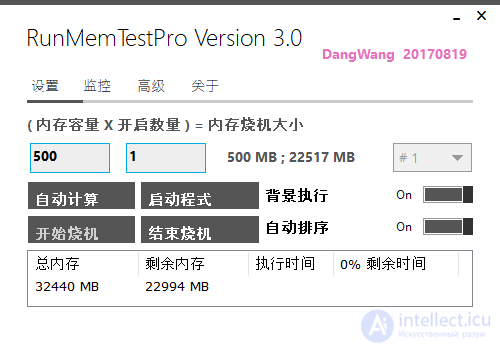
Unfortunately, updates to these shells most often remain in Chinese.
But our own enthusiasts write their own software too. A prime example – TestMem5 by Serj.
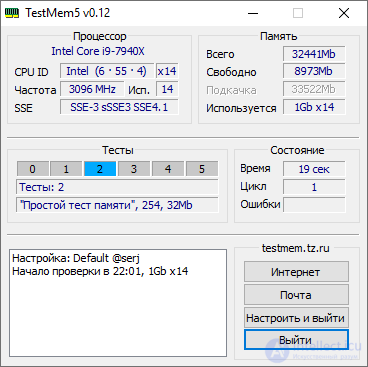
In general, linpack could also be added to the list of tests, but running it requires a full processor load, which risks overheating it, especially if AVX instructions are used. And besides, it's not really a suitable test for checking memory, but rather for warming up the processor to study the effectiveness of the cooling system. And to look at the numbers. Overall, it's not a benchmark for home use, it has a completely different purpose.
A quick fix for all problems
Unfortunately, there isn't one. Unless you're the owner of a fat wallet, which would let you send your PC off for diagnostics and repair. And even then – it won't be fast even for money, unless you simply buy a whole set of new components. To answer the questions posed at the very beginning of the article, the following can be said. There can be several causes of system failures due to RAM. And not all of them relate directly to the memory modules – the processor or the motherboard could just as well be to blame. If we talk specifically about the memory, then stability is also affected by overclocking in any of its forms, and a module can be completely killed by accident physically – by static electricity or a careless hand movement. If you rule out the board and the processor, make sure the temperature regime is proper, remove overclocking, and test the modules in another system, and they still keep producing errors – then you'll have to go to the warranty department, or, if all deadlines have passed, buy new modules. Only a few users will be able to fix the problem themselves – this requires finding the faulty chip and replacing it with a new one, as well as, if necessary, making edits to the SPD. Difficult, but possible. And don't forget about the eraser – the problem might be solved very quickly :)
For additional information about HyperX and Kingston products, please visit the companies' websites.
https://www.hyperxgaming.com
https://www.kingston.com
See also
- [[b9825]]
- [[b7961]]
- [[b9804]]
- [[b9517]]
- [[b3304]]
- [[b9075]]
- [[b9805]]
- [[b3272]]
- [[b9101]]
- [[b3275]]
- [[b3299]]
- [[b900]]
- [[b3271]]
- [[b899]]
- [[b3297]]
- [[b7602]]
- [[b3290]]
- [[b3267]]
- [[b321]]
- [[b4642]]
- [[b9045]]
See also
- Diagnostics and Fault-Finding Algorithms for RAM, Motherboard, and CPU
- Faulty ports on the motherboard (COM LPT USB)
- Performance Diagnostics of the Motherboard, CPU, and RAM
- Structural and Functional Diagram of an Ultrasound Device, Diagnostics and Repair of the Ultrasound Machine and Its Probes
- Malfunctions of active and passive radio radio elements
- Диагностика неисправностей видеокарты и ремонт
- Find, diagnose and troubleshoot an ATA disk
- 3.1.4. MAIN MALFUNCTIONS OF THE SYSTEMBOARD, THEIR SIGNS, CAUSES AND ELIMINATION METHODS
- Fault-Finding Algorithm for TV Tuners, LCD Monitors, Televisions, TV Boxes, and Smart TVs
- 3.1.7. MALFUNCTIONS OF THE HARDWARE PART OF HDD THEIR CHARACTER OF MANIFESTATION, TECHNIQUE OF THEIR ELIMINATION
- Troubleshooting. Methods of troubleshooting As well as the reasons for the inoperability of electronic devices.
- Fault finding algorithm
- 3.1.3. TROUBLESHOOTING ALGORITHMS FOR PC POWER SUPPLY
- Development of a diagnostic and troubleshooting algorithm.
- 3.5. NETWORK EQUIPMENT TROUBLESHOOTING
- TV malfunctions - causes and methods of elimination, block diagram and principle of TV operation
- 3.2.11. PRINCIPLE OF CONSTRUCTION AND BASIC TYPES OF LCD LCD MONITORS AND THEIR REPAIR METHODOLOGY
- 2.3. TYPES OF FAILURES, FEATURES OF THEIR APPEARANCE AND DETECTION
- Random Access Memory (RAM) Dynamic RAM
- Theme 11. Storage devices Lecture 14
- Random access memory




















Comments