
Lecture
Bump mapping — a texture mapping technique in computer graphics used to simulate bumps and wrinkles on the surface of an object. This is achieved by perturbing the surface normals of the object and using the perturbed normal during lighting calculations. The result is a surface that appears distinctly uneven rather than smooth, although the surface of the underlying object is not actually changed. Bump mapping was introduced by James Blinn in 1978.
Normal mapping is the most common variation of bump mapping.
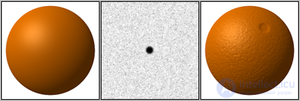
A sphere without bump mapping (left). The bump map that will be applied to the sphere (middle). The sphere with the bump map applied (right) has a mottled surface resembling an orange. Bump maps achieve this effect by changing the way the illuminated surface responds to light, without changing the size or shape of the surface.
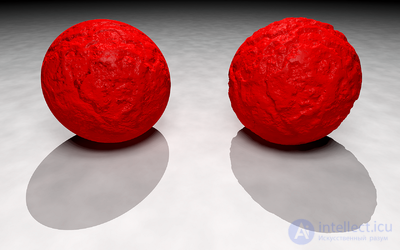
Bump mapping is limited in that it does not change the shape of the underlying object. On the left, the mathematical function defining the bump map simulates a pitted surface on the sphere, but the outline and shadow of the object remain the same as those of a perfect sphere. On the right, the same function is used to modify the surface of the sphere by creating an isosurface . This models a sphere with an uneven surface, so that both its outline and its shadow are rendered realistically.
Bump mapping — is a technique in computer graphics for making a rendered surface look more realistic by simulating small surface displacements. However, unlike offset mapping , the geometry of the surface is not changed. Instead, only the surface normal is modified, as if the surface had been displaced. The modified surface normal is then used in lighting calculations (for example, using the Phong reflection model ), creating the appearance of detail instead of a smooth surface.
Bump mapping is executed much faster and consumes fewer resources at the same level of detail compared to displacement mapping, since the geometry itself remains unchanged.
There are also extensions that modify other surface characteristics in addition to enhancing the sense of depth. Parallax mapping and horizon mapping — are two such extensions.
The main limitation of using bump mapping is that it perturbs only the surface normals without changing the underlying surface itself. As a result, silhouettes and shadows remain unchanged, which is especially noticeable with large simulated displacements. This limitation can be overcome with techniques involving offset mapping, in which bumps are applied to the surface, or through the use of an isosurface .
There are two main methods for performing bump mapping. The first uses a height map to simulate surface displacement, which yields a modified normal. This method was invented by Blinn and is usually referred to as bump mapping unless otherwise specified. The steps of this method are summarized as follows.
Before performing the lighting calculation for each visible point (or pixel ) on the surface of an object:
The result is a surface that appears to have real depth. The algorithm also ensures that the appearance of the surface changes as the light sources in the scene move.
The other method consists of specifying a normal map , which contains the modified normal for each point on the surface directly. Since the normal is specified directly rather than derived from a height map, this method usually produces more predictable results. This makes it easier for artists to work with, making it the most common bump mapping method today.
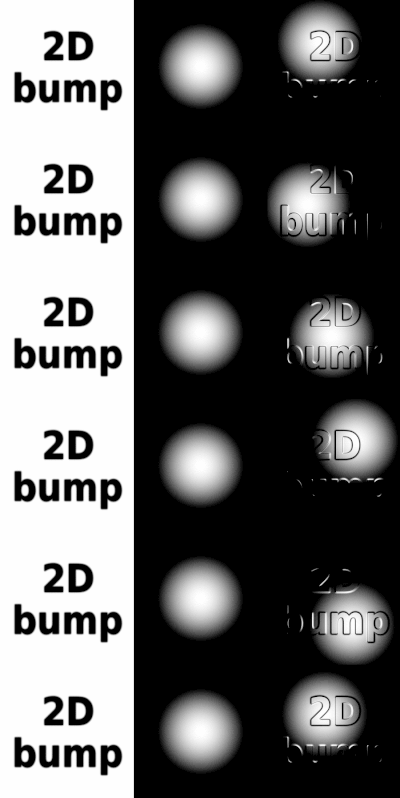 An example of fake real-time bump mapping.
From left to right:
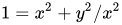 path.
path.Real-time 3D graphics programmers often use variations of this technique to simulate bump mapping at lower computational cost.
One typical approach was to use fixed geometry, which allows the surface normal from the height map to be used almost directly. Combined with a precomputed lookup table for lighting calculations, the method could be implemented with a very simple and fast loop, making a full-screen effect achievable. This method was a common visual effect when bump mapping was first introduced.

Comments