
Lecture
Image viewing tools fall into several types depending on their functionality and the file formats they support. Here are the main categories and examples:
Software tools for mutual conversion of graphic files allow images to be converted from one format to another. Such tools can be either universal (supporting many formats) or specialized (working with a limited set of formats). Here is a list of popular solutions:
These programs support a wide range of formats and provide a convenient interface for batch processing:
XnConvert
A universal image conversion program. Supports more than 500 input formats and 80 output formats. Suitable for batch processing.
IrfanView
A lightweight and functional viewing and conversion tool. Supports plugins for rare formats.
FastStone Photo Resizer
A convenient tool for resizing, converting, and batch-processing images.
Total Image Converter
A program for working with most popular formats (JPEG, PNG, TIFF, BMP, RAW, and others).
These tools are oriented toward specific tasks or formats:
RAWTherapee
Designed for working with RAW files used in professional photography.
Adobe Photoshop
A powerful tool for editing and converting images, supporting many professional formats, including PSD.
CorelDRAW
Suitable for working with vector and raster formats such as AI, CDR, SVG, and converting between them.
GIMP
A free graphics editor with advanced image conversion capabilities.
Suitable for quick conversion without installing software:
Convertio
Supports most graphic formats. Works online, supports batch processing.
Online-Convert
A universal tool for converting images, video, audio, and documents.
ILoveIMG
A convenient online service for image conversion and basic editing.
For automating processes and working with large numbers of images:
ImageMagick
A powerful command-line tool for working with images. The convert command allows images to be converted between formats.
Example:
bash
convert input.png output.jpg
GraphicsMagick
A more optimized counterpart to ImageMagick.
ffmpeg
Used for working with multimedia, but also supports converting graphic formats such as PNG, JPEG, and others.
If conversion of vector formats is required (for example, SVG, EPS, PDF):
Inkscape
A free vector graphics editor. Can convert SVG to PNG, PDF, EPS, and other formats.
Adobe Illustrator
A professional tool for working with vector images. Supports export to various formats.
For programmatic image conversion:
Pillow (Python)
A Python library for working with raster images.
Example:
python
from PIL import Image
img = Image.open("input.png")
img.save("output.jpg")
OpenCV
Suitable for working with images and video, including format conversion.
Sharp (Node.js)
A fast image processing library supporting popular formats.
Converting vector objects into raster (bitmap) images is called rasterization. This is the process by which vector data (described by mathematical curves, lines, and points) is converted into an image composed of pixels. The result is a file in a format such as PNG, JPEG, or BMP.
Adobe Illustrator
A professional tool for working with vector graphics. Allows exporting vector files to raster formats.
Process:
CorelDRAW
Also supports export to raster formats.
Process:
Inkscape
A free tool for working with vector graphics.
Process:
For quick conversion without installing software:
AutoCAD
Supports exporting drawings (DWG, DXF) to raster formats such as TIFF and PNG.
Process:
FreeCAD
For working with technical 2D/3D models. Export to PNG via rendering with resolution settings.
Inkscape CLI
Convenient for bulk processing of SVG files.
Command:
bash
inkscape input.svg --export-filename=output.png --export-dpi=300
ImageMagick
Used for converting vector formats to raster formats.
Command:
bash
convert input.svg -density 300 output.png
CairoSVG
A Python library for rasterizing SVG.
Example:
python

from cairosvg import svg2png
with open("input.svg", "rb") as svg_file:
   svg2png(file_obj=svg_file, write_to="output.png", dpi=300)
Converting raster (bitmap) images into vector objects is called tracing or vectorization. This process consists of converting an image's pixel information into mathematical descriptions of shapes (lines, curves, etc.) that can be scaled without loss of quality. This is especially useful for logos, illustrations, or other graphic elements that need to be modified without loss of quality.
Adobe Illustrator (Live Trace)
Illustrator offers a powerful "Image Trace" tool that automatically vectorizes raster images such as JPEG, PNG, or TIFF.
Process:
CorelDRAW (PowerTRACE)
CorelDRAW has a built-in vectorization tool — PowerTRACE — similar to Illustrator's tracing function.
Process:
Inkscape
A free, open-source vector graphics editor that also has a tool for tracing raster images.
Process:
For quick vectorization without installing additional software:
AutoCAD
The "Raster to Vector" tool can be used to convert raster images into vector formats (for example, DXF).
Process:
FreeCAD
For working with engineering graphics, raster images can be traced into vector objects using extensions and plugins.
Vector Magic
One of the best-known vectorization tools, delivering high-quality results. Works both online and as a desktop application.
Process:
Potrace
A free, open-source program for tracing raster images into vector form. Has a graphical interface and is also available via the command line.
Command line usage (Linux, macOS):
bash
potrace input.bmp -o output.svg
Brightness threshold
During tracing it is important to set the brightness threshold correctly in order to properly interpret the areas of the image that should be converted into outlines.
Color palette
When tracing color images, the number of colors to be used in the vector image must be specified. The more colors used, the more accurate the result, but it may become more complex and harder to edit.
Smoothing level
For curves and lines, the smoothing level can be adjusted to minimize "jaggedness" during vectorization.
Several types of algorithms are used to convert raster (bitmap) images into vector objects. These algorithms perform tracing or vectorization of raster images, turning pixel information into mathematical shapes such as lines, curves, and polygons
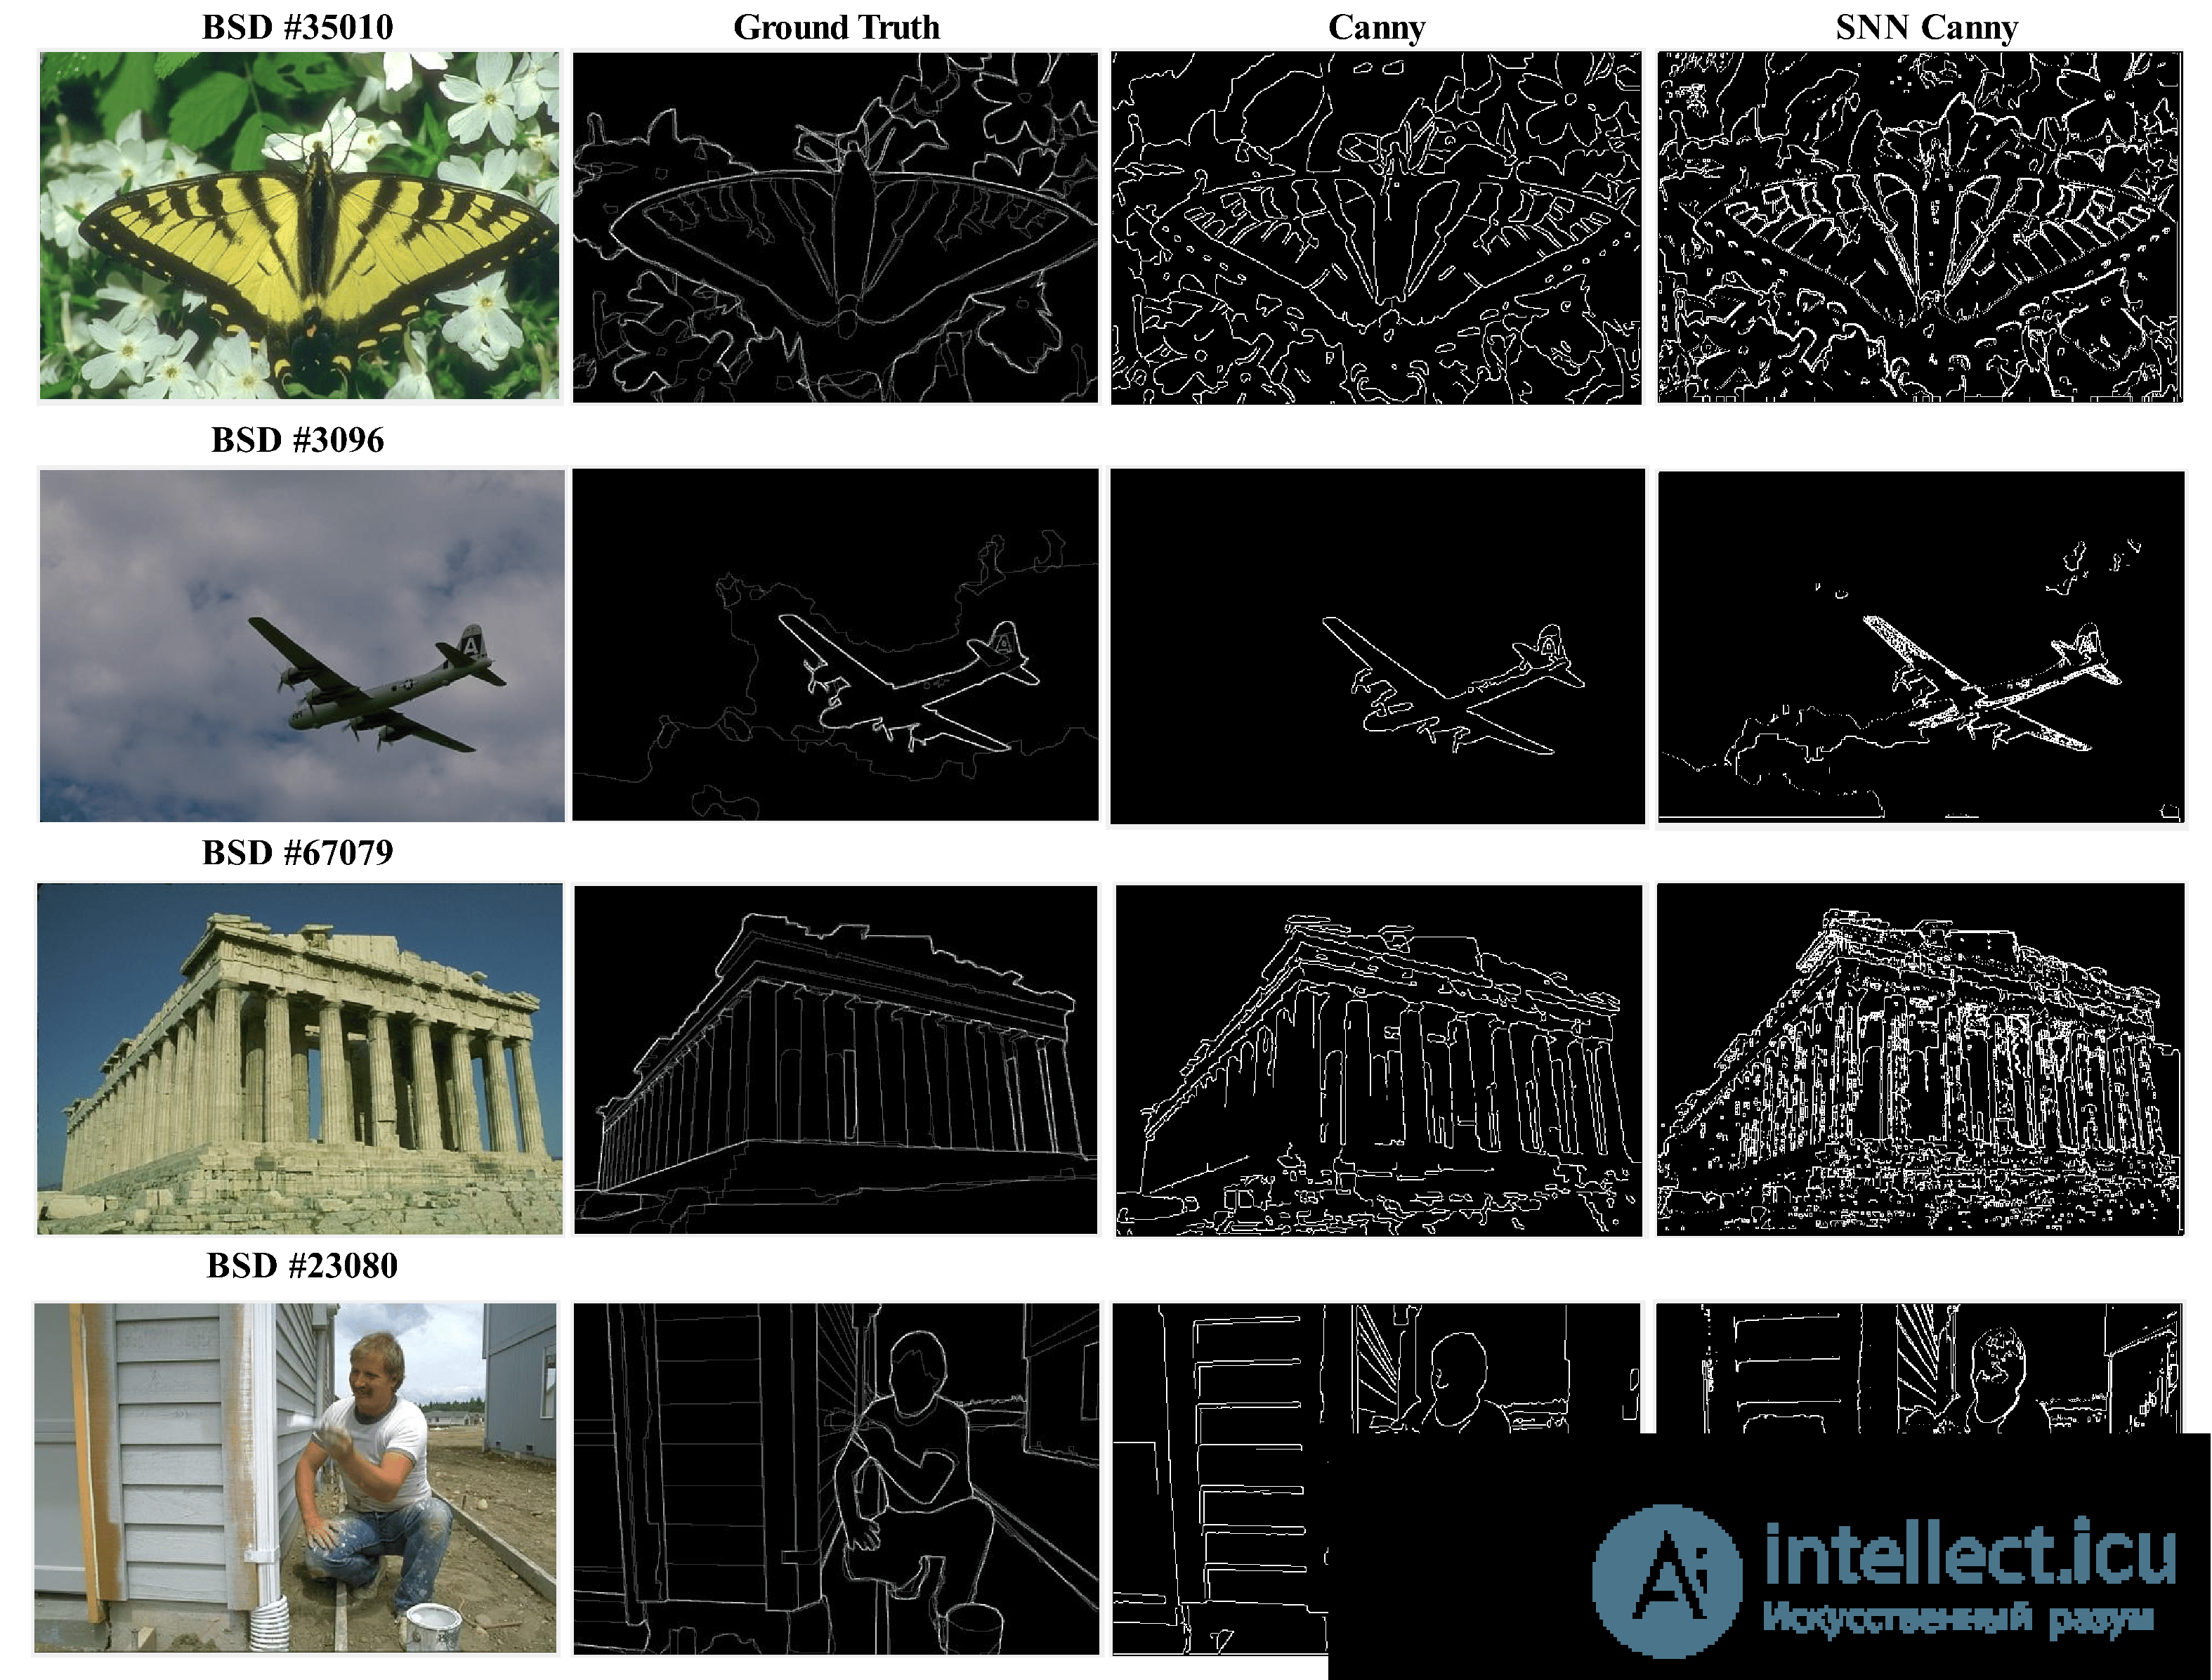
. The most common approaches include:
These algorithms focus on extracting contours from raster images in order to convert them into vector objects.
The Canny algorithm is an edge detection method used to identify contours. It applies several steps: filtering with a Gaussian filter, gradient computation, non-maximum suppression, and thresholding to isolate true edges.
This is a classic algorithm for finding gradients in an image. It computes changes in pixel intensity in the horizontal and vertical directions, which makes it possible to highlight contours.
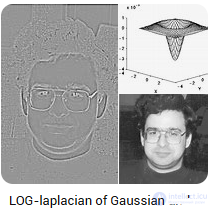
This algorithm combines two stages: filtering the image with a Gaussian filter for smoothing, and applying the Laplacian operator to highlight contours.
Potrace is one of the best-known toolsets for tracing raster images into vector shapes. It uses a method based on adaptive smoothing and curve optimization to produce smooth contours.
An image tracing algorithm can use Bezier curves to describe the contours obtained during vectorization. Bezier curves are mathematical curves defined by a set of control points and used to create smooth curves.
This algorithm is used to create vector objects from raster data by analyzing the pixels that form the boundaries of objects. The algorithm starts with a square on a pixel grid and gradually moves across the image, creating contours wherever the pixel color changes.
The flood-fill algorithm is used to detect closed regions in an image. It looks for pixels sharing a particular color identity and fills them, which can be used for vectorization.
Once the contours or boundaries of an object have been detected and converted into vector lines, it is often necessary to simplify them to improve quality and reduce complexity (the number of points).
This algorithm is used to simplify polygons and contours by reducing the number of points while minimizing the error between the original and simplified contour.
This algorithm is a modification of the Douglas-Peucker algorithm and is used to simplify curves represented as polylines. It selects the most significant points and discards less significant ones.
More sophisticated methods, which can take into account hue, saturation, and pixel brightness, are used for vectorizing color images.
This algorithm is used to cluster pixels by color and then convert these clusters into vector regions. It divides the image into several color groups (classes), which simplifies further vectorization.
The process of vectorizing raster images includes several stages, such as contour detection, tracing contours into vector lines, and simplifying these contours to reduce complexity. The choice of algorithm depends on the type of image, the required accuracy, and the complexity of the task. Algorithms such as Potrace, Canny, and the Douglas-Peucker algorithm are among the most popular for obtaining high-quality vector objects.
Automatic vectorization is the process of converting raster (bitmap) images into vector formats with minimal user intervention. This process is carried out using algorithms that identify contours and turn them into mathematical descriptions (lines, curves, polygons, etc.).
Image preprocessing
At this stage, filtering is often used to increase contrast or reduce noise in the image. Algorithms may use various image-processing methods, such as:
Contour detection
Algorithms such as Canny or Sobel highlight contours in the image. This is a key step, since contours define the boundaries of the objects to be vectorized.
Vectorization of contours
Once contours have been detected, algorithms are used to convert them into vector lines. This can be done using Bezier curves or other methods, for example, point reduction using the Douglas-Peucker algorithm.
Color segmentation (for color images)
For color images, a clustering method (such as k-means) is applied to divide the image into regions of similar colors, which helps in vectorizing individual objects.
Simplification and optimization
After the contours have been vectorized, algorithms such as the Ramer-Douglas-Peucker algorithm are often used to simplify the images, reducing the number of points and smoothing the lines.
Adobe Illustrator (Image Trace)
The Image Trace feature automates the vectorization process in Illustrator, allowing various modes to be selected (for example, black-and-white or color vectorization).
CorelDRAW (PowerTRACE)
Vectorization of raster images using the PowerTRACE feature. In CorelDRAW, raster images can be automatically converted to vector form with settings for precision and complexity.
Inkscape
A free, open-source tool for vectorization using the Trace Bitmap feature. Inkscape allows images to be vectorized with fine-grained precision settings.
Vector Magic
A specialized tool for automatic image vectorization. It uses sophisticated algorithms to convert raster images into high-quality vector images.
Potrace
A free, open-source program for tracing raster images into vector formats such as SVG, EPS, and PDF.
Automatic vectorization is defined as an automated technology for converting raster data into vector objects. This process is controlled by the user, who manages the course of vectorization. Factors such as image resolution, the amount of noise (interference) in the image, and the actual content of the scanned document determine the final vectorization result.
ArcScan supports two vectorization methods: centerline and outline.
Centerline vectorization allows vector objects to be created along the center of linear raster features.
Outline digitizing allows vector objects to be created along the boundary of linear raster features.
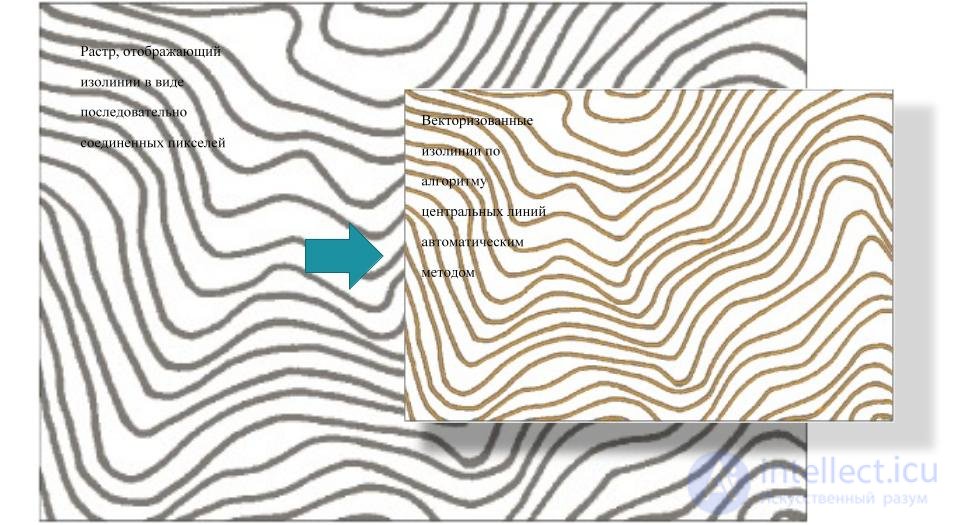
The figure below shows centerline tracing used to create linear features. The square points correspond to the nodes of the vector line being created.

With Vectorization Trace, it is enough to simply point the cursor in the direction in which you want to perform vectorization and click the mouse. With each click, objects are created along the axes of the raster cells. The current vectorization settings affect the resulting vector geometry. You have the option to create linear or polygonal objects.
The figure below shows tracing and raster closure used when creating polygonal objects.
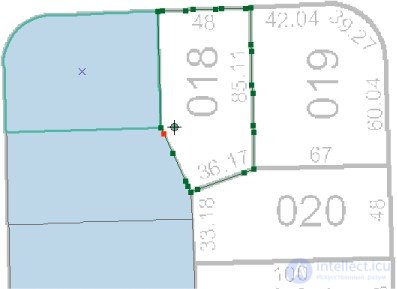
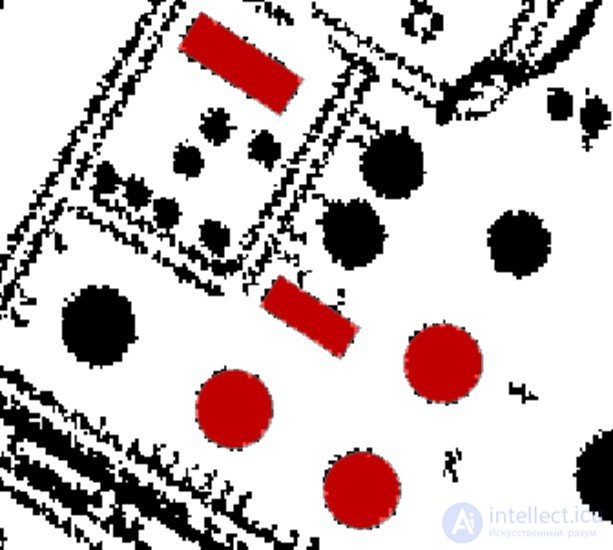
Objects of a particular shape, such as a building or a storage tank, can be vectorized using shape recognition tools. This allows objects to be created with a single mouse click on the raster object you want to select.
The figure shows, in red, automatically selected objects of circular and rectangular shape.
Manual vectorization is the process of creating vector images from scratch or based on raster images using drawing tools. This method requires more time and skill but allows for maximum precision and control over the result. Complex images such as logos, illustrations, or intricate graphic elements can be readily handled manually.
Image import
A vector image is usually created based on a raster image (for example, a scanned drawing or photograph). This image is imported into a vector editor (for example, Illustrator, CorelDRAW, or Inkscape).
Creating contours
A contour is drawn for each element of the image using tools for drawing lines, curves, or shapes. This process can use:
Defining colors and fills
After the contours have been created, colors, gradients, and textures can be added. The color palette can be adjusted manually, and the areas to be filled with particular colors can be precisely defined.
Using layers and objects
Vector images are often created using layers, making it convenient to work with different parts of the image and create more complex compositions.
Editing and refinement
Contours can be manually adjusted, errors corrected, and details improved. Manual vectorization gives full control for precisely adjusting each element.
Export and saving
Once drawing is complete, the vector image is exported to the required format, such as SVG, EPS, or AI.
Adobe Illustrator
One of the most popular tools for manual vectorization, with powerful drawing and editing capabilities.
CorelDRAW
An excellent tool for professional vector graphics, with powerful drawing and editing tools.
Inkscape
A free, open-source alternative to Illustrator, which also supports manual vectorization using drawing tools.
Affinity Designer
A paid but relatively affordable vector graphics tool with a convenient interface for drawing and creating illustrations.
Automatic vectorization:
Manual vectorization:
Automatic vectorization is ideal for simple, well-defined images such as logos, graphics, and illustrations. It is a fast process that saves time, but its accuracy depends on the quality of the original raster image and the algorithm settings.
Manual vectorization is the best choice when high precision is required or when working with more complex images. This method gives full control over the result and allows unique images to be created, but requires more time and skill.
Depending on the task, the appropriate method can be chosen: automatic for fast conversion or manual for achieving the highest quality.

Comments