
Lecture
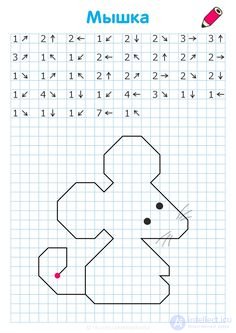
Grid-based graphic dictation — a developmental game for older preschoolers and first-graders that teaches orientation on a sheet of paper, develops visual and auditory perception, and voluntary attention and memory. It helps children of older preschool age form the graphic skills necessary to prepare the hand for writing. Graphic dictations develop fine motor skills and hand movement coordination, and form spatial thinking.
Grid drawings are given only after preschoolers have mastered graphic skills, become familiar with a large-grid notebook, learned to orient themselves on the sheet, and developed the ability to fix a cell's corner. You need not say in advance what the result will be. Present the task as a riddle – this will increase children's interest.
Starting school is an important moment in the life of a child and their parents. The better a child is prepared for school psychologically, emotionally and intellectually, the more confident they will feel, and the easier their adaptation period in elementary school will be.
Graphic dictations, or grid drawing, for preschoolers help parents and educators systematically prepare a child for school and prevent such typical learning difficulties as underdeveloped spelling vigilance, restlessness and inattentiveness. Regular practice with these graphic dictations develops a child's voluntary attention, spatial imagination, fine motor skills of the fingers, movement coordination, and perseverance.
Grid drawing is a very engaging and useful activity for children. It is a playful way of developing a young child's spatial imagination, fine motor skills of the fingers, movement coordination, and perseverance. Graphic dictations can be successfully used with children aged 5 to 10.
By completing the tasks – graphic dictations – presented below, a child will broaden their outlook, expand their vocabulary, learn to navigate a notebook, and become familiar with various ways of depicting objects.
Remember! The length of a session for children aged 4-5 should be no more than 15 minutes, and for children aged 5-6, 20 minutes. Older children can work for 30 minutes.
Each dictation contains tasks for children aged 5 to 7.
A graphic dictation can be completed in two ways:
1. The child is shown a sample geometric drawing and asked to reproduce exactly the same drawing in a grid notebook.
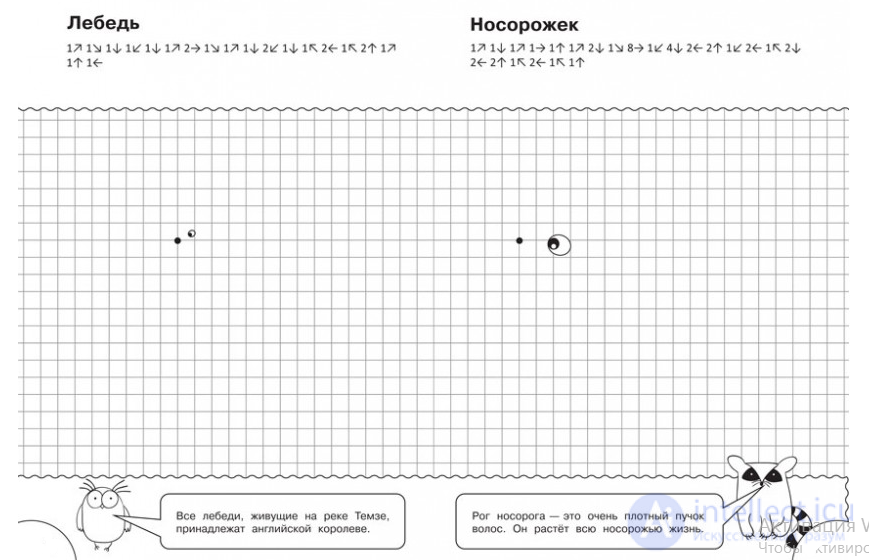
2. An adult dictates a sequence of actions indicating the number of cells and their directions (left, right, up, down); the child performs the work by ear, and then compares, by overlay, their depiction of the pattern or figure with the sample in the manual.
The graphic dictations are supplemented with riddles, tongue twisters, articulation exercises, and finger exercises. During the activity, the child practices correct, clear and literate speech, develops fine motor skills of the hands, learns to identify the distinguishing features of objects, and expands their vocabulary.
The tasks are selected according to the principle of «from simple to complex». If you are starting to work with a child using these graphic dictations, complete the tasks with them in order: start with the very first, simplest dictations and gradually move on to more complex ones.
For the activities you will need a grid notebook, a simple pencil and an eraser, so that the child can always correct an incorrect line. For children aged 5-6, it is better to use a large-grid notebook (0.8 mm) so as not to strain their eyesight. Starting from graphic dictation No. 40, all the drawings are designed for a regular school notebook (they will not fit in a large-grid notebook).
The tasks use the following notation: the number of cells to be counted is denoted by a digit, and the direction is denoted by an arrow. For example, the entry:

should be read as: 1 cell right, 3 cells up, 2 cells left, 4 cells down, 1 cell right.
During the activities, the child's mood and the adult's friendly attitude are very important. Remember that the activities are not an exam for the child, but a game. Help the little one and make sure they do not make mistakes. The result of the work should always satisfy the child, so that they want to draw by grid again and again.
Your task is to help the child, in a playful way, master the skills necessary for good learning. Therefore, never scold them. If something is not working out, simply explain how to do it correctly. Praise the child often, and never compare them with anyone.
The duration of one session with graphic dictations should not exceed 10-15 minutes for children aged 5, 15-20 minutes for children aged 5-6, and 20-25 minutes for children aged 6-7. But if the child gets absorbed, there is no need to stop them and interrupt the activity.
Pay attention to the child's posture while completing the dictation, and to how they hold the pencil. Show the child how to hold the pencil between the phalanges of the index, thumb and middle fingers. If the child is not good at counting, help them count the cells in the notebook.
Before each session, be sure to talk with the child about the fact that there are different directions and sides. Show them where right is, where left is, where up is, where down is. Draw the child's attention to the fact that every person has a right side and a left side. Explain that the hand they eat, draw and write with is the right hand, and the other hand is the left. For left-handed children it is the opposite; left-handed children must be told that there are people for whom the working hand is the right one, and there are people for whom the working hand is the left one.
After that, you can open the notebook and teach the child to orient themselves on the sheet of paper. Show the child where the left edge of the notebook is, where the right edge is, where the top is, where the bottom is. You can explain that in the past schools had slanted desks, which is why the upper edge of the notebook came to be called the top and the lower edge the bottom. Explain to the child that if you say «right», then the pencil should be moved «there» (to the right). And if you say «left», then the pencil should be moved «there» (to the left), and so on. Show the child how to count the cells.
You yourself will also need a pencil and an eraser to mark the lines you have read. The dictations can be quite lengthy, and so as not to lose your place, put a pencil dot next to the lines you are reading. This will help you not to lose track. After the dictation you can erase all the dots.
Each session includes a graphic dictation, discussion of the images, tongue twisters, articulation exercises, riddles and finger exercises. Each stage of the session carries meaning. Sessions with a child can be structured in different sequences. You can start with finger exercises, read tongue twisters and articulation exercises, and then do the graphic dictation. Or you can do it the other way round: first do the graphic dictation, then the tongue twisters and finger exercises. Riddles are best posed at the end of the session.
When the child draws a picture, talk about the fact that there are objects and there are their images. Images come in different kinds: photographs, drawings, schematic depictions. A graphic dictation is a schematic depiction of an object.
Talk about the fact that every animal has its own distinctive features. A schematic depiction shows the distinctive features by which we can recognize the animal or object. Ask the child what distinctive features the animal they drew has. For example, a hare has long ears and a small tail, an elephant has a long trunk, an ostrich has a long neck, a small head and long legs, and so on.
Work with tongue twisters and articulation drills in different ways:
1. Have the child take a ball in their hands and, rhythmically tossing and catching it, say the tongue twister or articulation drill. The ball can be tossed and caught on every word or on every syllable.
2. Have the child say the tongue twister (articulation drill) while passing the ball from one hand to the other.
3. The tongue twister can be said while clapping out the rhythm with the hands.
4. Suggest saying the tongue twister three times in a row without making a mistake.
Do finger exercises together, so that the child can see you and repeat the movements after you.

Comments