
Lecture
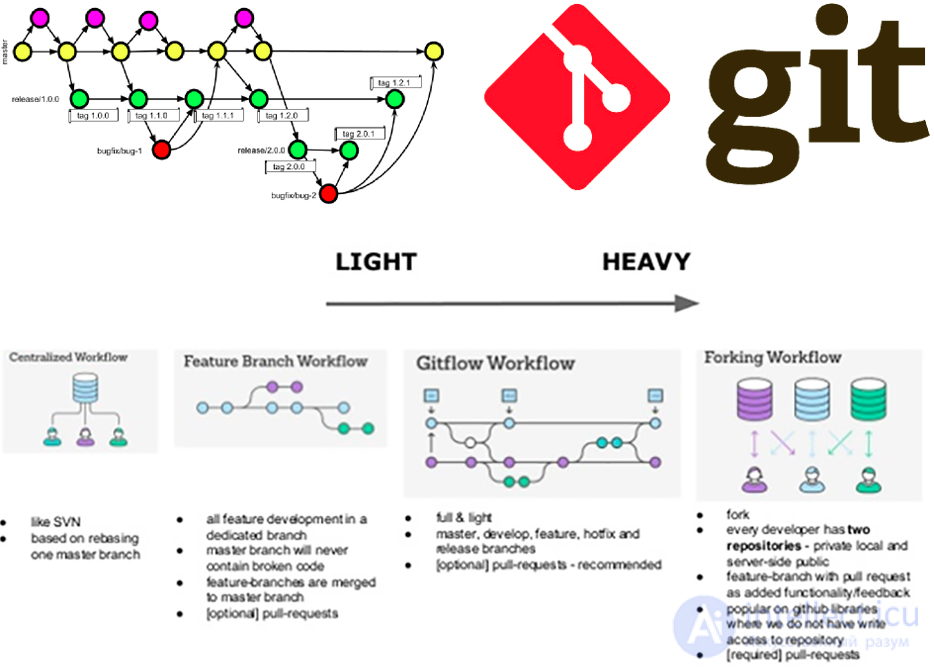
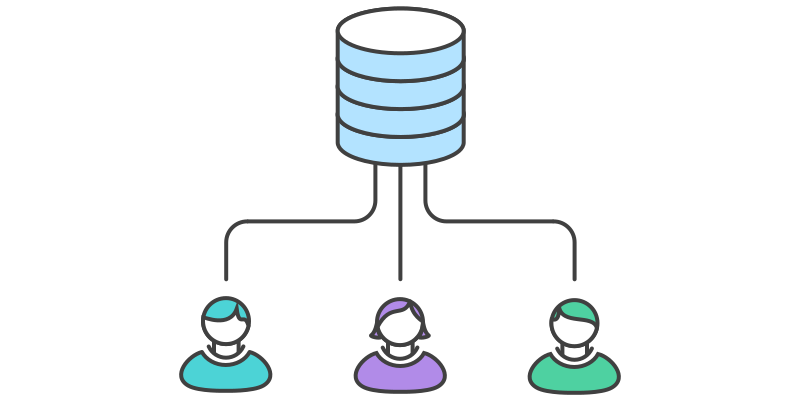
The Centralized Workflow is a great Git workflow for teams transitioning from SVN. Like Subversion, the Centralized Workflow uses a central repository that serves as the single point of entry for all changes to the project. Instead of trunk, the default development branch is called master, and all changes are committed to this branch. This workflow doesn't require any branches other than master.
Transitioning to a distributed version control system may seem like a daunting task, but you don't have to change your existing workflow to take advantage of Git. Your team can develop projects in exactly the same way as they do in Subversion.
That said, using Git to power your development workflow provides several advantages over SVN. First, it gives every developer their own local copy of the entire project. This isolated environment lets each developer work independently of all other changes to the project - they can add commits to their local repository and completely forget about upstream developments until it's convenient for them.
Second, it gives you access to Git's robust branching and merging model. Unlike SVN, Git branches are designed to be a fail-safe mechanism for integrating code and sharing changes between repositories. The Centralized Workflow is similar to other workflows in that it uses a remote server-side repository that developers push and pull from. Compared to other workflows, the Centralized Workflow has no defined pull request or forking patterns. The Centralized Workflow is generally better suited for teams migrating from SVN to Git and smaller teams.
Developers start by cloning the central repository. In their own local copies of the project, they edit files and commit changes as they would with SVN; however, these new commits are stored locally - they're completely isolated from the central repository. This lets developers defer synchronizing with upstream until they reach a convenient breakpoint.
To publish changes to the official project, developers "push" their local master branch to the central repository. This is the equivalent of svn commit, except that it adds all of the local commits that aren't already in the central master branch.
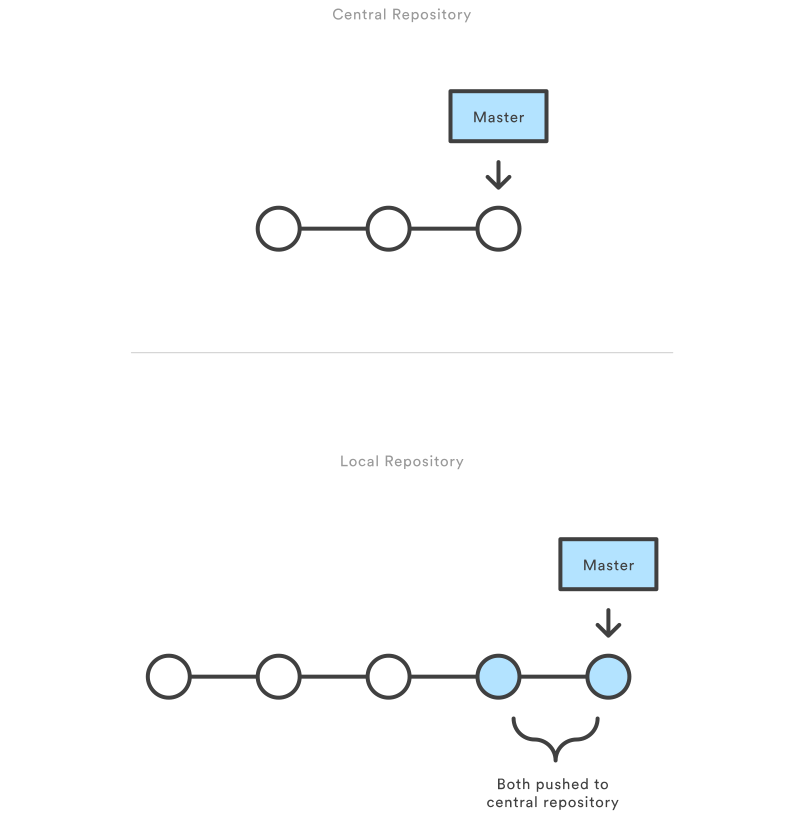
First, someone needs to create the central repository on a server. If it's a new project, you can initialize an empty repository. Otherwise, you'll need to import an existing Git or SVN repository.
Central repositories should always be bare repositories (they shouldn't have a working directory), which can be created as follows:
ssh user@host git init --bare /path/to/repo.git
Be sure to use a valid SSH username for user, the domain or IP address of your server for host, and the location where you want to store your repo for /path/to/repo.git. Note that the .git extension is conventionally appended to the repository name to indicate that it's a bare repository.
Central repositories are often created through third-party Git hosting services like Bitbucket Cloud or Bitbucket Server. The process of initializing a bare repository described above is handled for you by the hosting service. The hosting service will then provide an address for the central repository to access from your local repository.
Next, each developer creates a local copy of the entire project. This is accomplished with the git clone command:
git clone ssh://user@host/path/to/repo.git
When you clone a repository, Git automatically adds a shortcut called origin that points back to the "parent" repository, under the assumption that you'll want to interact with it further down the road.
Once the repository is cloned locally, a developer can make changes using the standard Git commit process: edit, stage, and commit. If you aren't familiar with the staging area, it's a way to prepare a commit without having to include every change in the working directory. This lets you create highly focused commits, even if you've made a lot of local changes.
git status # View the state of the repo git add# Stage a file git commit # Commit a file
Remember that since these commands create local commits, John can repeat this process as many times as he wants without worrying about what's going on in the central repository. This can be very useful for large features that need to be broken down into simpler, more atomic chunks.
Once new changes have been made to the local repository, these changes will need to be pushed to share them with the other developers on the project.
git push origin master
This command will push the newly committed changes to the central repository. When pushing changes to the central repository, it's possible that updates from another developer were previously pushed that contain code which conflicts with the intended push updates. Git will output a message indicating this conflict. In this situation, git pull will need to be executed first. This conflict scenario will be expanded on in the following section.
The central repository represents the official project, so its commit history should be treated as sacred and immutable. If a developer's local commits diverge from the central repository, Git will refuse to push their changes because doing so would overwrite official commits.
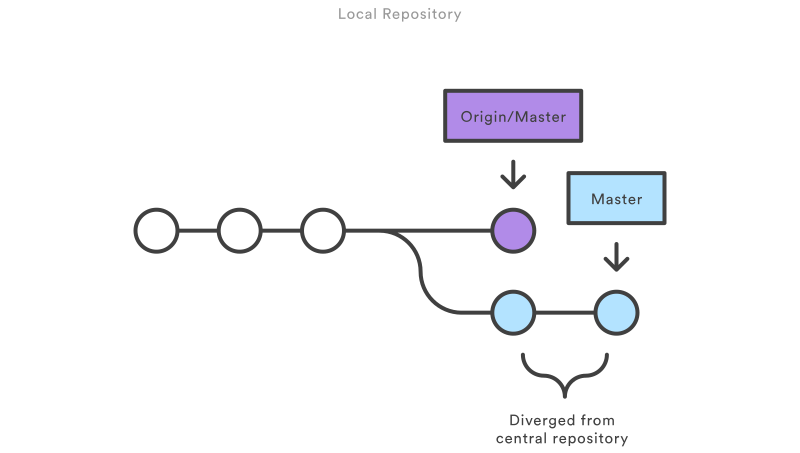
Before the developer can publish their feature, they need to fetch the updated central commits and rebase their changes on top of them. This is like saying, "I want to add my changes to what everyone else has already done." The result is a perfectly linear history, just like in traditional SVN workflows.
If local changes directly conflict with upstream commits, Git will pause the rebasing process and give you a chance to manually resolve the conflicts. The nice thing is that Git uses the same git status and git add commands for both generating commits and resolving merge conflicts. This makes it easy for new developers to manage their own merges. Plus, if they get themselves into trouble, Git makes it very easy to abort the entire rebase and try again (or go find help).
Let's step through a general example of how a typical small team would collaborate using this workflow. We'll see how two developers, John and Mary, can work on separate features and share their contributions through a centralized repository.
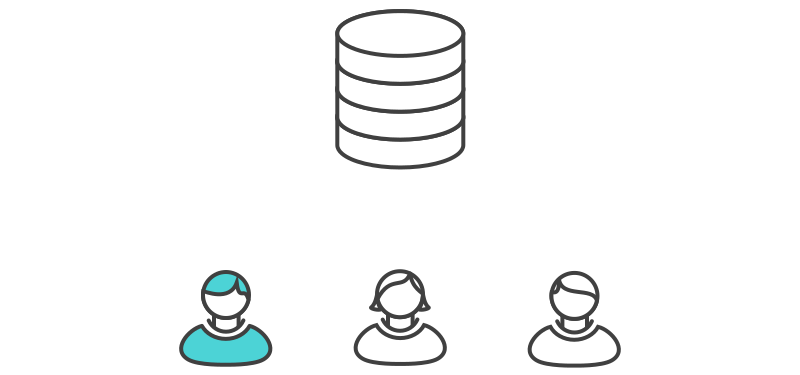
In his local repository, John can develop features using the standard Git commit process: edit, stage, and commit.
Remember that since these commands create local commits, John can repeat this process as many times as he wants without worrying about what's going on in the central repository.
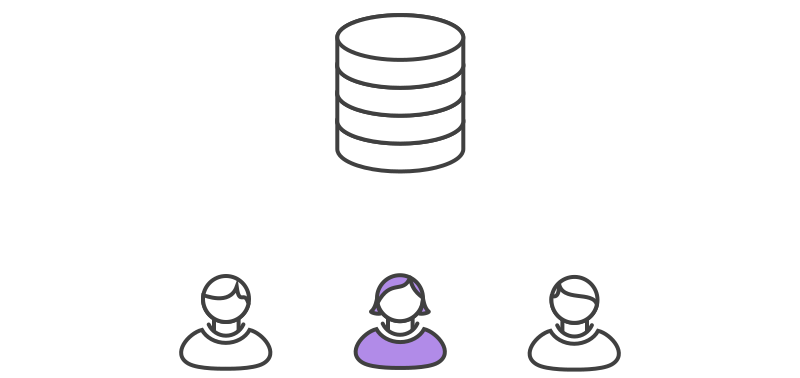
Meanwhile, Mary is working on her own feature in her own local repository using the same edit/stage/commit process. Like John, she doesn't care what's going on in the central repository, and she really doesn't care what John is doing in his local repository, since all local repositories are private.
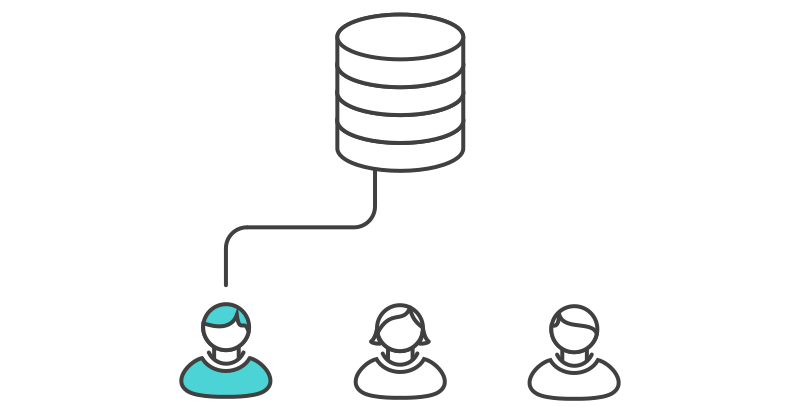
Once John finishes his feature, he should publish his local commits to the central repository so that other team members can access it. He can do this with the git push command:
git push origin master
Remember that origin is the remote connection to the central repository that Git created when John cloned it. The master argument tells Git to try to make the origin's master branch look like his local master branch. Since the central repository hasn't been updated since John cloned it, this won't result in any conflicts and the push will work as expected.
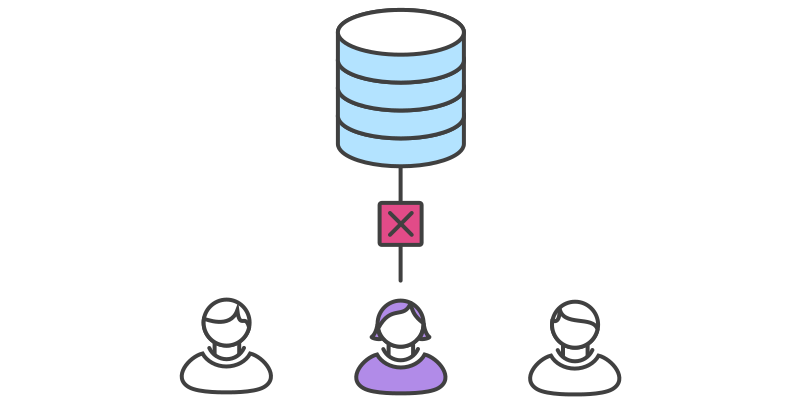
Let's see what happens if Mary tries to push her feature after John has successfully published his changes to the central repository. She can use the exact same push command:
git push origin master
But, since her local history has diverged from the central repository, Git will reject the request with a rather verbose error message:
error: failed to push some refs to '/path/to/repo.git'
hint: Updates were rejected because the tip of your current branch is behind
hint: its remote counterpart. Merge the remote changes (e.g. 'git pull')
hint: before pushing again.
hint: See the 'Note about fast-forwards' in 'git push --help' for details.
This prevents Mary from overwriting official commits. She needs to pull John's updates into her repository, integrate them with her local changes, and then try again.
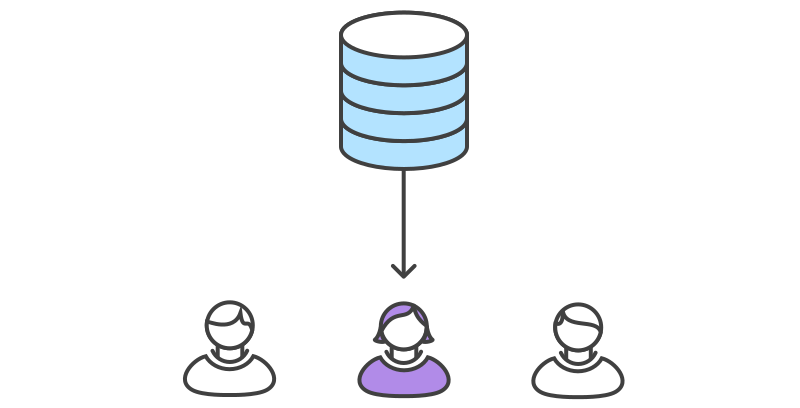
Mary can use git pull to incorporate the upstream changes into her repository. This command is kind of like svn update - it pulls the entire upstream commit history into Mary's local repository and tries to integrate it with her local commits:
git pull --rebase origin master
The --rebase option tells Git to move all of Mary's commits to the tip of the master branch after synchronizing it with the changes from the central repository, as shown below:
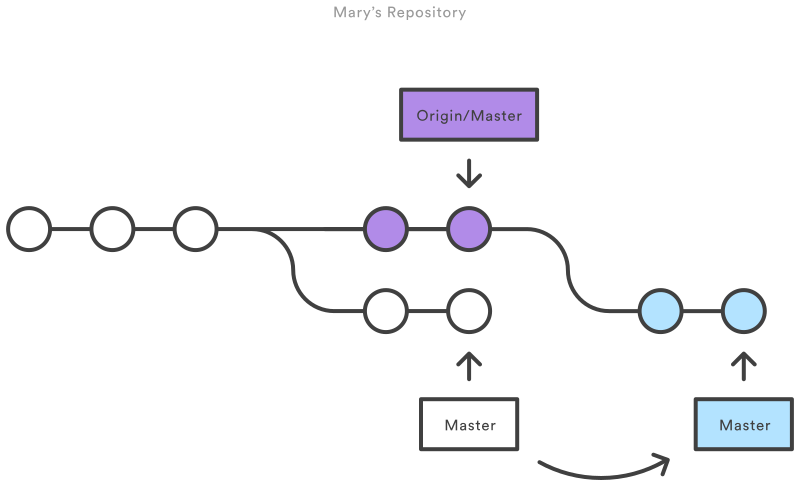
The pull would still work if you forgot this option, but you would wind up with a superfluous "merge commit" every time someone needed to synchronize with the central repository. For this workflow, it's always better to rebase instead of generating a merge commit.
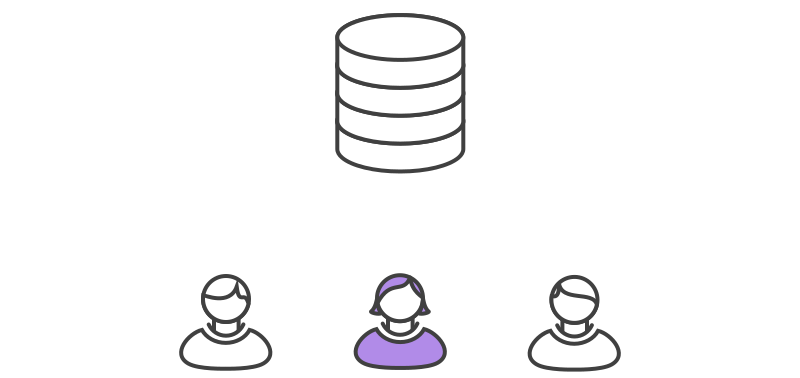
Rebasing works by transferring each local commit to the updated master branch one at a time. This means that you catch merge conflicts on a commit-by-commit basis rather than resolving them all in one massive merge commit. This keeps your commits as focused as possible and makes for a clean project history. In turn, this makes it much easier to figure out where bugs were introduced and, if necessary, to roll back changes with minimal impact on the project.
If Mary and John are working on unrelated features, it's unlikely that the rebasing process will generate conflicts. But if it does, Git will pause the rebase at the current commit and output the following message, along with some relevant instructions:
CONFLICT (content): Merge conflict in
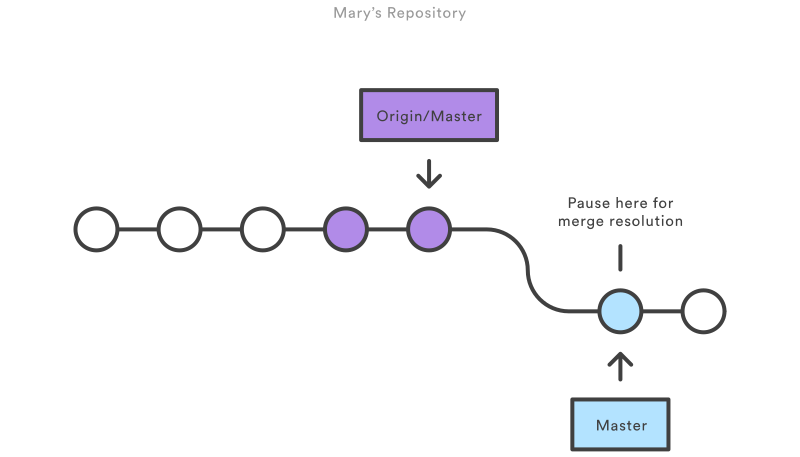
The great thing about Git is that anyone can resolve their own merge conflicts. In our example, Mary would simply run git status to see where the problem is. Conflicting files will appear in the Unmerged paths section:
# Unmerged paths: # (use "git reset HEAD..." to unstage) # (use "git add/rm ..." as appropriate to mark resolution) # # both modified:
Then she'll edit the file(s) to her liking. Once she's happy with the result, she can stage the file(s) in the usual fashion and let git rebase do the rest:
git addgit rebase --continue
And that's all there is to it. Git moves on to the next commit and repeats the process for any other commits that generate conflicts.
If you get to this point and realize you have no idea what's going on, don't panic. Just execute the following command and you'll be right back to where you started:
git rebase --abort
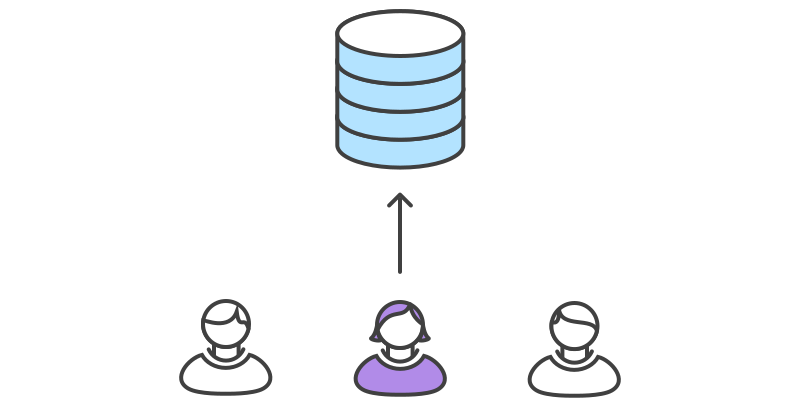
After she's done synchronizing with the central repository, Mary will be able to publish her changes successfully:
git push origin master
As you can see, it's possible to replicate a traditional Subversion development environment using only a handful of Git commands. This is great for transitioning teams off of SVN, but it doesn't leverage the distributed nature of Git.
The Centralized Workflow is great for small teams. The conflict-resolution process described above can form a bottleneck as your team scales in size. If your team is comfortable with the Centralized Workflow but wants to streamline its collaboration efforts, it's definitely worth exploring the benefits of the Feature Branch Workflow. By dedicating an isolated branch to each feature, it's possible to initiate in-depth discussions around new additions before integrating them into the official project.
The Centralized Workflow is essentially a building block for other Git workflows. Most popular Git workflows will have some sort of centralized repo that individual developers will push and pull from. Below, we'll briefly discuss some other popular Git workflows. These extended workflows offer more specialized patterns for managing branches for feature development, hotfixes, and eventual release.
The Feature Branch Workflow is a logical extension of the Centralized Workflow. The core idea behind the Feature Branch Workflow is that all feature development should take place in a dedicated branch instead of the master branch. This encapsulation makes it easy for multiple developers to work on a particular feature without disturbing the main codebase. It also means the master branch should never contain broken code, which is a huge advantage for continuous integration environments.
The Gitflow Workflow was first published in 2010 in a respected blog post by Vincent Driessen at nvie. The Gitflow Workflow defines a strict branching model designed around the project release. This workflow doesn't add any new concepts or commands beyond what's required for the Feature Branch Workflow. Instead, it assigns very specific roles to different branches and defines how and when they should interact.
The Forking Workflow is fundamentally different from the other workflows described in this guide. Instead of using a single server-side repository to act as the "central" codebase, it gives every developer a server-side repository. This means that each contributor has not one, but two Git repositories: a private local one and a public server-side one.
There's no one-size-fits-all Git workflow. As discussed earlier, it's important to develop a Git workflow that will boost your team's productivity. In addition to team culture, a workflow should also complement business culture. Git features like branches and tags should complement your business's release schedule. If your team uses project management software to track tasks, you may want to use branches that correspond to the tasks in progress. In addition, here are some guidelines to consider when picking a workflow:
The longer a branch lives separated from the production branch, the higher the risk of merge conflicts and deployment challenges. Short-lived branches promote cleaner merges and deploys.
It's important to have a workflow that helps proactively prevent merges that will have to be reverted. A workflow that tests a branch before allowing it to be merged into the master branch is one example of this. However, accidents do happen. That said, it's beneficial to have a workflow that allows for easy reverts that won't disrupt the flow of the rest of the team.
A workflow should complement your business's software development lifecycle. If you plan to release multiple times a day, you'll want to keep your master branch stable. If your release schedule is less frequent, you may want to consider using Git tags to tag a branch to a version.
The core idea behind the Feature Branch Workflow is that all feature development should take place in a dedicated branch instead of the master branch. This encapsulation makes it easy for multiple developers to work on a particular feature without disturbing the main codebase. It also means the master branch will never contain broken code, which is a huge advantage for continuous integration environments.
Encapsulating feature development also makes it possible to leverage pull requests, which are a way to initiate discussions around a branch. They give other developers the opportunity to sign off on a feature before it gets integrated into the official project. Or, if you get stuck in the middle of a feature, you can open a pull request asking for suggestions from your colleagues. The point is, pull requests make it incredibly easy for your team to comment on each other's work.
The Git Feature Branch Workflow is a composable workflow that can be leveraged by other high-level Git workflows. We discussed other Git workflows on the Git workflow overview page. The Git Feature Branch Workflow is focused on the branching model, meaning that it is a guiding framework for managing and creating branches. Other workflows are more repo-focused. The Git Feature Branch Workflow can be incorporated into other workflows. The Gitflow and Git Forking Workflows traditionally use the Git Feature Branch Workflow with respect to their branching models.
The Feature Branch Workflow assumes a central repository, and master represents the official project history. Instead of committing directly to their local master branch, developers create a new branch every time they start work on a new feature. Feature branches should have descriptive names, like animated-menu-items or issue-#1061. The idea is to give a clear, highly focused purpose to each branch. Git makes no technical distinction between the master branch and feature branches, so developers can edit, stage, and commit changes to a feature branch.
In addition, feature branches can (and should) be pushed to the central repository. This makes it possible to share a feature with other developers without touching any official code. Since master is the only "special" branch, storing several feature branches on the central repository doesn't pose any problems. Of course, this is also a convenient way to back up everybody's local commits. The following is an overview of the life cycle of a feature branch.
All feature branches are created off the latest state of a project's code. This guide assumes this is maintained and updated in the master branch.
git checkout master
git fetch origin
git reset --hard origin/master
This switches the repo to the master branch, pulls the latest commits, and resets the repo's local copy of master to match the latest version.
Use a separate branch for each feature or issue you work on. After creating a branch, check it out locally so that any changes you make will be on that branch.
git checkout -b new-feature
This checks out a branch called new-feature based on master, and the -b flag tells Git to create the branch if it doesn't already exist.
On this branch, edit, stage, and commit changes in the usual fashion, building up the feature with as many commits as necessary. Work on the feature and make commits like you would any time you use Git. When ready, push your commits, updating the feature branch on Bitbucket.
git status git addgit commit
It's a good idea to push the feature branch up to the central repository. This serves as a convenient backup; when collaborating with other developers, it gives them access to view commits to the new branch.
git push -u origin new-feature
This command pushes new-feature to the central repository (origin), and the -u flag adds it as a remote tracking branch. After setting up the tracking branch, git push can be invoked without any parameters to automatically push the new-feature branch to the central repository. To get feedback on the new feature branch, create a pull request in a repository management solution like Bitbucket Cloud or Bitbucket Server. From there, you can add reviewers and make sure everything is good to go before merging.
Now teammates comment and approve the pushed commits. Resolve their comments locally, commit, and push the suggested changes to Bitbucket. Your updates appear in the pull request.
Before you merge, you may have to resolve merge conflicts if others have made changes to the repo. When your pull request is approved and conflict-free, you can add your code to the master branch. Merge from the pull request in Bitbucket.
Aside from isolating feature development, branches make it possible to discuss changes via pull requests. Once someone completes a feature, they don’t immediately merge it into master. Instead, they push the feature branch to the central server and file a pull request asking to merge their additions into master. This gives other developers an opportunity to review the changes before they become a part of the main codebase.
Code review is a major benefit of pull requests, but they're actually designed to be a way to talk about code in general. You can think of pull requests as a discussion dedicated to a particular branch. This means that they can also be used much earlier in the development process. For example, if a developer needs help with a particular feature, all they have to do is file a pull request. Interested parties will be notified automatically, and they'll be able to see the question right next to the relevant commits.
Once a pull request has been accepted, the actual act of publishing a feature is much the same as in the Centralized Workflow. First, you need to make sure your local master is synchronized with the upstream master. Then you merge the feature branch into master and push the updated master back to the central repository.
Pull requests can be facilitated by product repository management solutions like Bitbucket Cloud or Bitbucket Server. Take a look at the Bitbucket Server pull requests documentation for an example.
The following is an example of the type of scenario in which a feature branch workflow is used. The scenario is that of a team doing a code review around a new feature request. This is one of many examples of how this model can be used.

Before she starts developing a feature, Mary needs an isolated branch to work on. She can request a new branch with the following command:
git checkout -b marys-feature master
This checks out a branch called marys-feature based on master, and the -b flag tells Git to create the branch if it doesn't already exist. On this branch, Mary edits, stages, and commits changes in the usual fashion, building up her feature with as many commits as necessary:
git status git addgit commit
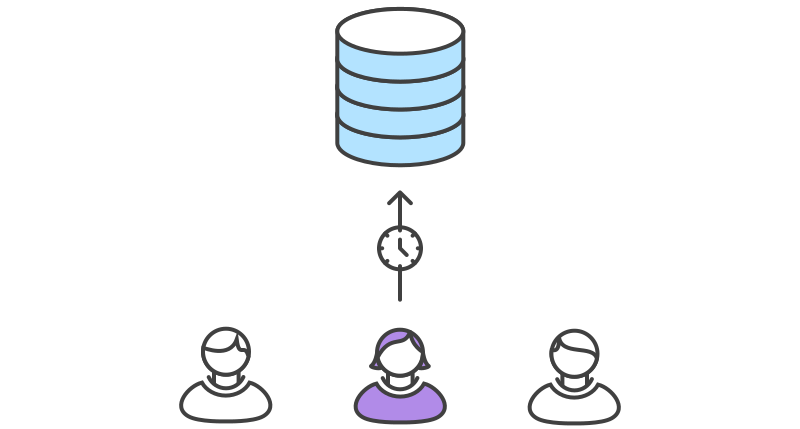
Mary adds a few commits to her feature over the course of the morning. Before she leaves for lunch, it's a good idea to push her feature branch up to the central repository. This serves as a convenient backup, but if Mary had been collaborating with other developers, this would also give them access to her initial commits.
git push -u origin marys-feature
This command pushes marys-feature to the central repository (origin), and the -u flag adds it as a remote tracking branch. After setting up the tracking branch, Mary can call git push without any parameters to push her feature.
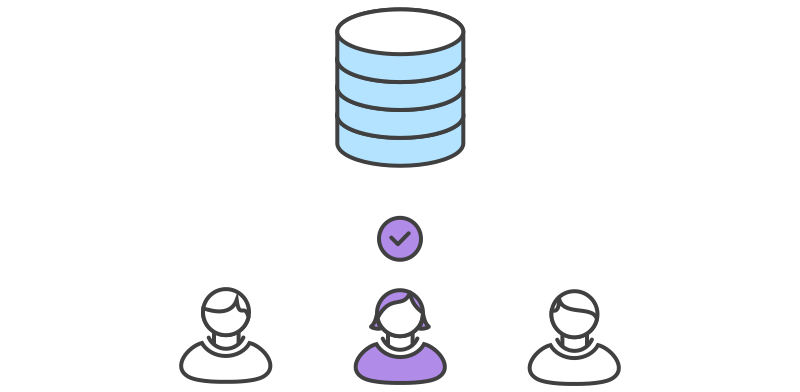
When Mary gets back from lunch, she completes her feature. Before merging it into master, she needs to file a pull request letting the rest of the team know she's done. But first, she should make sure the central repository has her most recent commits:
git push
Then she files a pull request in her Git GUI asking to merge marys-feature into master, and team members will be notified automatically. The great thing about pull requests is that they show comments right next to their related commits, so it's easy to ask questions about specific changesets.
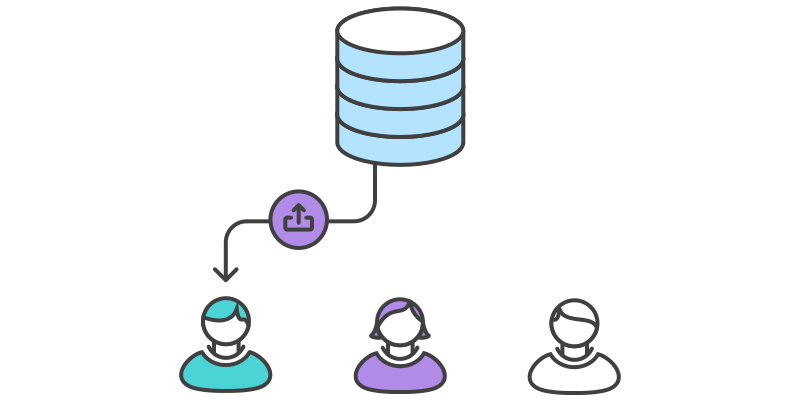
Bill receives the pull request and takes a look at marys-feature. He decides he wants to make a few changes before integrating it into the official project, and he and Mary have some back-and-forth via the pull request.
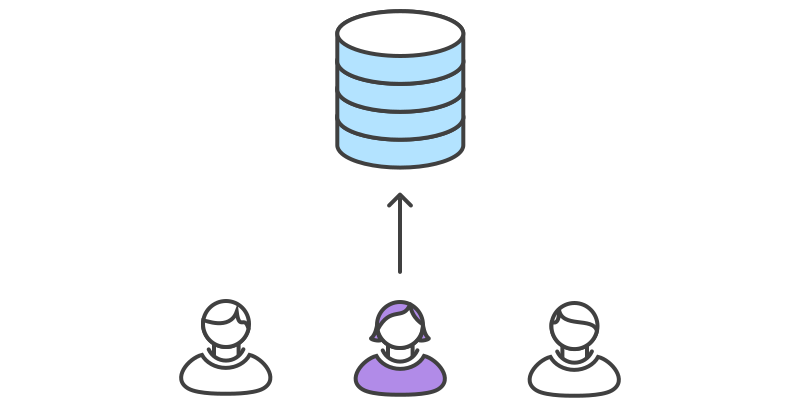
To make the changes, Mary uses the exact same process as she did to create the first iteration of her feature. She edits, stages, commits, and pushes updates to the central repository. All her activity shows up in the pull request, and Bill can still make comments along the way.
If he wanted to, Bill could pull marys-feature into his local repository and work on it on his own. Any commits he added would also show up in the pull request.

Once Bill is ready to accept the pull request, someone needs to merge the feature into the stable project (this can be done by either Bill or Mary):
git checkout master
git pull
git pull origin marys-feature
git push
This process often results in a merge commit. Some developers like this because it's like a symbolic joining of the feature with the rest of the code base. But, if you're partial to a linear history, it's possible to rebase the feature onto the tip of master before performing the merge, resulting in a fast-forward merge.
Some GUIs will automate the pull request acceptance process by running all these commands with just the click of an "Accept" button. If yours doesn't, it should at least be able to automatically close the pull request when the feature branch gets merged into master.
Meanwhile, John is doing the exact same thing
While Mary and Bill are working on marys-feature and discussing it in her pull request, John is doing the exact same thing with his own feature branch. By isolating features into separate branches, everybody can work independently, yet it's still trivial to share changes with other developers when necessary.
In this document, we discussed the Git Feature Branch Workflow. This workflow helps organize and track branches that are focused on business domain feature sets. Other Git workflows like the Git Forking Workflow and the Gitflow Workflow are repo-focused and can use the Git Feature Branch Workflow to manage their branching models. This document demonstrated a high-level code example and a fictional example of implementing the Git Feature Branch Workflow. Some key associations to make with the Feature Branch Workflow are:
Utilizing git rebase during the review and merge stages of a feature branch will create a cohesive Git merge history. A feature branching model is a great tool to promote collaboration within a team environment.
The Gitflow Workflow is a Git workflow design that was first published and made popular by Vincent Driessen at nvie. The Gitflow Workflow defines a strict branching model designed around the project release. This provides a robust framework for managing larger projects.
Gitflow is ideally suited for projects that have a scheduled release cycle. This workflow doesn't add any new concepts or commands beyond what's required for the Feature Branch Workflow. Instead, it assigns very specific roles to different branches and defines how and when they should interact. In addition to feature branches, it uses individual branches for preparing, maintaining, and recording releases. Of course, you also get to leverage all the benefits of the Feature Branch Workflow: pull requests, isolated experiments, and more efficient collaboration.
Gitflow is really just an abstract idea of a Git workflow. This means it dictates what kind of branches to set up and how to merge them together. We will touch on the purposes of the branches below. The git-flow toolset is an actual command-line tool that has an installation process. The installation process for git-flow is straightforward. Packages for git-flow are available on multiple operating systems. On OSX systems, you can execute brew install git-flow. On Windows, you will need to download and install git-flow. After installing git-flow, you can use it in your project by executing git flow init. Git-flow is a wrapper around Git. The git flow init command is an extension of the default git init command and doesn't change anything in your repository other than creating branches for you.
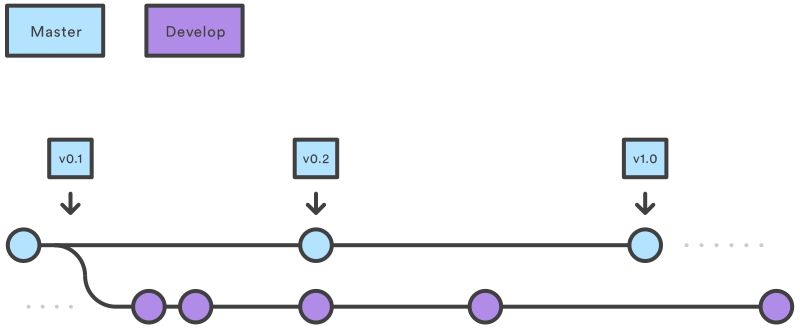
Instead of a single master branch, this workflow uses two branches to record the history of the project. The master branch stores the official release history, and the develop branch serves as an integration branch for features. It's also convenient to tag all commits in the master branch with a version number.
The first step is to complement the default master with a develop branch. A simple way to do this is for one developer to create an empty develop branch locally and push it to the server:
git branch develop
git push -u origin develop
This branch will contain the complete history of the project, whereas master will contain an abridged version. Other developers should now clone the central repository and create a tracking branch for develop.
When using the git-flow extension library, executing git flow init on an existing repo will create the develop branch:
$ git flow init
Initialized empty Git repository in ~/project/.git/
No branches exist yet. Base branches must be created now.
Branch name for production releases: [master]
Branch name for "next release" development: [develop]

How to name your supporting branch prefixes?
Feature branches? [feature/]
Release branches? [release/]
Hotfix branches? [hotfix/]
Support branches? [support/]
Version tag prefix? []

$ git branch
* develop
 master
Each new feature should reside in its own branch, which can be pushed to the central repository for backup/collaboration. But, instead of branching off of master, feature branches use develop as their parent branch. When a feature is complete, it gets merged back into develop. Features should never interact directly with master.
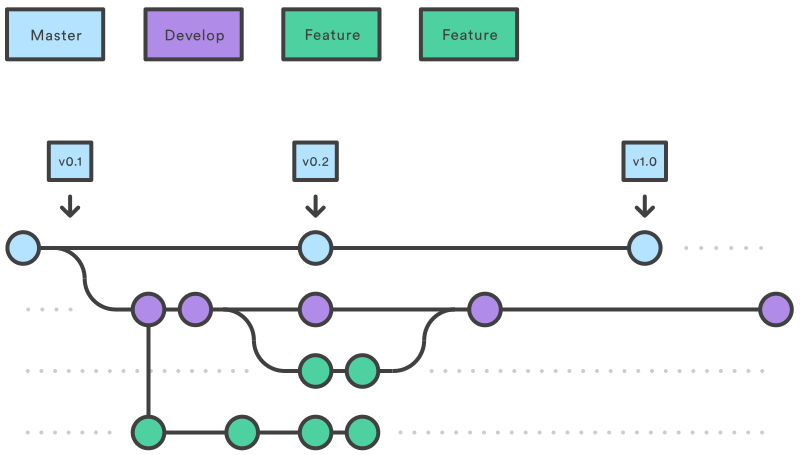
Note that feature branches combined with the develop branch is, for all intents and purposes, the Feature Branch Workflow. But the Gitflow Workflow doesn't stop there.
Feature branches are generally created off the latest develop branch.
Without the git-flow extensions:
git checkout develop
git checkout -b feature_branch
When using the git-flow extension:
git flow feature start feature_branch
Continue your work and use Git like you normally would.
When you're done with the development work on the feature, the next step is to merge the feature_branch into develop.
Without the git-flow extensions:
git checkout develop
git merge feature_branch
Using the git-flow extensions:
git flow feature finish feature_branch
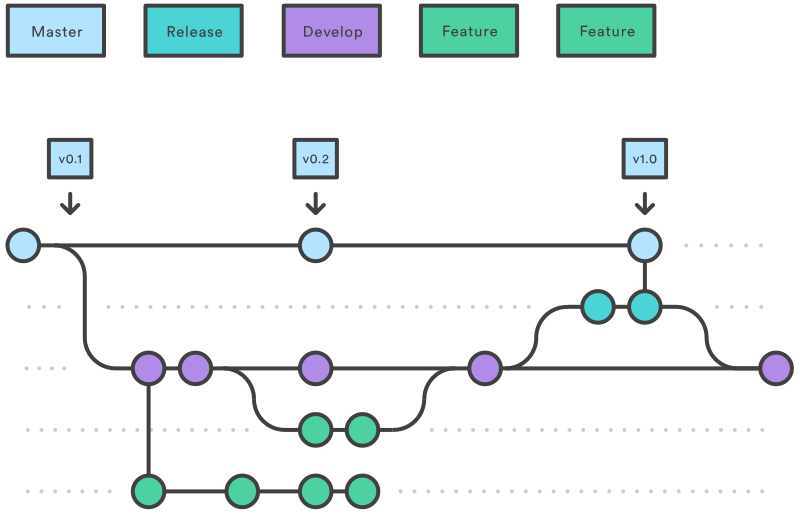
Once develop has acquired enough features for a release (or a predetermined release date is approaching), you fork a release branch off of develop. Creating this branch starts the next release cycle, so no new features can be added after this point - only bug fixes, documentation generation, and other release-oriented tasks should go in this branch. Once it's ready to ship, the release branch gets merged into master and tagged with a version number. In addition, it should be merged back into develop, which may have progressed since the release was initiated.
Using a dedicated branch to prepare releases makes it possible for one team to polish the current release while another team continues working on features for the next release. It also creates well-defined phases of development (e.g., it's easy to say, "This week we're preparing for version 4.0," and to actually see it in the structure of the repository).
Making release branches is another straightforward branching operation. Like feature branches, release branches are based on the develop branch. A new release branch can be created using the following methods.
Without the git-flow extensions:
git checkout develop
git checkout -b release/0.1.0
When using the git-flow extensions:
$ git flow release start 0.1.0
Switched to a new branch 'release/0.1.0'
Once the release is ready to ship, it will get merged into master and develop, and then the release branch will be deleted. It's important to merge back into develop because critical updates may have been added to the release branch, and they need to be accessible to new features. If your organization stresses code review, this would be an ideal place for a pull request.
To finish a release branch, use the following methods:
Without the git-flow extensions:
git checkout master
git merge release/0.1.0
Or with the git-flow extension:
git flow release finish '0.1.0'
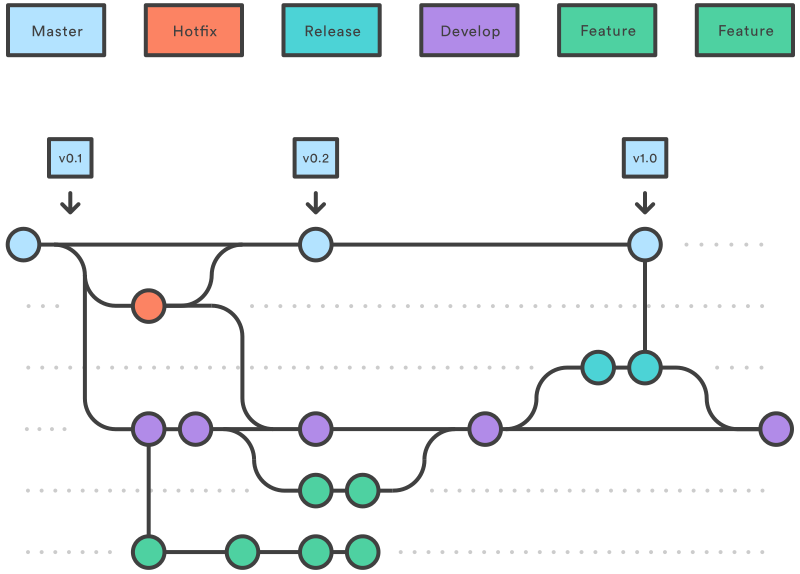
Maintenance or "hotfix" branches are used to quickly patch production releases. Hotfix branches are a lot like release branches and feature branches except they're based on master instead of develop. This is the only branch that should fork directly off of master. As soon as the fix is complete, it should be merged into both master and develop (or the current release branch), and master should be tagged with an updated version number.
Having a dedicated line of development for bug fixes lets your team address issues without interrupting the rest of the workflow or waiting for the next release cycle. You can think of maintenance branches as ad hoc release branches that work directly with master. A hotfix branch can be created using the following methods:
Without the git-flow extensions:
git checkout master
git checkout -b hotfix_branch
When using the git-flow extensions:
$ git flow hotfix start hotfix_branch
Similar to finishing a release branch, a hotfix branch gets merged into both master and develop.
git checkout master
git merge hotfix_branch
git checkout develop
git merge hotfix_branch
git branch -D hotfix_branch
$ git flow hotfix finish hotfix_branch
A complete example demonstrating a Feature Branch flow is as follows. Assuming we have a repo set up with a master branch.
git checkout master
git checkout -b develop
git checkout -b feature_branch
# work happens on feature branch
git checkout develop
git merge feature_branch
git checkout master
git merge develop
git branch -d feature_branch
In addition to the feature and release flow, a hotfix example is as follows:
git checkout master
git checkout -b hotfix_branch
# work is done commits are added to the hotfix_branch
git checkout develop
git merge hotfix_branch
git checkout master
git merge hotfix_branch
Here we discussed the Gitflow Workflow. Gitflow is one of many styles of Git workflows you and your team can utilize.
Some key takeaways to know about Gitflow are:
The overall flow of Gitflow is:
The Gitflow Workflow defines a strict branching model designed around the project release. This provides a robust framework for managing larger projects. Gitflow is ideally suited for projects that have a scheduled release cycle.
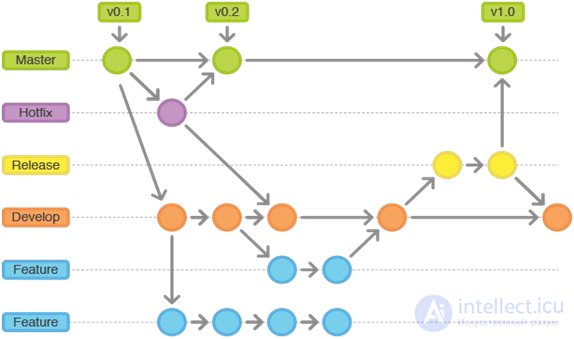
Some key takeaways to know about Gitflow are:
The overall flow of Gitflow is:
Gitflow with a pull request:
Pull requests let you tell others about changes you've added to a branch in a repository. Once a pull request is opened, you can discuss and review the potential changes with collaborators and add follow-up commits before your changes are merged into the base branch.
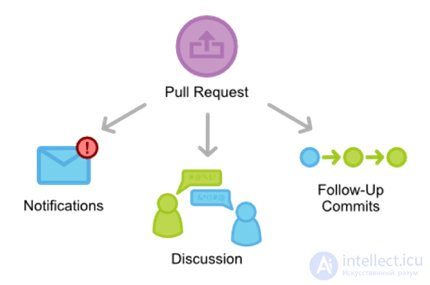
How does a pull request work with Gitflow?
Adding pull requests to the Gitflow Workflow gives developers a convenient place to discuss a release branch or a maintenance branch while they work on it.
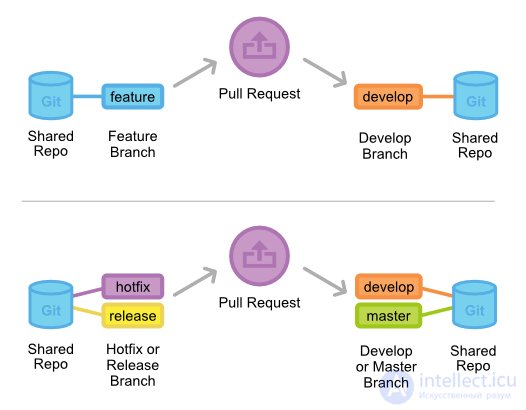
A developer simply files a pull request when a feature, release, or hotfix branch needs to be reviewed, and the rest of the team is notified.
Features are generally merged into the develop branch, while release and hotfix branches are merged into both develop and master. Pull requests can be used to formally manage all of these merges.
The overall flow of Gitflow with a Pull Request:
In this document, we discussed Git workflows. We took an in-depth look at the Centralized Workflow with practical examples. Extending from the Centralized Workflow, we discussed additional specialized workflows. Some key takeaways from this document are:
To read about the next Git workflow, check out our comprehensive walkthrough of the Feature Branch Workflow.
The Forking Workflow is fundamentally different from other popular Git workflows. Instead of using a single server-side repository to act as the "central" codebase, it gives every developer their own server-side repository. This means that each contributor has not one, but two Git repositories: a private local one and a public server-side one. The Forking Workflow is most often seen in public open source projects.
The main advantage of the Forking Workflow is that contributions can be integrated without the need for everybody to push to a single central repository. Developers push to their own server-side repositories, and only the project maintainer can push to the official repository. This allows the maintainer to accept commits from any developer without giving them write access to the official codebase.
The Forking Workflow typically follows a branching model based on the Gitflow Workflow. This means that complete feature branches will be purposed for merging into the original project maintainer's repository. The result is a distributed workflow that provides a flexible way for large, organic teams (including untrusted third parties) to collaborate securely. This also makes it an ideal workflow for open source projects.
As in the other Git workflows, the Forking Workflow begins with an official public repository stored on a server. But when a new developer wants to start working on the project, they do not directly clone the official repository.
Instead, they fork the official repository to create a copy of it on the server. This new copy serves as their personal public repository - no other developers can push to it, but they can pull changes from it (we'll see why this is important in a moment). After they have created their server-side copy, the developer performs a git clone to get a copy of it onto their local machine. This serves as their private development environment, just like in the other workflows.
When they're ready to publish a local commit, they push the commit to their own public repository - not the official one. Then, they file a pull request with the main repository, which lets the project maintainer know that an update is ready to be integrated. The pull request also serves as a convenient discussion thread if there are issues with the contributed code. The following is a step-by-step example of this workflow.
To integrate the feature into the official codebase, the maintainer pulls the contributor's changes into their local repository, checks to make sure it doesn't break the project, merges it into their local master branch, and then pushes the master branch to the official repository on the server. The contribution is now part of the project, and other developers should pull from the official repository to synchronize their local repositories.
It's important to understand that the notion of an "official" repository in the Forking Workflow is merely a convention. In fact, the only thing that makes the official repository so official is that it's the public repository of the project maintainer.
It's important to note that "forked" repositories and "forking" are not special operations. Forked repositories are created using the standard git clone command. Forked repositories are generally "server-side clones" and usually managed and hosted by a third-party Git service like Bitbucket. There is no unique Git command for creating forked repositories. A clone operation is essentially a copy of a repository and its history.
All these personal public repositories are really just a convenient way to share branches with other developers. Everybody should still be using branches to isolate individual features, just like in the Feature Branch Workflow and the Gitflow Workflow. The only difference is how those branches get shared. In the Forking Workflow, they're pulled into another developer's local repository, while in the Feature Branch and Gitflow Workflows they're pushed to the official repository.
All new developers to a Forking Workflow project need to fork the official repository. As discussed above, forking is just a standard git clone operation. This can be done by SSHing into the server and running git clone to copy it to another location on the server. Popular Git hosting services like Bitbucket offer repo forking features that automate this step.
Next, each developer needs to clone their own public forked repository. They can do this with the familiar git clone command.
Assuming the use of Bitbucket to host these repositories, developers on the project should have their own Bitbucket account and clone their forked copy of the repository with:
git clone https://user@bitbucket.org/user/repo.git
Whereas the other Git workflows use a single origin remote that points to the central repository, the Forking Workflow requires two remotes - one for the official repository, and one for the developer's personal server-side repository. While you can name these remotes anything you want, a common convention is to use origin as the remote for your forked repository (this will be created automatically when you run git clone) and upstream for the official repository.
git remote add upstream https://bitbucket.org/maintainer/repo
You'll need to create the upstream remote using the command above. This will allow you to easily keep your local repository up to date as the official project progresses. Note that if your upstream repository has authentication enabled (i.e., it's not open source), you'll need to supply a username, like so:
git remote add upstream https://user@bitbucket.org/maintainer/repo.git
This requires users to supply a valid password before cloning or pulling from the official codebase.
In the developer's local copy of the forked repository, they can edit code, commit changes, and create branches just like in the other Git workflows:
git checkout -b some-feature
# Edit some code
git commit -a -m "Add first draft of some feature"
All their changes will be entirely private until they push them to their public repository. And, if the official project has moved forward, they can access new commits with git pull:
git pull upstream master
Since developers should be working in a dedicated feature branch, this generally results in a fast-forward merge.
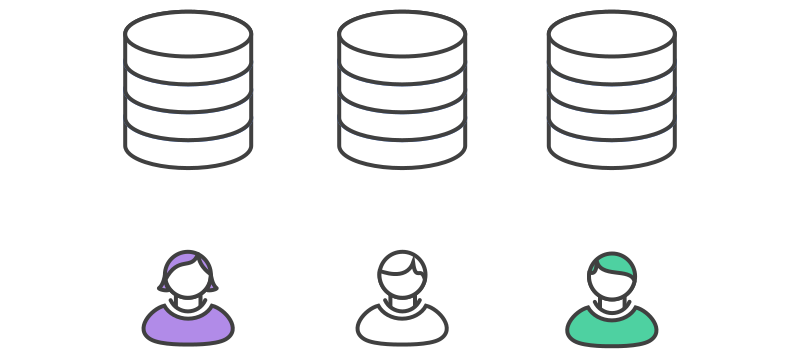
Once a developer is ready to share their new feature, they need to do two things. First, they have to make their contribution available to other developers by pushing it to their public repository. Their origin remote should already be set up, so all they have to do is the following:
git push origin feature-branch
This differs from the other workflows in that the origin remote points to the developer's personal server-side repository, not the main codebase.
Second, they need to notify the project maintainer that they want to merge their feature into the official codebase. Bitbucket provides a "pull request" button that leads to a form where you specify which branch you want to merge into the official repository. Typically, you'll want to integrate your feature branch into the upstream remote's master branch.
To recap, the Forking Workflow is commonly used in public open source projects. Forking is a git clone operation performed on a server-side copy of a project's repository. The Forking Workflow is often used in conjunction with a Git hosting service like Bitbucket. A high-level example of the Forking Workflow is:
The Forking Workflow helps a project maintainer open up the repository to contributions from any developer without having to manually manage authorization settings for each individual contributor. This gives the maintainer more of a "pull"-style workflow. Most often used in open source projects, the Forking Workflow can also be applied to private business workflows to give more authoritative control over what's merged into a release. This can be useful in teams that have deployment managers or strict release cycles.
In this document, we discussed Git workflows. We took an in-depth look at the Centralized Workflow with practical examples. Extending from the Centralized Workflow, we discussed additional specialized workflows. Some key takeaways from this document are:
продолжение следует...
Часть 1 Git Use Cases in the Software Development Lifecycle

Comments