Lecture
After styling the sidebar, we will enter the final stretch of our course. Already? Yes, but do not worry. I will continue to publish WordPress tutorials. After all, there is always something new that can be learned. And the course itself can be expanded and improved, which I will do.
Today, you do not need anything but a style file — open style.css in your editor.
Enter these lines under. Sidebar {} :
one 2 3 four five | .sidebar ul{ list-style-type : none ; margin : 0 ; padding : 0 10px 0 10px ; } |
Thus, we have given the tag style of the basic unlisted <ul> sidebar list, and now all nested UL lists will be decorated with the same style. In this case, it is: no bullet, zero outer margins and 10-pixel padding.
For example:
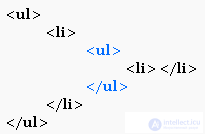
The style of the first UL list will be assigned to the second order list (nested list). If you assign a border to the first list, the second one will also have a border (border).
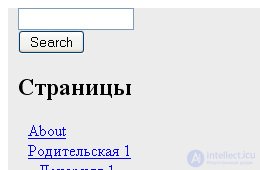
Save and refresh your browser. Now list items are no longer bulleted.
Pay attention to how you want to add padding at the top and bottom in step 2.
Step 2
Enter the following code under. Sidebar ul {} :
one 2 3 | .sidebar ul li{ padding : 10px 0 10px 0 ; } |
This is what happened with the padding:
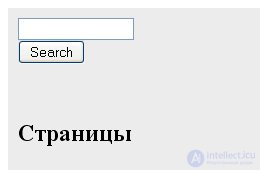
Why we didn't add the 10-px padding to the UL list for the first time. You need to separate one list item from another. Before we added padding to. Sidebar ul li {} , there was no gap between the search field and the calendar, nor was it between the Calendar and the Pages . So, these 10-pixel paddings above and below .sidebar ul li {} are needed to break down blocks. If the UL-tag had padding for all four sides, instead of just left and right (0 10px 0 10px), you would end up with a 20-pad padding on the top or a 20-pad padding from the bottom, if you tried to delimit the elements of the list after applying padding to UL. Do you understand what I am talking about?
If not, it's okay, just add padding for .sidebar ul {} above and below and see for yourself .
Enter this code under. Sidebar ul li {} :
one 2 3 four | .sidebar ul li h 2 { font-family : Georgia, Sans-serif ; font-size : 14px ; } |
Do not forget that the styling of the subtitle under .post {} does not matter, because you have marked the subtitles only under .post {}. Now, you add style to the unaffected subheadings in the sidebar. Here is the result:
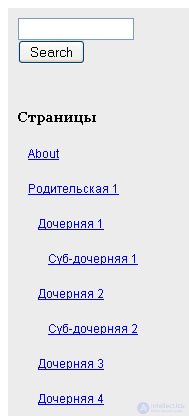
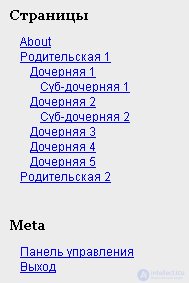
This is what my list of Links pages look like. Probably you have only one link, About yourself. I added a few links and nested levels of pages to my local version of WordPress to see how the links of the lower levels would look. Notice the unnecessary extra padding below, I highlighted it with red. This is an illustration of the style assignment mechanism. 10 pixels were added and it turned out 20.
Because you added padding to. Sidebar ul li {} , the elements of the list of lower levels got the same padding. To fix this, see step 4 .
Add these lines under. Sidebar ul li h2 {} :
one 2 3 | .sidebar ul ul li{ padding : 0 ; } |
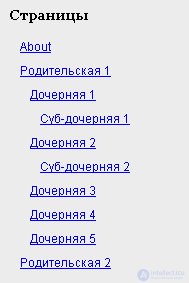
The ordered UL lists in. Sidebar ul ul li {} determine that the target is the elements of the list of lower levels. Let me remind you that when all parameters are equal to 0, you do not need to put the suffix px.
Here is the result:
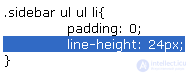
The rows are too close together, so let's set the rows to 24px height.
Add line-height: 24px; to .side ul ul li {} .
That's all for today. The lesson is over :)

Comments