Lecture
CMS Made Simple (abbreviated as CMSMS ) is a site management system with which you can create websites, design their design and extend functionality. The system can be expanded with the help of modules and tags and is suitable both for managing small sites and for setting up entire portals.
The template system in the system is built on HTML and CSS. The system comes standard templates and styles.
CMSMS is written in PHP and is free software distributed under the GPL license. Smarty is used to support the template engine [1]
![]()
How to create a website using CMS Made Simple? There are several concepts that are central to understanding this system. First, you use the templates that contain the HTML code for your pages. Each template has one or more CSS styles attached. And to each page of your site in turn one of the templates is applied.
It is not difficult. And in principle, you don’t need to know HTML or CSS at all in order to create a website using CMS Made Simple. Only if you want to change the design of the site to your taste, then you will need the basics of CSS (external link).
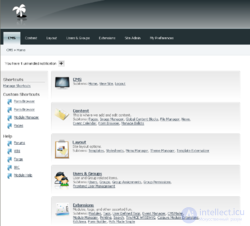
On this page you will read not only how to customize the design, but also how to use other functions built into the system, such as Menu Manager, Module Manager and Event System to monitor the processes in the system.
CMS Made Simple has very small requirements. The system was tested on different platforms and most of the errors were corrected. Current requirements are:
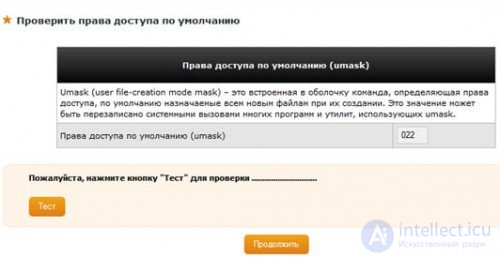
The system does not require server administrator (root) rights and, de facto, requires minimal rights to work. Permission to write is necessary only for a few directories and should be safe for normal use.
There are small points that should be included or customizable on your hosting for optimal system performance and for the smooth use of additional modules. In the server, the safe mode function must be disabled and the GD library loaded.
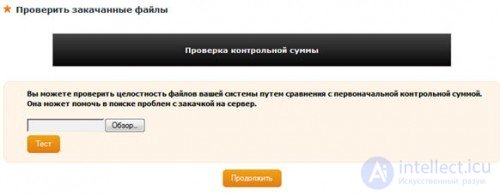
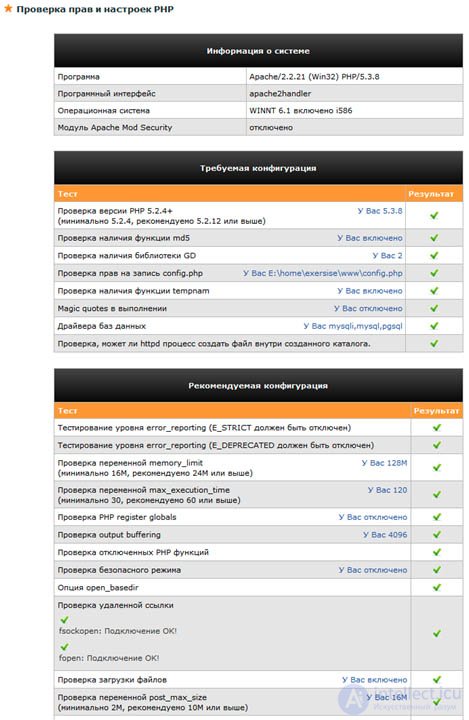
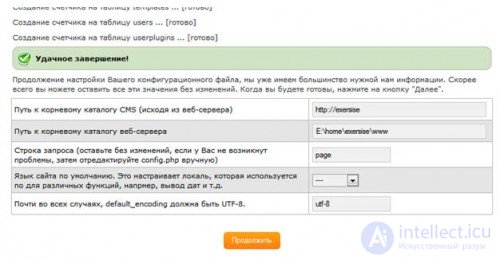
When installing the CMS, a detailed check of the settings will be made, but you can check the settings of your hosting before installation by downloading the verification script. Unzip this script and call it in the browser after downloading to the server. Check the information received from the "Requirements" table.
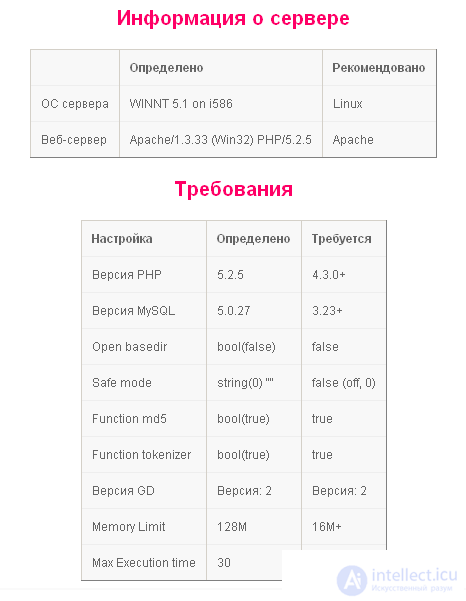
In the second column, the script will determine the setting on your hosting, and in the third column you see the requirements for successful work with CMS Made Simple. By comparing the two columns, you can see before the installation whether the requirements are met.
Download the installation package CMS Made Simple, you can on the official website
http://cmsmadesimple.org

A window will open that will contain available downloadable packages on the right, and the last stable release on the left (the download link is framed). I recommend you the full version, which includes more than 20 languages. It should be noted that there is also a version of base, in which there is only English.

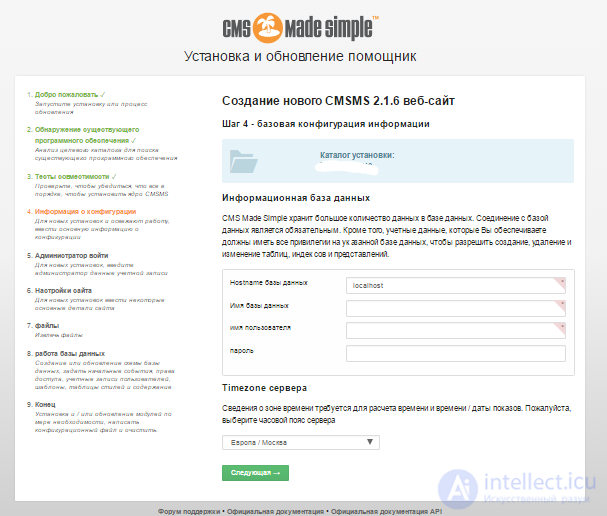
Installation CMS Made Simple starts automatically when you enter the site name (domain name) in the address bar of the browser. We type it and see that the initial installation window has opened - the choice of language.
In the drop-down box, you will see all the languages available in the installation package.
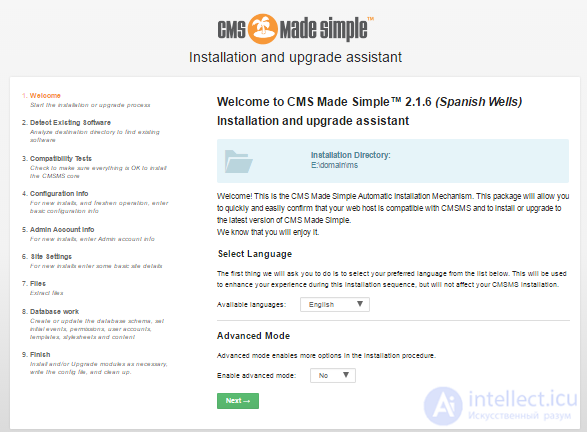
In the drop-down list we find Russian and click Next. The installation language will switch to Russian.
A template is a “frame” of a page that is laid out in HTML. As the template is used for each page of the site, this means that no web design skills are required to edit the site content. Tags are inserted into the template with the help of which the places where the content of the page or the navigation of the site will be shown are indicated. When you call the page in the explorer, the content management system will automatically create the necessary page from the template and fill it with content.
The template is made on HTML. Attached is one or more style sheets. Styles in turn are made on CSS. Thus, to change the design of the site, you should be familiar with HTML and CSS, at least at a basic level. If this knowledge is not available, then you can download ready-made themes or use the standard design set by default.
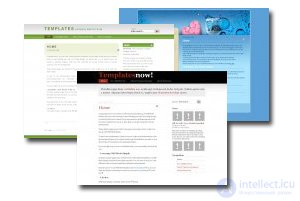
After the standard installation of CMS Made Simple, several basic templates will be added that can be used and customized to suit your needs. Your site designer will also be able to create and add new templates. The CMSMS community also offers ready-made themes that can be downloaded on the CMSMS Themes site (external link).
Assistance in installing templates in the article Installing templates, and for those who create templates in HTML and CSS, a master class “Implementing Your Template” is offered.
Templates and styles you will find in the administrative interface of your site under the item "Design".
Ready-made templates for CMS Made Simple can be downloaded from:
Pages define the structure of your website. To do this, you need to submit your site as a set of pages. These pages are available through the menu. Naturally, you can relink your pages among themselves additionally directly from the text.
Navigation, or menus - these are links that help the user of your site freely navigate from one page to another. These links are automatically created by CMS Made Simple from the structure of your pages. You can see an illustrative example on the right side of this page. The navigation menu is created from the pages of the documentation automatically.
Pages can be organized in several levels, approximately as a genealogical tree. The top level consists of parent pages. Each parent page can have child pages, which, in turn, can be parents of other children. In the template using a special tag marks the place where the navigation will be shown on the page.
With the help of templates for navigation and menu manager, you can create any kind of navigation for the site. And with the help of styles give it any look. In the main menu template is issued a list of HTM. On how to change such a list, you can read on the website Short recipes on CSS and HTML (external link).
In the administrative interface you can add pages in the "Content
Content is content, information on the page. We have already mentioned that for each page of your site, you choose a template that is used to display this page. The place where this content will be shown is marked with a special tag {content}. One page can include only one such tag. In order to add additional content to the template, you can create any number of content blocks and output them through the template using {content block = 'block name'}. Text fields for editing these blocks will be displayed additionally in the page editing window.
You can also use a one-line field instead of a text field to enter content into the content block. For this, in the content block, the parameter oneline = true is used. In its full form, it will look like this {content block = 'block name' oneline = true}. More information about the parameters can be found in the help for the content tag. To do this, go to the administrative interface on Extensions -> Tags and click on the "Help" link opposite the content tag.
There are 4 main types of content. You assign each page one of these types.
Content type is applied to the regular page of the site Typically, this is the type you will use most often. For example, the page you are currently reading corresponds to the type Content. On this page you can specify any arbitrary content that you would like to see on your page. Page design is controlled by templates. For each page of the Content type you created, you choose one of the templates. If you log in as an administrator, you can change the template of such a page to see how all the pages using this template will change.
The type of Separator is a semantic separator in the structure of your menu. This type is used to create multi-level site content structures.
Link type is a link to another page, be it internal or external. This type is displayed in the menu as well as the Content type pages.
Type Section Header is used to group the menu. It is not related to levels, as the heading section has no pages associated with them. They are a short description to identify a group of links under this heading.
There is also the type of content "News" that was used in older versions of CMS Made Simple. But it is better not to use it anymore. Instead, insert the tag {cms_selflink page = news text = 'Here is our news'}.
From basic functions, we turn to functions for advanced users ... The menu manager is a module that allows you to create almost any type of site navigation. After installing CMS Made Simple you will find three ready-made templates for menus. And for most users, this will be enough, because the menu is just an unordered list of HTML that can be styled using CSS styles.
That's all you need to know at this stage, use the simple navigation template for a regular menu list or cssmenu for a drop-down menu. To do this, use the parameter in the menu tag to define a template, for example: {menu template = 'simple navigation'}. Do not forget to add the menu template style to the templates for the entire page! You should also be aware that the cssmenu template uses JavaScript for Internet Explorer, and you should definitely add it to the website template when using cssmenu.
Website developers, designers and advanced users can edit menu templates and add new ones in the Menu Manager. You can use any template file downloaded from FTP or into the database by importing template files. You can also add new templates directly to the database.
Read more about how to do this in the help to the Menu Manager in the administrative interface of the CMSMS. It is located in the menu Appearance -> Template Manager.
There are three types of extensions that add functionality to the CMSMS. They are called modules, tags or user tags.
Tags are the simplest form of extensions. They are designed to solve only one small and specific problem.
In CMS Made Simple there are a number of tags set by default. Available tags can be found in the administrative interface under Extensions -> Tags. To insert any of them into a template or page, just type, for example, {sitemap}. Many of these Smarty tags are used as tags in templates, i.e. determining the location of the future display for page content, navigation, etc. You can easily create your own tag, which can be included in a page or template.
Users can also create their own tags to insert into templates or a page. These are called user tags. Such tags are nothing but php code snippets (but without <? Php and?> Around them) and make it possible to reuse the php code on your site. User tags are inserted in templates and pages like this: {tagname}.
If you have written your own tag, which may be useful to other project participants, then you can share it here. (External link)
Module - this is a plugin for CMS Made Simple. Modules are written by developers and allow you to perform complex tasks within the CMSMS. The module has an administrator interface and access to an extremely well-defined API (Application Programming Interface). The latter allows developers to build really complex functionality within the CMSMS system.
There are several modules enabled by default when installing CMS Made Simple. Other popular modules, such as User Management, Album, Calendar, Guestbook or contact form can be downloaded via the Module Manager.
In CMS Made Simple, modules can be downloaded and installed directly from the administrative interface. You can find the list of modules for installation under Extensions -> Module Manager.
To install modules into a template or page, you must use the module name as a parameter for the {cms_module} tag. It looks like this: {cms_module = 'modulename' parameter1 = 'this' parameter2 = 5 parameter3 = 'that'}. Modules accept multiple parameters to change their default behavior, although this is not always required.
Events is a powerful new way to execute code that reacts to events in the system. Например, если вы хотите отправить письмо администратору сайта, когда загружен новый файл или создается новая страница, то Вы можете привязать определенный код к этим события. Он будет воспроизведен в тот момент, когда это событие произойдет.
Вот как это работает:
Вот основные действия при создании веб-сайт с CMS Made Simple:
Когда пользователь перейдет на Ваш сайт страницы будут сгенерированы из шаблонов, с применением содержания которое вставляется в места отмеченные тегами в шаблоне.
Сообщество CMS Made Simple всегда готово помочь, если Вам потребуется помощь с Вашим сайтом. Здесь вы найдете более подробную информацию и поддержку:
Помните, что люди вовлеченые в разработку и поддержку CMSMS как правило имеют нормальную работу и другие обязанности и не могут быть доступны 24 часа в день и 7 дней в неделю. Будьте терпеливы и вежливы, и Вы получите ответы на Ваши вопросы.
Если вы хотите внести свой вклад в развитие системы, мы будет очень рады. Вы можете связаться с разработчиками по IRC(external link).
http://apidoc.cmsmadesimple.org/

Comments
To leave a comment
Content Management Systems (CMS)
Terms: Content Management Systems (CMS)