
Practice
Firebase is a cloud platform provided by Google that offers a variety of services and tools for developing web and mobile applications. Firebase positions itself as an integrated, all-in-one toolkit that makes developers' work easier and improves the app-building process
Hi, in this blog post you will learn everything about Firebase push notifications for the WEB using JavaScript and PHP. You will learn how to send messages to users even when your site is not open. The browser will handle displaying the notifications while the user is connected to the internet.
Web Push is a technology that gives websites the ability to send notifications to a user's desktop even when the site itself is not open in the browser. These notifications are supported by most modern browsers, such as Google Chrome, Mozilla Firefox, Microsoft Edge, Safari and others.
The main components of the Web Push technology:
Service Workers: Service workers are JavaScript scripts that run in the background, independently of your website. They are used to handle events, including notifications.
Push API: The Push API is a standard browser interface that provides the ability to create and send notifications from web applications.
Notification API: The Notification API lets you create nicely styled notifications that are shown on the user's desktop.
Push server: The push server is the part of the infrastructure that sends notifications to the user's devices. In practice it is often used together with cloud services such as Firebase Cloud Messaging (FCM) for the web.
The Web Push workflow is as follows:
The user grants the site permission to send notifications.
When the website wants to send a notification, it sends a request to the push server.
The push server, in turn, sends the notification to the user's browser.
If the user's browser is open, the notification is shown directly in the browser; if the browser is closed, it is shown on the user's desktop.
Web Push is a powerful tool for holding users' attention and keeping them informed about important events, even when they are not on your website.
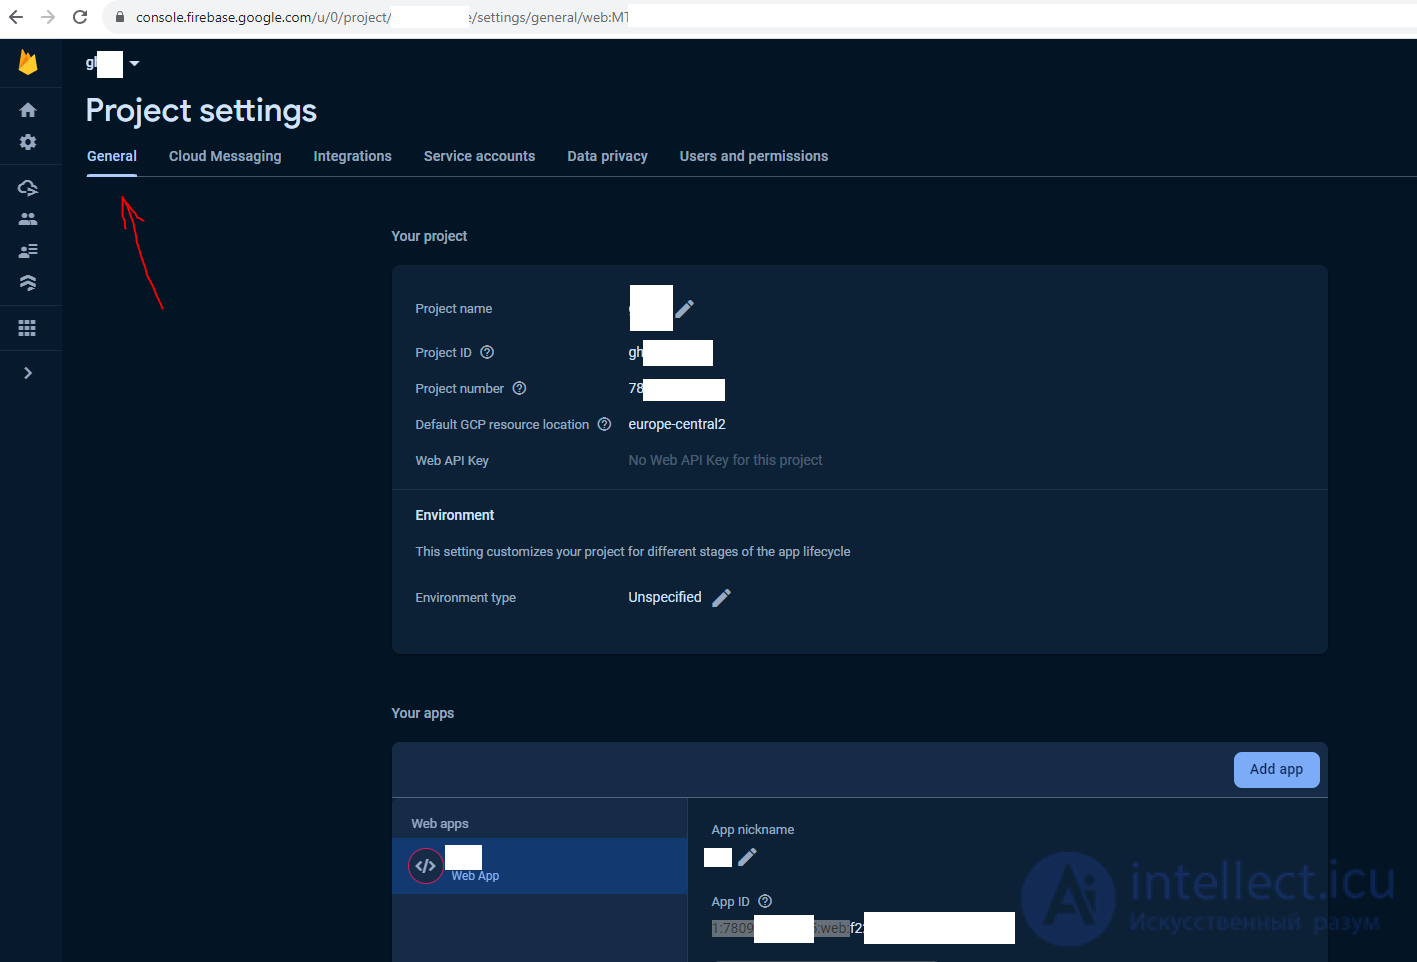
Here are the steps for creating a Firebase project.
There are a few more things we need to do in our Firebase project that are specific to push notifications.
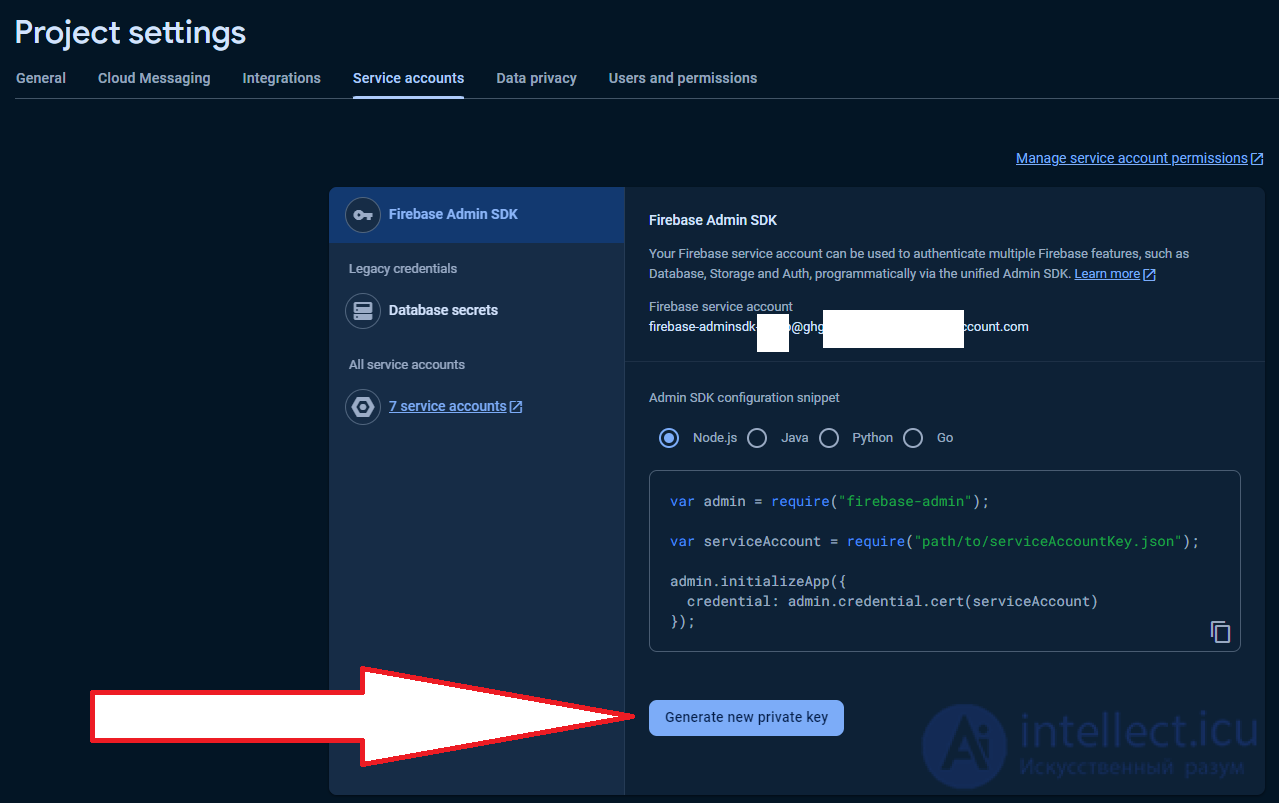
There are two ways of using Firebase push notifications on a website. We will cover both.
To use the first method we simply need to create an HTML file as the notification receiver and a service worker file as the background receiver. Let's create them.
In the HTML we need some UI for receiving messages while the app is open and focused. Rest assured that when a message is received inside the app, it will not be displayed in the background.
|
|
|
|
|
Notification data will receive here if the app is open and focused.
|
|
|
|
|
|
Device Token:
|
|
|
Add the CDN below to your HTML file.
|
|
|
|
|
Take the firebaseConfig object with all the credentials from your Firebase project in order to initialise the Firebase app on the website using the Firebase SDK. Get a Messaging instance from the app using firebase.messaging(). This instance will be used to obtain tokens and messages. Now first use the getToken() method to get the token, which is unique to each device. If we send notifications from Firebase, we don't need this token and we don't store it. This token is used automatically by Firebase to send notifications.
|
|
const firebaseConfig = { |
|
|
apiKey: "A***************", |
|
|
authDomain: "s*******.firebaseapp.com", |
|
|
projectId: "s******", |
|
|
messagingSenderId: "1******", |
|
|
appId: "1:3********" |
|
|
}; |
|
|
const app = firebase.initializeApp(firebaseConfig) |
|
|
const messaging = firebase.messaging() |
|
|
messaging.getToken({ vapidKey: "I-u**********" }) |
Now use the messaging.onMessage() method to receive a message while the app is open. We need to pass a callback function that will fire automatically when data is received. You can use this JSON data however you like. I am displaying this data on the web page.
vapidKey (Key pair) is a key generated from the public and private key

|
|
messaging.onMessage((payload) => { |
|
|
console.log('Message received ', payload); |
|
|
const messagesElement = document.querySelector('.message') |
|
|
const dataHeaderElement = document.createElement('h5') |
|
|
const dataElement = document.createElement('pre') |
|
|
dataElement.style = "overflow-x: hidden;" |
|
|
dataHeaderElement.textContent = "Message Received:" |
|
|
dataElement.textContent = JSON.stringify(payload, null, 2) |
|
|
messagesElement.appendChild(dataHeaderElement) |
|
|
messagesElement.appendChild(dataElement) |
|
|
}) |
Create a JavaScript file, whose name must be `firebase-messaging-sw.js` . It must be in the project's root folder. If you are using localhost, put the file in the folder htdocs .
Add the Firebase SDK CDN to the JS file as shown below.
|
|
importScripts('https://www.gstatic.com/firebasejs/9.14.0/firebase-app-compat.js') |
|
|
importScripts('https://www.gstatic.com/firebasejs/9.14.0/firebase-messaging-compat.js') |
Use the same process to create a messaging instance.
|
|
const firebaseConfig = { |
|
|
apiKey: "S***************", |
|
|
authDomain: "a*******.firebaseapp.com", |
|
|
projectId: "a******", |
|
|
messagingSenderId: "******", |
|
|
appId: "1:7********" |
|
|
}; |
|
|
const app = firebase.initializeApp(firebaseConfig) |
|
|
const messaging = firebase.messaging() |
Open your Firebase project screen and click the "All products" button at the bottom of the left-hand menu. Under Build you will find the Cloud Messaging card — click it. The messaging page will open. Click the "New campaign" button, then click the "Notifications" button in the pop-up. Provide a notification title and text and click "Next". Select your app and click "Next". Choose "Now" for the schedule, click "Review" and then click "Publish". Your campaign will start. If the website you created earlier has been opened at least once, Firebase will send this notification to all of them. It can take 4 to 5 minutes to receive the notification. Your notification will not be delivered until the browser in which the website was opened at some point is open.
To receive messages from our own backend we need to use each device's device token to send notifications. Here we will change the getToken() method to obtain the device token.
When the promise resolves successfully in the getToken() method, it yields a token. You can collect the tokens in a database for later use. I am simply displaying the tokens on the web page and using them directly for testing purposes.
<div class="emgithub-container embed-code" style="box-sizing: border-box; color: rgb(33, 37, 41); font-family: -apple-system, BlinkMacSystemFont, " segoe="" ui",="" roboto,="" "helvetica="" neue",="" arial,="" "noto="" sans",="" sans-serif,="" "apple="" color="" emoji",="" "segoe="" ui="" symbol",="" emoji";="" font-size:="" 16px;"="">
Here I have created a function sendTokenToServer() that can be used to send tokens to the server for storage. It first checks in local storage whether this token has already been sent or not, using the function isTokenSentToServer() . Once the token has been sent to the server successfully, you can call `setTokenSentToServer()` with the parameter true, which will record in local storage that the token has been sent.
|
|
function sendTokenToServer(currentToken) { |
|
|
if (!isTokenSentToServer()) { |
|
|
console.log('Sending token to server ...'); |
|
|
setTokenSentToServer(true) |
|
|
} else { |
|
|
console.log('Token already available in the server'); |
|
|
} |
|
|
} |
|
|
function isTokenSentToServer() { |
|
|
return window.localStorage.getItem('sentToServer') === '1' |
|
|
} |
|
|
function setTokenSentToServer(sent) { |
|
|
window.localStorage.setItem('sentToServer', sent ? '1' : '0') |
|
|
} |
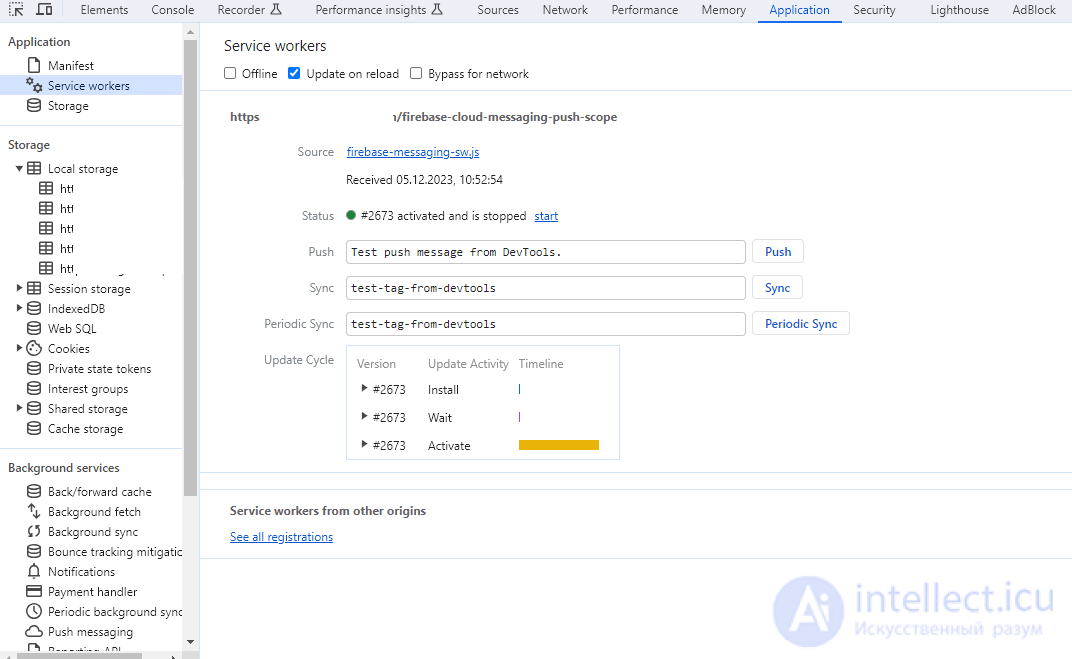
We also need to add an extra function to firebase-messaging-sw.js in order to receive notifications of this kind. We will use the messaging.onBackgroundMessage() method , which will pass the payload to a callback function. You can then use that data in the self.registration.showNotification() function to display the notification.
|
|
messaging.onBackgroundMessage(function (payload) { |
|
|
if (!payload.hasOwnProperty('notification')) { |
|
|
const notificationTitle = payload.data.title |
|
|
const notificationOptions = { |
|
|
body: payload.data.body, |
|
|
icon: payload.data.icon, |
|
|
image: payload.data.image |
|
|
} |
|
|
self.registration.showNotification(notificationTitle, notificationOptions); |
|
|
self.addEventListener('notificationclick', function (event) { |
|
|
const clickedNotification = event.notification |
|
|
clickedNotification.close(); |
|
|
event.waitUntil( |
|
|
clients.openWindow(payload.data.click_action) |
|
|
) |
|
|
}) |
|
|
} |
|
|
}) |
This data will be displayed on the web page if the website is open and set up as in the previous method, using the method messages.onMessage() . But keep in mind that here the data has different keys, and be sure to check both before using them.
Data received on the web page with the first method:
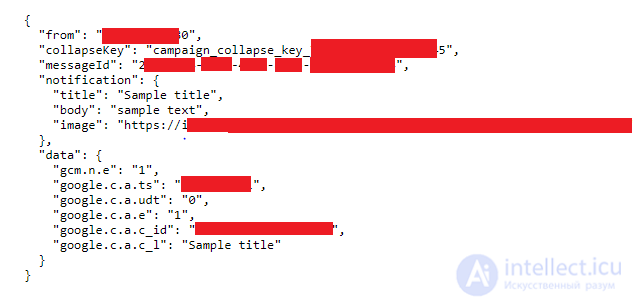
Data received on the web page with the second method:
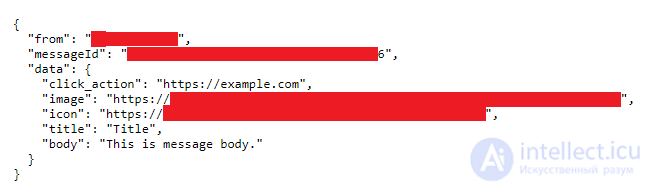
With that we have finished the process of receiving notifications, and next we will write the code for sending notifications in PHP.
Here we need to use the Google API library https://github.com/googleapis/google-api-php-client for PHP. Download it with Composer (the PHP package manager) using the command
`composer require google/apiclient:^2.12.1` .
This library is used to obtain an access token from the credentials in the JSON file. If you have not downloaded the JSON file from the "Service accounts" tab, download it. We will be using it here.
The source file get_access_token.php is used to generate an access token using the JSON file and the apiclient library.
Create a PHP file send.php and include the get_access_token.php file. Now we can use the get_access_token() function from that file. We need to pass the path to the JSON file as a parameter to this function.
|
|
include "./get_access_token.php"; |
|
|
$access_token = get_access_token("a******-firebase******.json"); |
Create an array of the stored device tokens — the token that is generated on the client side with the getToken() method. Each token represents one device to notify. Loop through the array and call the sendFCMNotification() function for each token. This function takes our notification data and sends the notification to each device using the device token.
|
|
$device_tokens = [ |
|
|
"****", |
|
|
"****", |
|
|
"****" |
|
|
]; |
|
|
foreach ($device_tokens as $token) { |
|
|
$response = sendFCMNotification($access_token, $token); |
|
|
echo $response . ' '; |
|
|
} |
This function sends a request to the send endpoint. You need to add your project ID to the endpoint URL.
|
|
function sendFCMNotification($access_token, $token) { |
|
|
$url = "https://fcm.googleapis.com/v1/projects/your-project-id-here/messages:send"; |
|
|
... |
|
|
} |
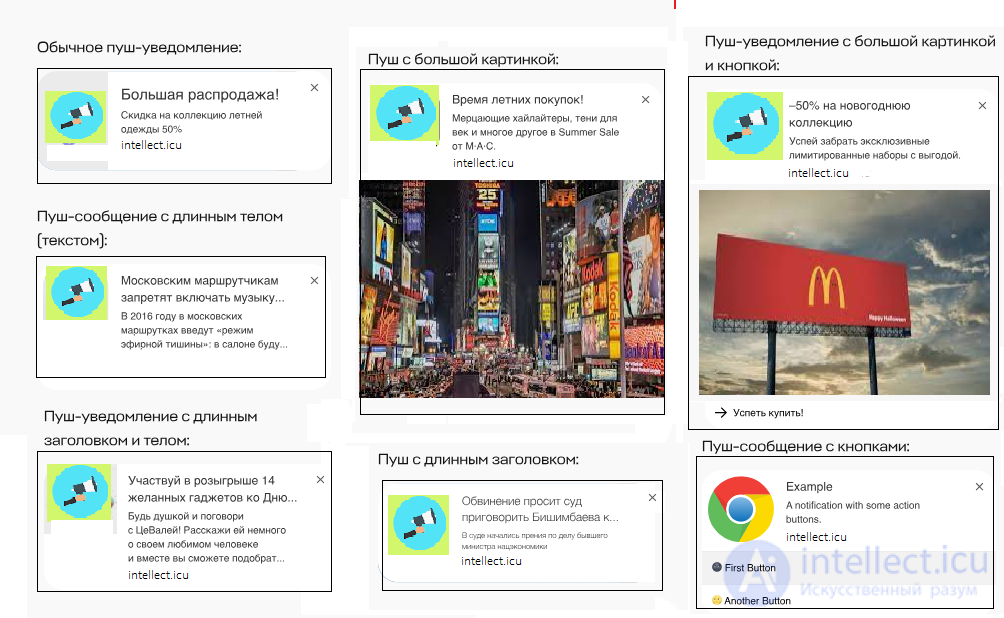
Also in this function we can set the notification data. Some example data is added below. You can change it to suit your needs.
|
|
$data = [ |
|
|
'message' => [ |
|
|
"data"=> [ |
|
|
"title" => "Title", |
|
|
"body" => "This is message body.", |
|
|
"icon" => "https://intellect.icu/img/logo.png", |
|
|
"image" => "https://intellect.icu/img/logo.png", |
|
|
"click_action" => "https://example.com" |
|
|
], |
|
|
'token' => $token |
|
|
] |
|
|
]; |
Now set the options for the POST request. Our access token will be used here and our notification data will be added.
|
|
$options = array( |
|
|
CURLOPT_URL => $url, |
|
|
CURLOPT_POST => true, |
|
|
CURLOPT_HTTPHEADER => array( |
|
|
"Authorization: Bearer " . $access_token, |
|
|
"Content-Type: application/json", |
|
|
), |
|
|
CURLOPT_POSTFIELDS => json_encode($data), |
|
|
); |
Make the request using these options. If the request succeeds, the notification will be shown on the devices whose tokens were used.
|
|
$curl = curl_init(); |
|
|
curl_setopt_array($curl, $options); |
|
|
curl_setopt($curl, CURLOPT_RETURNTRANSFER, true); |
|
|
$response = curl_exec($curl); |
|
|
curl_close($curl); |
|
|
return $response; |
You have now unlocked the potential of Firebase push notifications using JavaScript and PHP in your web application. With this integration you can deliver personalised, real-time notifications that keep your users engaged and bring them back again and again. As you continue to explore what Firebase can do, remember to follow best practices and refine your notification strategy for the best results. May your web app's notifications shine and take the user experience to new heights. Happy coding!

Comments