
Lecture
Это окончание невероятной информации про symfony .
...
install a CMS application template using the Symfony CMF edition.
Step 1 — Download the Symfony CMF sandbox using the following command.
composer create-project symfony-cmf/sandbox cmf-sandbox
This will download Symfony CMF.
Step 2 — Try configuring it by answering a few questions. For all the questions, choose the default answer, except for the database. For the database, choose pdo_sqlite. You may need to enable the sqlite extension in PHP if it is not already installed.
Step 3 — Create a demo database using the console application as follows.
php app/console doctrine:database:create
Step 4 — Load the demo data into the database using the following command.
php app/console doctrine:phpcr:init:dbal --force
php app/console doctrine:phpcr:repository:init
php app/console doctrine:phpcr:fixtures:load -n
Step 5 — Now run the application using the following command.
php app/console server:run
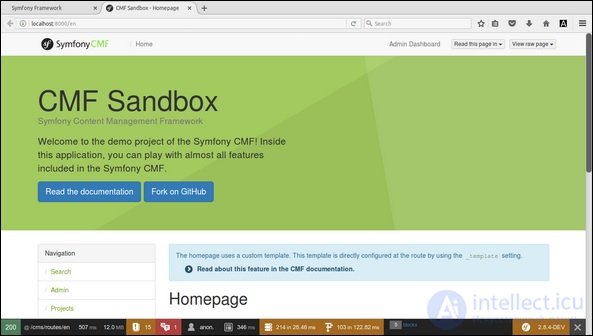
Step 6 — Finally, open the application in the browser using http: // localhost: 8000 /.
This will give the following result —
In this chapter, we will learn how to create a complete MVC-based BookStore application in the Symfony Framework. The steps are as follows.
Let us create a new project named “BookStore” in Symfony using the following command.
symfony new BookStore
Create BooksController in the “src / AppBundle / Controller” directory. It is defined as follows.
Now that we have created BooksController, let us create the view to render the action.
Step 3: Create the View
Let us create a new folder named “Books” in the “app / Resources / views /” directory. Inside the folder, create a file “author.html.twig” and add the following changes.
author.html.twig
Simple book store application
Now let us render the view in the BooksController class. It is defined as follows.
BooksController.php
render('books/author.html.twig'); } }At this point, we have created the basic BooksController, and the result is displayed. You can check the result in the browser using the URL “http: // localhost: 8000 / books / author”.
Step 4: Database Configuration
Configure the database in the “app / config / parameters.yml” file.
Open the file and add the following changes.
parameter.yml
# This file is auto-generated during the composer install parameters: database_driver: pdo_mysql database_host: localhost database_port: 3306 database_name: booksdb database_user:database_password: mailer_transport: smtp mailer_host: 127.0.0.1 mailer_user: null mailer_password: null secret: 0ad4b6d0676f446900a4cb11d96cf0502029620d doctrine: dbal: driver: pdo_mysql host: '%database_host%' dbname: '%database_name%' user: '%database_user%' password: '%database_password%' charset: utf8mb4 Now Doctrine can connect to your “booksdb” database.
Step 5: Create the Database
Run the following command to create the “booksdb” database. This step is used to bind the database in Doctrine.
php bin/console doctrine:database:createAfter executing the command, it automatically generates an empty “booksdb” database. You can see the following response on your screen.
This will give the following result —
Created database `booksdb` for connection named defaultStep 6: Mapping Information
Create the Book entity class in the Entity directory, which is located at “src / AppBundle / Entity”.
You can map the Book class directly using annotations. It is defined as follows.
Book.php
Add the following code to the file.
Here, the table name is optional.
If the table name is not specified, it will be determined automatically based on the entity class name.
Step 7: Bind the Entity
Doctrine generates simple entity classes for you. This will help you build any entity.
Run the following command to generate the entity.
php bin/console doctrine:generate:entities AppBundle/Entity/BookThen you will see the following result, and the entity will be updated.
Generating entity "AppBundle\Entity\Book” > backing up Book.php to Book.php~ > generating AppBundle\Entity\BookBook.php
id; } /** * Set name * * @param string $name * * @return Book */ public function setName($name) { $this->name = $name; return $this; } /** * Get name * * @return string */ public function getName() { return $this->name; } /** * Set author * * @param string $author * * @return Book */ public function setAuthor($author) { $this->author = $author; return $this; } /** * Get author * * @return string */ public function getAuthor() { return $this->author; } /** * Set price * * @param string $price * * @return Book */ public function setPrice($price) { $this->price = $price; return $this; } /** * Get price * * @return string */ public function getPrice() { return $this->price; } }Step 8: Validate the Mapping
After creating the entities, you should validate the mappings using the following command.
php bin/console doctrine:schema:validateThis will give the following result —
[Mapping] OK - The mapping files are correct [Database] FAIL - The database schema is not in sync with the current mapping file.Since we have not created the Books table, the entity is not in sync. Let us create the Books table using the Symfony command in the next step.
Step 9: Create the Schema
Doctrine can automatically create all the database tables needed for the Book entity. This can be done using the following command.
php bin/console doctrine:schema:update --forceAfter executing the command, you will see the following response.
Updating database schema... Database schema updated successfully! "1" query was executedNow validate the schema again, using the following command.
php bin/console doctrine:schema:validateThis will give the following result —
[Mapping] OK - The mapping files are correct. [Database] OK - The database schema is in sync with the mapping files.Step 10: Getter and Setter
As seen in the “Bind the Entity” section, the following command generates all the getter and setter methods for the Book class.
$ php bin/console doctrine:generate:entities AppBundle/Entity/BookStep 11: Fetch Objects from the Database
Create a method in BooksController that will display the book details.
BooksController.php
/** * @Route("/books/display", name="app_book_display") */ public function displayAction() { $bk = $this->getDoctrine() ->getRepository('AppBundle:Book') ->findAll(); return $this->render('books/display.html.twig', array('data' => $bk)); }Step 12: Create the View
Let us create a view that points to the display action. Go to the views directory and create a file “display.html.twig”. Add the following changes to the file.
display.html.twig
{% extends 'base.html.twig' %} {% block stylesheets %} {% endblock %} {% block body %}Books database application!
| Name | Author | Price |
|---|---|---|
| {{ x.Name }} | {{ x.Author }} | {{ x.Price }} |
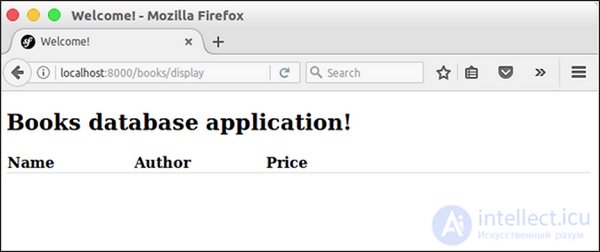
You can get the result by requesting the URL “http: // localhost: 8000 / books / display” in the browser.
Let us create the functionality to add a book to the system. Create a new page, the newAction method in BooksController as follows.
// use section
use Symfony\Component\HttpFoundation\Request;
use Symfony\Component\Form\Extension\Core\Type\TextType;
use Symfony\Component\Form\Extension\Core\Type\SubmitType;

// methods section
/**
   * @Route("/books/new")
*/

public function newAction(Request $request) {
   $stud = new StudentForm();
      $form = $this->createFormBuilder($stud)
         ->add('name', TextType::class)
         ->add('author', TextType::class)
         ->add('price', TextType::class)
         ->add('save', SubmitType::class, array('label' => 'Submit'))
         ->getForm();
   return $this->render('books/new.html.twig', array('form' => $form->createView(),));
}
Let us create a view that points to the new action. Go to the views directory and create a file “new.html.twig”. Add the following changes to the file.
{% extends 'base.html.twig' %}
{% block stylesheets %}
{% endblock %}
{% block body %}
Book details:
{{ form_start(form) }}
{{ form_widget(form) }}
{{ form_end(form) }}
{% endblock %}
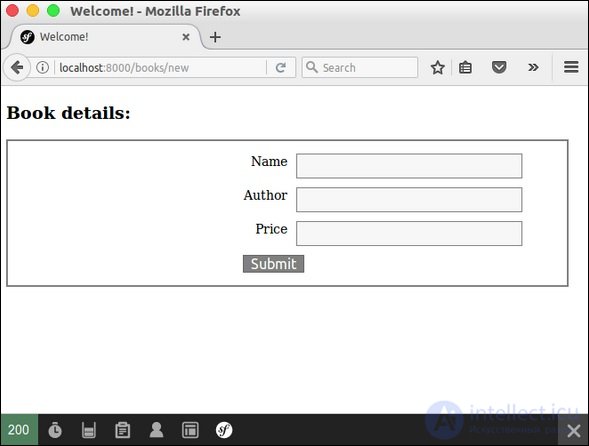
It will output the following screen as the result —
Let us modify the newAction method and include code to handle the form submission. Also save the book information to the database.
/**
   * @Route("/books/new", name="app_book_new")
*/
public function newAction(Request $request) {
   $book = new Book();
   $form = $this->createFormBuilder($book)
      ->add('name', TextType::class)
      ->add('author', TextType::class)
      ->add('price', TextType::class)
      ->add('save', SubmitType::class, array('label' => 'Submit'))
      ->getForm();

   $form->handleRequest($request);

   if ($form->isSubmitted() && $form->isValid()) {
      $book = $form->getData();
      $doct = $this->getDoctrine()->getManager();

      // tells Doctrine you want to save the Product
      $doct->persist($book);

      //executes the queries (i.e. the INSERT query)
      $doct->flush();

      return $this->redirectToRoute('app_book_display');
   } else {
      return $this->render('books/new.html.twig', array(
         'form' => $form->createView(),
      ));
   }
}
Once the book is saved to the database, redirect it to the book display page.
To update a book, create an action, updateAction, and add the following changes.
/**
   * @Route("/books/update/{id}", name = "app_book_update" )
*/
public function updateAction($id, Request $request) {
   $doct = $this->getDoctrine()->getManager();
   $bk = $doct->getRepository('AppBundle:Book')->find($id);

   if (!$bk) {
      throw $this->createNotFoundException(
         'No book found for id '.$id
      );
   }
   $form = $this->createFormBuilder($bk)
      ->add('name', TextType::class)
      ->add('author', TextType::class)
      ->add('price', TextType::class)
      ->add('save', SubmitType::class, array('label' => 'Submit'))
      ->getForm();

   $form->handleRequest($request);

   if ($form->isSubmitted() && $form->isValid()) {
      $book = $form->getData();
      $doct = $this->getDoctrine()->getManager();

      // tells Doctrine you want to save the Product
      $doct->persist($book);

      //executes the queries (i.e. the INSERT query)
      $doct->flush();
      return $this->redirectToRoute('app_book_display');
   } else {
      return $this->render('books/new.html.twig', array(
         'form' => $form->createView(),
      ));
   }
}
Here we handle two functions. If the request contains only the id, we fetch it from the database and show it in the book form. And, if the request contains the complete book information, we update the data in the database and redirect to the book display page.
To delete an object, you need to call the remove () method of the entity manager (Doctrine).
This can be done using the following code.
/**
   * @Route("/books/delete/{id}", name="app_book_delete")
*/
public function deleteAction($id) {
   $doct = $this->getDoctrine()->getManager();
   $bk = $doct->getRepository('AppBundle:Book')->find($id);

   if (!$bk) {
      throw $this->createNotFoundException('No book found for id '.$id);
   }
   $doct->remove($bk);
   $doct->flush();
   return $this->redirectToRoute('app_book_display');
}
Here we deleted the book and redirected to the book display page.
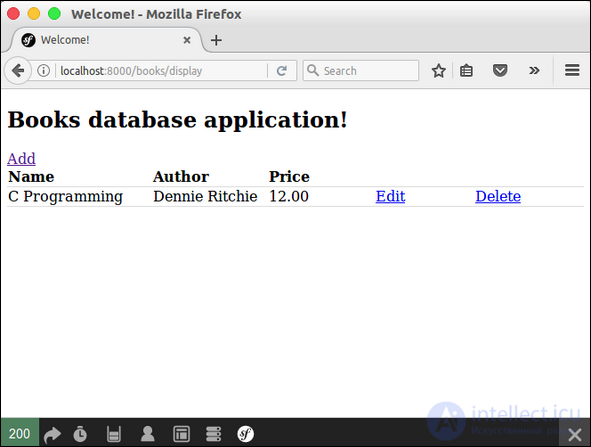
Now update the body block in the display view and include the add / edit / delete links as follows.
{% block body %}
Books database application!
| Name | Author | Price | ||
|---|---|---|---|---|
| {{ x.Name }} | {{ x.Author }} | {{ x.Price }} | Edit | Delete |
It will output the following screen as the result —
Symfony consists of a set of PHP components, an application framework, a community and a philosophy. Symfony is extremely flexible and capable of meeting all the requirements of experienced users and professionals, and is the ideal choice for everyone starting out with PHP.
Часть 1 Symfony - an overview of its features with examples
Часть 2 Controller - Symfony - an overview of its features with
Часть 3 Validation Example - Symfony - an overview of its features
Часть 4 Step 1: Create the Project - Symfony - an overview

Comments