
Lecture
Это продолжение увлекательной статьи про symfony .
...
@Assert\IsNull() */ protected $studentName; }
Validates that a given string length is between some minimum and maximum value. Its syntax is as follows —
namespace AppBundle\Entity;
use Symfony\Component\Validator\Constraints as Assert;

class Student {
   /**
      * @Assert\Length(
         * min = 5,
         * max = 25,
         * minMessage = "Your first name must be at least {{ limit }} characters long",
         * maxMessage = "Your first name cannot be longer than {{ limit }} characters"
      * )
   */
   protected $studentName;
}
Validates that a given number is between some minimum and maximum number. Its syntax is as follows —
namespace AppBundle\Entity;
use Symfony\Component\Validator\Constraints as Assert;
class Student {
   /**
      * @Assert\Range(
         * min = 40,
         * max = 100,
         * minMessage = "You must be at least {{ limit }} marks”,
         * maxMessage = "Your maximum {{ limit }} marks”
      * )
   */
   protected $marks;
}
Validates that a value is a valid date. It must match a valid YYYY-MM-DD format. Its syntax is as follows —
namespace AppBundle\Entity;
use Symfony\Component\Validator\Constraints as Assert;

class Student {
   /**
      * @Assert\Date()
   */
   protected $joinedAt;
}
This constraint is used to guarantee that a given value is one of a given set of valid choices. It can also be used to validate that each item in an array of items is one of these valid choices. Its syntax is as follows —
namespace AppBundle\Entity;
use Symfony\Component\Validator\Constraints as Assert;

class Student {
   /**
      * @Assert\Choice(choices = {"male", "female"}, message = "Choose a valid gender.")
   */
   protected $gender;
}
This validates that the input value equals the password of the currently authenticated user. This is useful on a form where users can change their password, but for security, they must enter their old password. Its syntax is as follows —
namespace AppBundle\Form\Model;
use Symfony\Component\Security\Core\Validator\Constraints as SecurityAssert;

class ChangePassword {
   /**
      * @SecurityAssert\UserPassword(
         * message = "Wrong value for your current password"
      * )
   */
   protected $oldPassword;
}
This constraint validates that the old password matches the user's current password.
Let us write a simple example application to understand the concept of validation.
Step 1 — Create the validation application.
Create a Symfony application, validationsample , using the following command.
symfony new validationsample
Step 2 — Create an entity named FormValidation in the file “FormValidation.php” in the directory “src / AppBundle / Entity /” . Add the following changes to the file.
name;
   }
   public function setName($name) {
      $this->name = $name;
   }
   public function getId() {
      return $this->id;
   }
   public function setId($id) {
      $this->id = $id;
   }
   public function getAge() {
      return $this->age;
   }
   public function setAge($age) {
      $this->age = $age;
   }
   public function getAddress() {
      return $this->address;
   }
   public function setAddress($address) {
      $this->address = $address;
   }
   public function getEmail() {
      return $this->email;
   }
   public function setEmail($email) {
      $this->email = $email;
   }
}
Step 3 — Create the validateAction method in StudentController. Go to the “src / AppBundle / Controller” directory, create the file “StudentController.php” and add the following code to it.
use AppBundle\Entity\FormValidation;
/**
   * @Route("/student/validate")
*/
public function validateAction(Request $request) {
   $validate = new FormValidation();
   $form = $this->createFormBuilder($validate)
      ->add('name', TextType::class)
      ->add('id', TextType::class)
      ->add('age', TextType::class)
      ->add('address', TextType::class)
      ->add('email', TextType::class)
      ->add('save', SubmitType::class, array('label' => 'Submit'))
      ->getForm();

   $form->handleRequest($request);
   if ($form->isSubmitted() && $form->isValid()) {
      $validate = $form->getData();
      return new Response('Form is validated.');
   }
   return $this->render('student/validate.html.twig', array(
      'form' => $form->createView(),
   ));
}
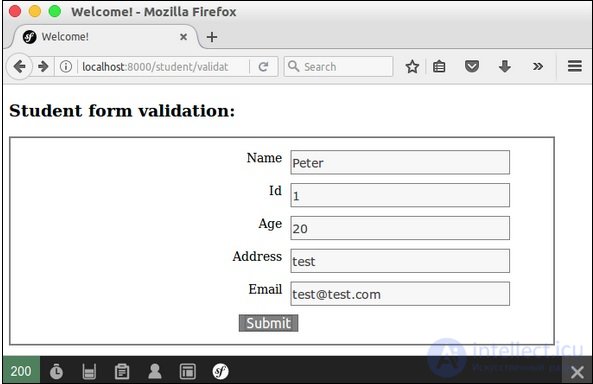
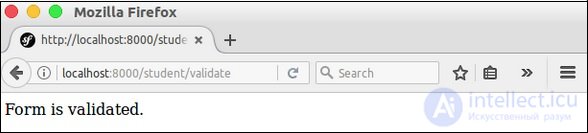
Here we created a form using the Form classes, and then handled the form. If the form is submitted and is valid, a message confirming the form is displayed. Otherwise, the default form is displayed.
Step 4 — Create a view for the action created above in StudentController. Go to the “app / Resources / views / student /” directory. Create the file “validate.html.twig” and add the following code to it.
{% extends 'base.html.twig' %}
{% block stylesheets %}
{% endblock %}
{% block body %}
Student form validation:
{{ form_start(form) }}
{{ form_widget(form) }}
{{ form_end(form) }}
{% endblock %}
Here we used form tags to build the form.
Step 5 — Finally, run the application, http: // localhost: 8000 / student / validate .
The Symfony Form component provides the FileType class for handling file input elements. It makes it easy to upload images, documents, etc. Let us learn how to create a simple application using the FileType feature.
Step 1 — Create a new application fileuploadsample using the following command.
symfony new fileuploadsample
Step 2 — Create a “Student” entity with a name, age, and photo, as shown in the following code.
name;
   }
   public function setName($name) {
      $this->name = $name;
      return $this;
   }
   public function getAge() {
      return $this->age;
   }
   public function setAge($age) {
      $this->age = $age;
      return $this;
   }
   public function getPhoto() {
      return $this->photo;
   }
   public function setPhoto($photo) {
      $this->photo = $photo;
      return $this;
   }
}
Here we specified a file for the photo property.
Step 3 — Create the student controller, StudentController, and a new addAction method, as shown in the following code.
createFormBuilder($student)
         ->add('name', TextType::class)
         ->add('age', TextType::class)
         ->add('photo', FileType::class, array('label' => 'Photo (png, jpeg)'))
         ->add('save', SubmitType::class, array('label' => 'Submit'))
         ->getForm();

      $form->handleRequest($request);
      if ($form->isSubmitted() && $form->isValid()) {
         $file = $student->getPhoto();
         $fileName = md5(uniqid()).'.'.$file->guessExtension();
         $file->move($this->getParameter('photos_directory'), $fileName);
         $student->setPhoto($fileName);
         return new Response("User photo is successfully uploaded.");
      } else {
         return $this->render('student/new.html.twig', array(
            'form' => $form->createView(),
         ));
      }
   }
}
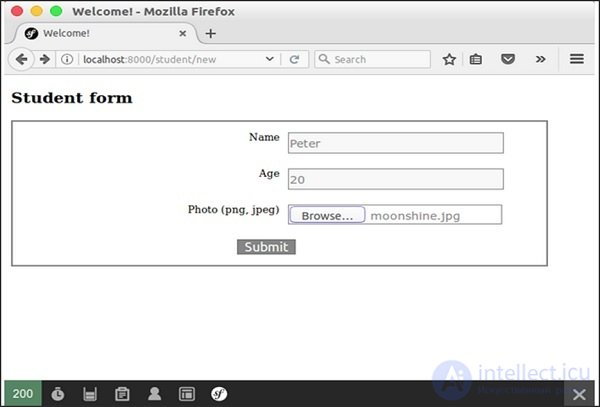
Here we created a form for the student and handled the request. When the form is submitted by the user and it is valid, we moved the uploaded file to the upload directory using the photos_directory parameter.
Step 4 — Create the view new.html.twig , using the following form tags.
{% extends 'base.html.twig' %}
{% block javascripts %}
{% endblock %}
{% block stylesheets %}
{% endblock %}
{% block body %}
Student form
{{ form_start(form) }}
{{ form_widget(form) }}
{{ form_end(form) }}
{% endblock %}
Step 5 — Set the photos_directory parameter in the parameters configuration file as follows.
parameters: photos_directory: '%kernel.root_dir%/../web/uploads/photos'
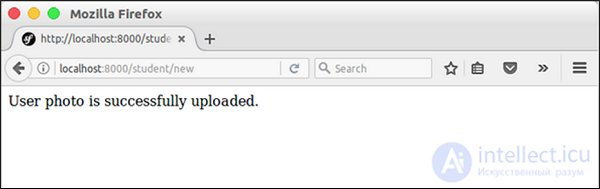
Step 6 — Now run the application, open http: // localhost: 8000 / student / new and upload a photo. The uploaded photo will be saved to the photos_directory, and a success message will be displayed.
AJAX is a modern technology in web programming. It provides options for sending and receiving data on a web page asynchronously, without reloading the page. Let us learn Symfony AJAX programming in this chapter.
The Symfony framework provides options for identifying whether a request type is AJAX or not. The Request class of the Symfony HttpFoundation component has an isXmlHttpRequest() method for this purpose. If an AJAX request is made, the isXmlHttpRequest() method of the current request object returns true, otherwise — false.
This method is used to properly handle the AJAX request on the server side.
if ($request->isXmlHttpRequest()) {
   // Ajax request
} else {
   // Normal request
}
Symfony also provides a JSON-based Response class, JsonResponse, for building a JSON response. We can combine these two methods to build a simple and clean AJAX-based web application.
Let us add a new page, student / ajax, to the student application and try to fetch the student information asynchronously.
Step 1 — Add the ajaxAction method to StudentController (src / AppBundle / Controller / StudentController.php).
/**
   * @Route("/student/ajax")
*/
public function ajaxAction(Request $request) {
   $students = $this->getDoctrine()
      ->getRepository('AppBundle:Student')
      ->findAll();

   if ($request->isXmlHttpRequest() || $request->query->get('showJson') == 1) {
      $jsonData = array();
      $idx = 0;
      foreach($students as $student) {
         $temp = array(
            'name' => $student->getName(),
            'address' => $student->getAddress(),
         );
         $jsonData[$idx++] = $temp;
      }
      return new JsonResponse($jsonData);
   } else {
      return $this->render('student/ajax.html.twig');
   }
}
Here, if the request is AJAX, we fetch the student information, encode it as JSON, and return it using a JsonResponse object. Otherwise, we simply render the corresponding view.
Step 2 — Create the view file ajax.html.twig in the student views directory, app / Resources / views / student / and add the following code.
{% extends 'base.html.twig' %}
{% block javascripts %}
{% endblock %}
{% block stylesheets %}
{% endblock %}
{% block body %}
Load student information
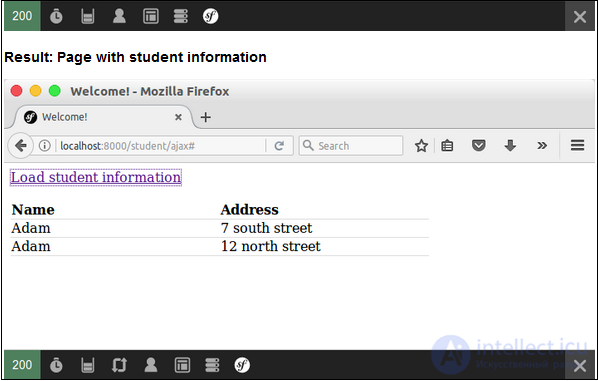
Here we created an anchor tag (id: loadstudent) to load the student information using an AJAX call. The AJAX call is executed using jQuery. The event attached to the loadstudent tag fires when the user clicks on it. It then fetches the student information using an AJAX call and dynamically generates the required HTML.
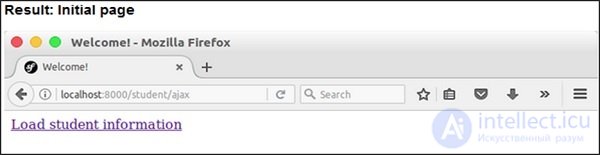
Step 3. Finally, run the application, http: // localhost: 8000 / student / ajax and click the “Load student information” link.
The Symfony HttpFoundation component provides cookie and session management in an object-oriented way. A Cookie stores data on the client side and only supports a small amount of data. This is typically 2KB per domain, and it depends on the browser. A Session stores data on the server side and supports a large amount of data. Let us see how to create a cookie and a session in a Symfony web application.
Symfony provides the Cookie class for creating a cookie element. Let us create a color cookie that expires in 24 hours with the value blue . The constructor parameters of the Cookie class are as follows.
use Symfony\Component\HttpFoundation\Cookie;
$cookie = new Cookie('color', 'green', strtotime('tomorrow'), '/',
   'somedomain.com', true, true);
Symfony also provides the following option for creating cookies from strings.
$cookie = Cookie::fromString('color = green; expires = Web, 4-May-2017 18:00:00 +0100;
path=/; domain = somedomain.com; secure; httponly');
Now the created cookie must be attached to the header of the http response object as follows.
$response->headers->setCookie($cookie);
To retrieve a cookie, we can use the request object as follows.
$cookie = $request->cookie->get('color');
Here request-> cookie is of type PropertyBag, and we can manipulate it using PropertyBag's methods.
Symfony provides the Session class, which implements the SessionInterface interface. The important session API is as follows,
start — starts the session
Session $session = new Session();
$session->start();
invalidate — clears all session data and regenerates the session id.
set — stores data in the session using a key.
$session->set('key', 'value');
We can use any data as the session value, from a simple integer to complex objects.
get — retrieves data from the session using a key.
$val = $session->get('key');
remove — removes a key from the session.
clear — clears the session data
The session provides another useful feature called FlashBag . This is a special container within the session that holds data only until the next page redirect. This is useful in http redirects. Before redirecting to a page, data can be stored in the FlashBag instead of the normal session container, and the stored data will be available on the next request (the redirected page). The data is then automatically invalidated.
$session->getFlashBag()->add('key', 'value');
$session->getFlashBag()->get('key');
Internationalization (i18n) and localization (l10n) help extend a web application's customer reach. Symfony provides an excellent translation component for this purpose. Let us learn how to use the translation component in this chapter.
By default, the Symfony web framework disables the “Translation” component. To enable it, add a translator section to the configuration file, app / config / config.yml.
framework: translator: { fallbacks: [en] }
The translation component translates text using a translation resource file. The resource file can be written in PHP, XML, and YAML. The default resource file location is app / Resources / translations . One resource file is required per language. Let us write the resource file messages.fr.yml for French.
I love Symfony: J'aime Symfony
I love %name%: J'aime %name%
The text on the left is written in English, and on the right — in French. The second line shows the use of a placeholder. Placeholder information can be added dynamically when using the translation.
By default, the user's default system locale is set by the Symfony web framework. If a default locale is not configured in the web application, it will fall back to English. The locale can also be specified in the web page's URL.
http://www.somedomain.com/en/index
http://www.somedomain.com/fr/index
Let us use our URL-based locale in our example to easily understand the concept of translation. Create a new function translationSample with the route / {_ locale} / translation / sample in DefaultController (src / AppBundle / Controller / DefaultController.php). {_locale} is a special keyword in Symfony for specifying the default locale.
/**
   * @Route("/{_locale}/translation/sample", name="translation_sample")
*/
public function translationSample() {
   $translated = $this->get('translator')->trans('I love Symfony');
   return new Response($translated);
}
Here we used the translation method trans , which translates the content into the current locale. In this case, the current locale is the first part of the URL. Now run the application and load the page, http: // localhost: 8000 / en / translation / sample, in the browser.
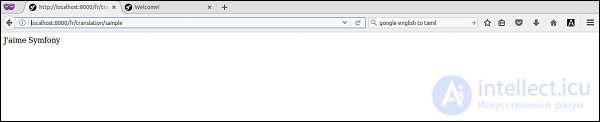
The result will be “I love Symfony” in English. Now load the page http: // localhost: 8000 / fr / translation / sample in the browser. Now the text will be translated into French as follows.
Similarly, the Twig template has a {% trans%}, block to enable the translation feature in views. To test this, add a new function translationTwigSample and the corresponding view in app / Resources / views / translate / index.html.twig .
/**
   * @Route("/{_locale}/translation/twigsample", name="translation_twig_sample")
*/
public function translationTwigSample() {
   return $this->render('translate/index.html.twig');
}
{% extends 'base.html.twig' %}
{% block body %}
   {% trans with {'%name%': 'Symfony'} from "app" into "fr" %}I love %name% {% endtrans %}
{% endblock %}
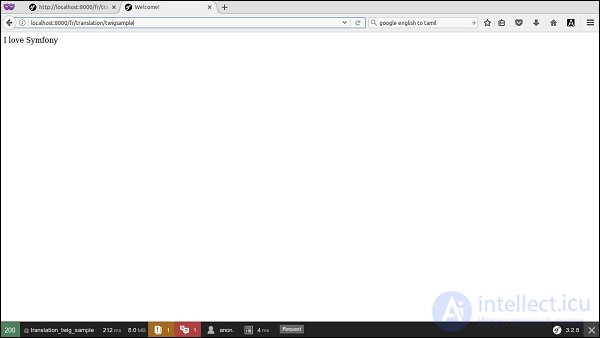
Here the trans block also specifies a placeholder. The page result is as follows.
Logging is very important for a web application. Web applications are used by hundreds and thousands of users simultaneously. To get a preview of the events happening around the web application, logging must be enabled. Without logging, a developer will not be able to find the status of the application. Let us assume that the end customer reports an issue, or the project stakeholder reports a performance problem — then the first tool for the developer is logging. By examining the log data, one can get an idea of the possible cause of the problem.
Symfony provides an excellent logging feature by integrating the Monolog logging library. Monolog is the de-facto standard for logging in the PHP environment. Logging is enabled in every Symfony web application and is provided as a service. Simply get the logger object using the base controller as follows.
$logger = $this->get('logger');
Once the logger object is fetched, we can log information, warnings and errors using it.
$logger->info('Hi, It is just a information. Nothing to worry.');
$logger->warn('Hi, Something is fishy. Please check it.');
$logger->error('Hi, Some error occured. Check it now.');
$logger->critical('Hi, Something catastrophic occured. Hurry up!');
The Symfony web application configuration file app / config / config.yml contains a separate section for the logger framework. It can be used to update the working of the logger framework.
Email functionality is the most sought-after feature in a web environment. Even a simple application will have a contact form, and the details will be sent to the system administrator via email. Symfony integrates SwiftMailer , the best email module available for PHP on the market. SwiftMailer is an excellent email library that lets you send email using anything from old-school sendmail to the newest cloud-based mail application.
Let us understand the concept of mailing in Symfony by sending a simple email. Before writing the mailer functionality, configure the mailer configuration details in app / config / parameters.yml . Then create a new function, MailerSample , in DefaultController and add the following code.
/**
   * @Route("/mailsample/send", name="mail_sample_send")
*/
public function MailerSample() {
   $message = \Swift_Message::newInstance()
      ->setSubject('Hello Email')
      ->setFrom('someone@gmail.com')
      ->setTo('anotherone@gmail.com')
      ->setBody(
      $this->renderView('Emails/sample.html.twig'), 'text/html' );

   $this->get('mailer')->send($message);
   return new Response("Mail send");
}
Here, we simply created a message using the SwiftMailer, component and rendered the message body using the Twig template. Then we fetched the mailer component from the controller’s get method with the key ‘mailer’. Finally, we sent the message using the send method, and printed Mail send .
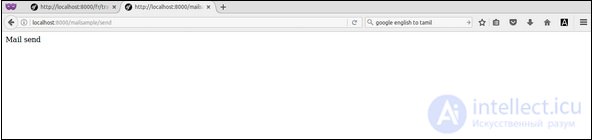
Now run the page http: // localhost: 8000 / mailsample / send, and the result will be as follows.
Unit testing is essential for continuous development in large projects. Unit tests automatically test the components of your application and tell you when something is not working. Unit testing can be done manually, but it is often automated.
The Symfony framework integrates with the PHPUnit unit testing framework. To write a unit test for the Symfony framework, we need to set up PHPUnit. If PHPUnit is not installed, download and install it. If it is installed correctly, then you will see the following response.
phpunit
PHPUnit 5.1.3 by Sebastian Bergmann and contributors
A unit test — is a test against a single PHP class, also called a unit.
Create a Student class in the Libs / AppBundle directory. It is located at “src / AppBundle / Libs / Student.php” .
namespace AppBundle\Libs;

class Student {
   public function show($name) {
      return $name. “ , Student name is tested!”;
   }
}
Now create a StudentTest file in the “tests / AppBundle / Libs” directory.
namespace Tests\AppBundle\Libs;
use AppBundle\Libs\Student;

class StudentTest extends \PHPUnit_Framework_TestCase {
   public function testShow() {
      $stud = new Student();
      $assign = $stud->show(‘stud1’);
      $check = “stud1 , Student name is tested!”;
      $this->assertEquals($check, $assign);
   }
}
To run the test in the directory, use the following command.
$ phpunit
After executing the above command, you will see the following response.
PHPUnit 5.1.3 by Sebastian Bergmann and contributors. Usage: phpunit [options] UnitTest [UnitTest.php] phpunit [options]Code Coverage Options: --coverage-clover Generate code coverage report in Clover XML format. --coverage-crap4j Generate code coverage report in Crap4J XML format. --coverage-html Generate code coverage report in HTML format.
Now run the tests in the Libs directory as follows.
$ phpunit tests/AppBundle/Libs
Time: 26 ms, Memory: 4.00Mb
OK (1 test, 1 assertion)
In this chapter, we will learn about some advanced concepts in the Symfony framework.
Caching in a web application improves performance. For example, hot products in a shopping cart web application can be cached for a limited time, so that they can be presented to the customer quickly, without hitting the database. The following are some basic cache components.
A cache item — is a unit of information stored as a key / value pair. The key must be a string, and the value can be any PHP object. PHP objects are stored as a string by serialization and are converted back to objects when the items are read.
A cache adapter — is the actual mechanism for storing an item in the store. The store can be memory, a file system, a database, Redis, and so on. The Cache component provides the AdapterInterface, through which the adapter can store the cache item in the internal storage. There are many built-in cache adapters. A few of them are as follows:
Array Cache Adapter — cache items are stored in a PHP array.
Filesystem Cache Adapter — cache items are stored in files.
PHP Files Cache Adapter — cache items are stored as php files.
APCu Cache Adapter — cache items are stored in shared memory using the PHP APCu extension.
Redis Cache Adapter — cache items are stored on a Redis server.
PDO and Doctrine DBAL Cache Adapter — cache items are stored in a database.
Chain Cache Adapter — combines several cache adapters for replication purposes.
Proxy Cache Adapter — cache items are stored using a third-party adapter that implements CacheItemPoolInterface.
Array Cache Adapter — cache items are stored in a PHP array.
Filesystem Cache Adapter — cache items are stored in files.
PHP Files Cache Adapter — cache items are stored as php files.
APCu Cache Adapter — cache items are stored in shared memory using the PHP APCu extension.
Redis Cache Adapter — cache items are stored on a Redis server.
PDO and Doctrine DBAL Cache Adapter — cache items are stored in a database.
Chain Cache Adapter — combines several cache adapters for replication purposes.
Proxy Cache Adapter — cache items are stored using a third-party adapter that implements CacheItemPoolInterface.
Cache Pool — is a logical store of cache items. Cache pools are implemented by cache adapters.
Let us create a simple application to understand the concept of caching.
Step 1 — Create a new application, cache-example .
cd /path/to/app
mkdir cache-example
cd cache-example
Step 2 — Install the cache component.
composer require symfony/cache
Step 3 — Create a filesystem adapter.
require __DIR__ . '/vendor/autoload.php';
use Symfony\Component\Cache\Adapter\FilesystemAdapter;
$cache = new FilesystemAdapter();
Step 4 — Create a cache item using the adapter's getItem and set methods. getItem retrieves a cache item using its key. if the key is not present, it creates a new item. The set method stores the actual data.
$usercache = $cache->getitem('item.users');
$usercache->set(['jon', 'peter']);
$cache->save($usercache);
Step 5 — Access the cache item using the getItem, isHit and get methods. isHit reports whether the cache item is available, and the get method provides the actual data.
$userCache = $cache->getItem('item.users');
if(!$userCache->isHit()) {
   echo "item.users is not available";
} else {
   $users = $userCache->get();
   var_dump($users);
}
Step 6 — Remove a cache item using the deleteItem method.
$cache->deleteItem('item.users');
The complete code list is as follows.
getitem('item.users');
   $usercache->set(['jon', 'peter']);
   $cache->save($usercache);
   $userCache = $cache->getItem('item.users');

   if(!$userCache->isHit()) {
      echo "item.users is not available";
   } else {
      $users = $userCache->get();
      var_dump($users);
   }
   $cache->deleteItem('item.users');
?>
array(2) {
    =>
   string(3) "jon"
    =>
   string(5) "peter"
}
Debugging is one of the most frequent activities in application development. Symfony provides a separate component to ease the debugging process. We can enable Symfony's debugging tools simply by calling the enable method of the Debug class.
use Symfony\Component\Debug\Debug
Debug::enable()
Symfony provides two classes, ErrorHandler and ExceptionHandler for debugging. While ErrorHandler catches PHP errors and converts them into exceptions, ErrorException or FatalErrorException, ExceptionHandler catches unhandled PHP exceptions and converts them into a useful PHP response. ErrorHandler and ExceptionHandler are disabled by default. We can enable it using the register method.
use Symfony\Component\Debug\ErrorHandler;
use Symfony\Component\Debug\ExceptionHandler;
ErrorHandler::register();
ExceptionHandler::register();
In a Symfony web application, the debugging environment is provided by the DebugBundle. Register the bundle in AppKernel's registerBundles method to enable it.
if (in_array($this->getEnvironment(), ['dev', 'test'], true)) {
   $bundles[] = new Symfony\Bundle\DebugBundle\DebugBundle();
}
Application development requires a world-class profiling tool. A profiling tool collects all the information about the application's runtime, such as execution time, the execution time of individual units, the time spent on database actions, memory usage, and so on. A web application requires much more information, such as request time, the time needed to generate a response, and so on, in addition to the above metrics.
Symfony resolves all such information in a web application by default. Symfony provides a separate bundle for web profiling, called the WebProfilerBundle . The web profiler bundle can be enabled in a web application by registering the bundle in AppKernel's registerBundles method.
if (in_array($this->getEnvironment(), ['dev', 'test'], true)) {
   $bundles[] = new Symfony\Bundle\WebProfilerBundle\WebProfilerBundle();
}
The web profiler component can be configured in the web_profile section of the application configuration file, app / config / config.xml.
web_profiler:
   toolbar:      false
   position:     bottom
The Symfony application shows the profiled data at the bottom of the page as a separate section.
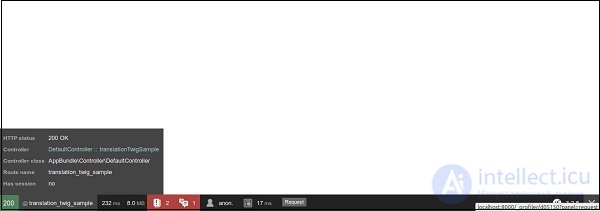
Symfony also provides a simple way to add custom page data to the profile data, using the DataCollectorInterface and a twig template. In short, Symfony lets a web developer build world-class applications by providing an excellent profiling environment with relative simplicity.
As discussed earlier, Symfony provides a robust security framework through its security component. The security component is split into four sub-components as follows.
Let us study the concept of authentication and authorization with a simple demo application.
Step 1. Create a new security web application demo using the following command.
symfony new securitydemo
Step 2 — Enable the security feature in the application using the security configuration file. Security-related configuration is located in a separate security.yml file. The default configuration is as follows.
security:
   providers:
      in_memory:
         memory: ~
   firewalls:
      dev:
         pattern: ^/(_(profiler|wdt)|css|images|js)/
         security: false
   main:
      anonymous: ~
      #http_basic: ~
      #form_login: ~
The default configuration provides a memory-based security provider and anonymous access to all pages. The firewall section excludes files matching the pattern, ^ / (_ (profiler | wdt) | css | images | js) / from the security framework. The default pattern includes stylesheets, images and Java scripts (as well as development tools such as the profiler).
Step 3 — Enable HTTP-based system authentication by adding the http_basic parameter to the main section as follows.
security:
   # ...
   firewalls:
      # ...
      main:
         anonymous: ~
         http_basic: ~
         #form_login: ~
Step 4 — Add some users to the memory provider section. Also add roles for the users.
security:
   providers:
      in_memory:
         memory:
            users:
               myuser:
                  password: user
                  roles: 'ROLE_USER'
                     myadmin:
                        password: admin
                        roles: 'ROLE_ADMIN'
We added two users: user with role ROLE_USER and admin with role ROLE_ADMIN.
Step 5 — Add an encoder to get full information about the currently logged-in user. The purpose of the encoder is to get full information about the current user object from the web request.
security:
   # ...
   encoders:
      Symfony\Component\Security\Core\User\User: bcrypt
      # ...
Symfony provides the UserInterface interface to get user details such as username, roles, password, etc. We need to implement the interface according to our requirements and configure it in the encoders section.
For example, let us consider that user data is located in a database. Then we need to create a new User class and implement the UserInterface methods to fetch user details from the database. Once the data is available, the security system uses it to allow / deny the user. Symfony provides a default User implementation for the memory provider. The algorithm is used to decrypt the user's password.
Step 6 — Encrypt the user's password using the bcrypt algorithm and place it in the configuration file. Since we used the bcrypt algorithm, the User object tries to decrypt the password specified in the configuration file, and then tries to match it against the password entered by the user. The Symfony console application provides a simple command to encrypt a password.
php bin/console security:encode-password admin
Symfony Password Encoder Utility
================================
------------------ -----------------------------------
Key   Value
------------------ ------------------------------------
Encoder used       Symfony\Component\Security\Core\Encoder\BCryptPasswordEncoder
Encoded password
$2y$12$0Hy6/.MNxWdFcCRDdstHU.hT5j3Mg1tqBunMLIUYkz6..IucpaPNO
------------------ ------------------------------------
! [NOTE] Bcrypt encoder used: the encoder generated its own built-in salt.
[OK] Password encoding succeeded
Step 7 — Use the command to generate the encrypted password and update it in the configuration file.
# To get started with security, check out the documentation:
# http://symfony.com/doc/current/security.html
   security:
      # http://symfony.com/doc/current/security.html#b-configuring-how-users-are-loaded
      providers:
         in_memory:
            memory:
               users:
                  user:
                     password: $2y$13$WsGWNufreEnVK1InBXL2cO/U7WftvfNvH
                     Vb/IJBH6JiYoDwVN4zoi
                     roles: 'ROLE_USER'
                     admin:
                        password: $2y$13$jQNdIeoNV1BKVbpnBuhKRuOL01NeMK
                        F7nEqEi/Mqlzgts0njK3toy
                        roles: 'ROLE_ADMIN'

         encoders:
            Symfony\Component\Security\Core\User\User: bcrypt
         firewalls:
            # disables authentication for assets and the profiler,
            # adapt it according to your needs
         dev:
            pattern: ^/(_(profiler|wdt)|css|images|js)/
         security: false
         main:
            anonymous: ~
            # activate different ways to authenticate
            # http://symfony.com/doc/current/security.html#a-co
            nfiguring-howyour-users-will-authenticate
            http_basic: ~
            # http://symfony.com/doc/current/cookbook/security/
            form_login_setup.html
            #form_login: ~
Step 8 — Now apply security to some section of the application. For example, restrict the admin section to users with the ROLE_ADMIN role.
security:
   # ...
      firewalls:
         # ...
      default:
         # ...
      access_control:
         # require ROLE_ADMIN for /admin*
         - { path: ^/admin, roles: 'ROLE_ADMIN' }
Step 9 — Add the admin page to DefaultController as follows.
/**
   * @Route("/admin")
*/
public function adminLandingAction() {
   return new Response('This is admin section.');
}
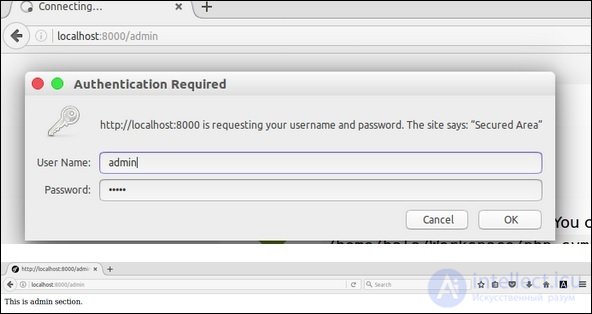
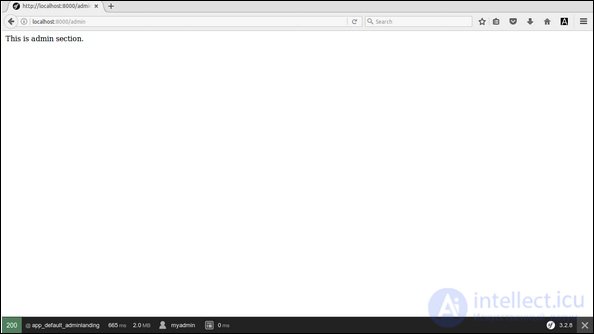
Step 10 — Finally, go to the admin page to test the security settings in the browser. The browser will prompt for a username and password and will only allow access to configured users.
Workflow — is an advanced concept that is used in many enterprise applications. In an e-commerce application, the process of delivering a product represents a workflow. The product is first paid for (order creation), purchased from the store and packed (packing / ready to ship) and shipped to the user. If there are any issues, the product is returned by the user, and the order is canceled. The order of the flow of actions is very important. For example, we cannot ship an item without billing it.
The Symfony component provides an object-oriented way to define and manage a workflow. Each step in the process is called a place, and the action needed to move from one place to another is called a transition . The collection of places and transitions that make up a workflow is called a workflow definition .
Let us understand the concept of workflow by creating a simple application to manage leaves.
Step 1 — Create a new application, workflow-example .
cd /path/to/dev
mkdir workflow-example

cd workflow-example
composer require symfony/workflow
Step 2 — Create a new class, Leave , with the apply_by, left_on and status attributes.
class Leave {
   public $applied_by;
   public $leave_on;
   public $status;
}
Here, “application_by” refers to the employee who wants to take leave. leave_on refers to the date of the leave. status refers to the status of the leave.
Step 3 — Leave management has four places: applied, in_process and approved / rejected.
use Symfony\Component\Workflow\DefinitionBuilder;
use Symfony\Component\Workflow\Transition;
use Symfony\Component\Workflow\Workflow;
use Symfony\Component\Workflow\MarkingStore\SingleStateMarkingStore;
use Symfony\Component\Workflow\Registry;
use Symfony\Component\Workflow\Dumper\GraphvizDumper;

$builder = new DefinitionBuilder();
$builder->addPlaces(['applied', 'in_process', 'approved', 'rejected']);
Here, we created a new definition using DefinitionBuilder and added places using the addPlaces method.
Step 4 — Define the actions needed to move from one place to another.
$builder->addTransition(new Transition('to_process', 'applied', 'in_process'));
$builder->addTransition(new Transition('approve', 'in_process', 'approved'));
$builder->addTransition(new Transition('reject', 'in_process', 'rejected'));
Here we have three transitions, to_process, approve and reject . The to_process transition accepts a leave application and moves the place from applied to in_process. The approve transition approves the leave application and moves the place to approved. Similarly, the reject transition rejects the leave application and moves the place to rejected. We created all the transitions using the addTransition method.
Step 5 — Build the definition using the build method.
$definition = $builder->build();
Step 6 — Optionally, the definition can be dumped in a graph dot format, which can be converted into an image file for reference purposes.
$dumper = new GraphvizDumper();
echo $dumper->dump($definition);
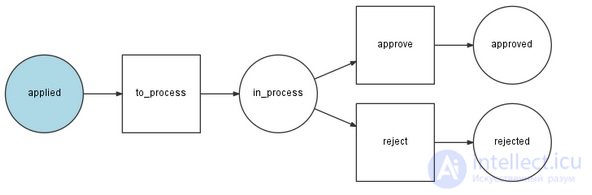
Step 7 — Create a marking store that will hold the current place / status of the object.
$marking = new SingleStateMarkingStore('status');
Here we used the SingleStateMarkingStore class to create the marking, and it marks the current status in the status property of the object. In our example, the object is the Leave object.
Step 8 — Create the workflow using the definition and the marking.
$leaveWorkflow = new Workflow($definition, $marking);
Here we used the Workflow class to create the workflow.
Step 9 — Add the workflow to the workflow framework's registry, using the Registry class.
$registry = new Registry();
$registry->add($leaveWorkflow, Leave::class);
Step 10 — Finally, use the workflow to determine whether a given transition applies, using the can method, and if so, apply the transition using the apply method. When a transition is applied, the status of the object moves from one place to another.
$workflow = $registry->get($leave);
echo "Can we approve the leave now? " . $workflow->can($leave, 'approve') . "\r\n";
echo "Can we approve the start process now? " . $workflow->can($leave, 'to_process') . "\r\n";

$workflow->apply($leave, 'to_process');
echo "Can we approve the leave now? " . $workflow->can($leave, 'approve') . "\r\n";
echo $leave->status . "\r\n";

$workflow->apply($leave, 'approve');
echo $leave->status . "\r\n";
The complete code is as follows:
addPlaces(['applied', 'in_process', 'approved', 'rejected']);
   $builder->addTransition(new Transition('to_process', 'applied', 'in_process'));
   $builder->addTransition(new Transition('approve', 'in_process', 'approved'));
   $builder->addTransition(new Transition('reject', 'in_process', 'rejected'));
   $definition = $builder->build();

   // $dumper = new GraphvizDumper();
   // echo $dumper->dump($definition);

   $marking = new SingleStateMarkingStore('status');
   $leaveWorkflow = new Workflow($definition, $marking);
   $registry = new Registry();
   $registry->add($leaveWorkflow, Leave::class);

   $leave = new Leave();
   $leave->applied_by = "Jon";
   $leave->leave_on = "1998-12-12";
   $leave->status = 'applied';

   $workflow = $registry->get($leave);
   echo "Can we approve the leave now? " . $workflow->can($leave, 'approve') . "\r\n";
   echo "Can we approve the start process now? " . $workflow->can($leave, 'to_process') . "\r\n";

   $workflow->apply($leave, 'to_process');
   echo "Can we approve the leave now? " . $workflow->can($leave, 'approve') . "\r\n";
   echo $leave->status . "\r\n";

   $workflow->apply($leave, 'approve');
   echo $leave->status . "\r\n";
?>
Can we approve the leave now?
Can we approve the start process now? 1
Can we approve the leave now? 1
in_process
approved
In any modern application, a REST service is one of the core fundamental building blocks. Whether it is a web application or a handy mobile application, the front end is usually a well-designed interface to back-end REST services. Symfony REST Edition provides a ready-made template for launching our REST-based web application.
Let us learn how to install a REST application template using the Symfony REST edition.
Step 1 — Download the Symfony REST Edition using the following command.
composer create-project gimler/symfony-rest-edition --stability=dev path/to/install
This will download the Symfony REST Edition.
Step 2 — Try configuring it by answering a few questions. For all the questions, choose the default answer, except for the database. For the database, choose pdo_sqlite. You may need to enable the sqlite extension in PHP if it is not already installed.
Step 3 — Now run the application using the following command.
php app/console server:run
Step 4 — Finally, open the application in the browser using http: // localhost: 8000 /.
This will give the following result —
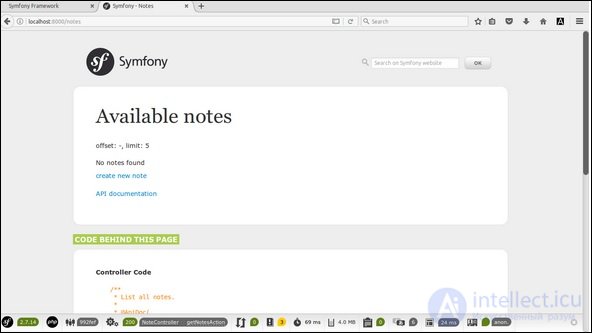
A content management system is one of the largest markets in the web application scenario. There are many frameworks available for content management systems, in practically every language under the sun. Most frameworks are easy for the end user to work with, but very hard to work with as a developer, and vice versa.
Symfony provides the developer with a simple and convenient framework. It has all the core features expected by the end user. In short, the responsibility of satisfying the end consumer falls on the developer.
Let us see how to
продолжение следует...
Часть 1 Symfony - an overview of its features with examples
Часть 2 Controller - Symfony - an overview of its features with
Часть 3 Validation Example - Symfony - an overview of its features
Часть 4 Step 1: Create the Project - Symfony - an overview

Comments