Lecture
Interaction Resizable adds manipulators to the element, moving which the user can scale the element by resizing it. Some browsers automatically provide this option for text areas, but the Resizable interaction provides the ability to scale this for any element in the document. An example of using this type of interaction, which is implemented using the resizable () method , is shown below:
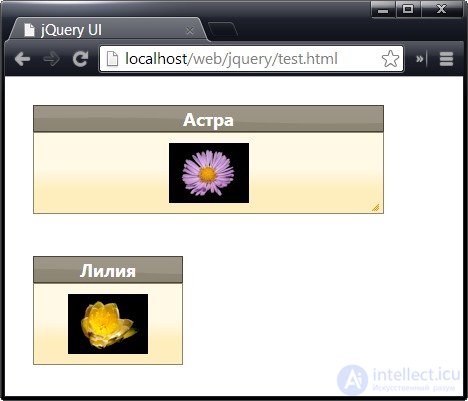
<!DOCTYPE html> <html> <head> <meta charset="utf-8"> <title>jQuery UI</title> <script src="//ajax.googleapis.com/ajax/libs/jquery/1.10.2/jquery.min.js"></script> <script src="//ajax.aspnetcdn.com/ajax/jquery.ui/1.10.3/jquery-ui.min.js"></script> <link rel="stylesheet" href="http://ajax.aspnetcdn.com/ajax/jquery.ui/1.10.3/themes/sunny/jquery-ui.css"> <style type="text/css"> #astor, #lily {text-align: center; width: 150px; float: left; margin: 20px} #astor img, #lily img {display: block; margin: auto} </style> <script type="text/javascript"> $(function() { $('#astor').resizable({ alsoResize: "#astor img" }); }); </script> </head> <body> <div id="astor" class="ui-widget"> <div class="ui-widget-header">Астра</div> <div class="ui-widget-content" style="padding:10px"> <img src="http://professorweb.ru/downloads/jquery/astor.png" /> </div> </div> <div id="lily" class="ui-widget"> <div class="ui-widget-header">Лилия</div> <div class="ui-widget-content" style="padding:10px"> <img src="http://professorweb.ru/downloads/jquery/lily.png" /> </div> </div> </body> </html> Запустить пример In this example, two div elements are created, each containing an img element and text. In the script, one of them is selected, and the resizable () method is applied to it (using the parameter alsoResize, which will be described later). The jQuery UI library adds a manipulator to the selected element that allows you to change the vertical and horizontal dimensions of the element, as can be seen in the figure. In the figure, the element is represented with an increased height and a reduced width:

To configure the Resizable interaction, the properties described in the table below are used. Interaction Resizable depends on the interaction Draggable. This means that in addition to the settings in the table, you can use the Draggable interaction settings, including such as delay, distance, grid, and containment.
| Property | Description |
|---|---|
| alsoResize | The selector used to select elements whose dimensions should change simultaneously with the dimensions of the element to which the Resizable interaction is applied. The default value is false, it means the absence of such elements. |
| aspectRatio | If the value of this option is true, the element will be resized with the aspect ratio preserved. The default is true. |
| autoHide | If the value of this option is true, then the manipulators become visible only when the mouse pointer is over the element. The default is false. |
| ghost | If the value of this option is true, then when the element is resized, the translucent contours will be visible, reflecting the new element dimensions. The default is true. |
| handles | Determines where the manipulators will be located. Supported values are shown below. |
| maxHeight | Specifies the maximum height to which the element can be resized. The default value is null, it means no restrictions. |
| maxWidth | Specifies the maximum width to which the element can be resized. The default is null. |
| minHeight | Specifies the minimum height to which the element can be resized. |
| minWidth | Specifies the minimum height to which the element can be resized. |
In my opinion, the most common option in setting up the Resizable interaction is the alsoResize option. With its help, you can define additional elements whose dimensions will change simultaneously with the size of the element to which the resizable () method has been applied. I use this option mainly to provide synchronous resizing of elements along with the size of their parent elements.
We already used this feature in the previous example, defining the simultaneous resizing of the img and div elements. First of all, let's see what happens if the option withResize is not used. The corresponding code is shown in the example below:
$(function() { $('#astor').resizable(); }); If the alsoResize option is not used, only the dimensions of the div element are changed. The dimensions of the elements contained in it remain unchanged. What happens when this is shown in the figure:

Sometimes this is exactly the result that I need to get, but personally I use the option alsoResize in almost all cases of using Resizable interactions. In this parameter, I like the fact that the selection of suitable elements is not limited to the contents of the element whose dimensions change. With this option, you can specify any other element, as shown in the example below:
$(function() { $('#astor').resizable({ alsoResize: "img, #lily" }); }); In this scenario, the selection of elements is expanded to include other div and img elements. Thus, when resizing a single div element, jQuery UI will resize four elements at once. The result is shown in the picture:

You can limit the resizing limits of scalable elements by using the maxHeight, maxWidth, minHeight, and minWidth options. The values of these options can be numbers expressing the number of pixels, or null. An example of using these settings is shown below:
$(function() { $('#astor').resizable({ alsoResize: "#astor img", maxWidth: 200, maxHeight: 150 }); }); The default setting for minHeight and minWidth is 10 pixels. With smaller values, jQuery UI will not be able to display the handles, which means that the user will not be able to increase the size of the element again. Therefore, lower values should be used with caution.
Using the handles option, you can determine which edges and corners are allowed to move to resize the element. As the value of this option, you can specify all (all edges and corners are moved) or any combination of compass points (n, e, s, w, ne, se, nw, sw) defining individual edges and corners.
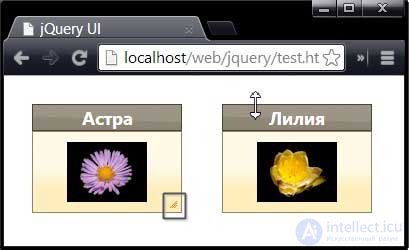
You can specify multiple values separated by commas. The default value is e, s, se, which means that the lower right corner (se), as well as the right (e) and lower (s) edge will be moved. The diagonal movement manipulator is displayed only in the lower right corner and only if the value of the handles option contains se. When you hover the mouse pointer over other edges or corners, the appearance of the pointer will change, displaying the possible directions of movement of this edge or fragile.
An example of using the handles option is shown below:
$(function() { $('#astor').resizable({ alsoResize: "#astor img" }); $('#lily').resizable({ alsoResize: "#lily img", handles: "n, s, e, w" }); }); In this scenario, a Resizable interaction is applied to both div elements, and for one of them a non-standard set of manipulators is defined:

Comments
To leave a comment
Scripting client side JavaScript, jqvery, BackBone
Terms: Scripting client side JavaScript, jqvery, BackBone