
Lecture
In modern 3D engines (Unity, Unreal Engine, etc.), lighting is one of the most resource-intensive processes.
To achieve a high FPS and good visual quality, lighting must be optimized properly.
Using baked lighting:
Suitable for static objects and scenes.
Calculated in advance, which greatly reduces the load on the GPU.
Unity: Lighting → Lightmapping.
Light Probes and Reflection Probes:
Light Probes interpolate lighting for dynamic objects based on the surrounding baked lighting.
Reflection Probes create realistic reflections without expensive real-time reflections.
LOD and shadow optimization:
Disabling or replacing shadows with cheaper alternatives (for example, blob shadows).
Using Cascaded Shadow Maps only near the camera.
Using lighting with a low update frequency (Mixed or Realtime + Distance-based updates).
Limiting the number of light sources:
Real-time light sources should be Directional or Spot whenever possible.
Avoid using many Point Lights with real-time shadows.
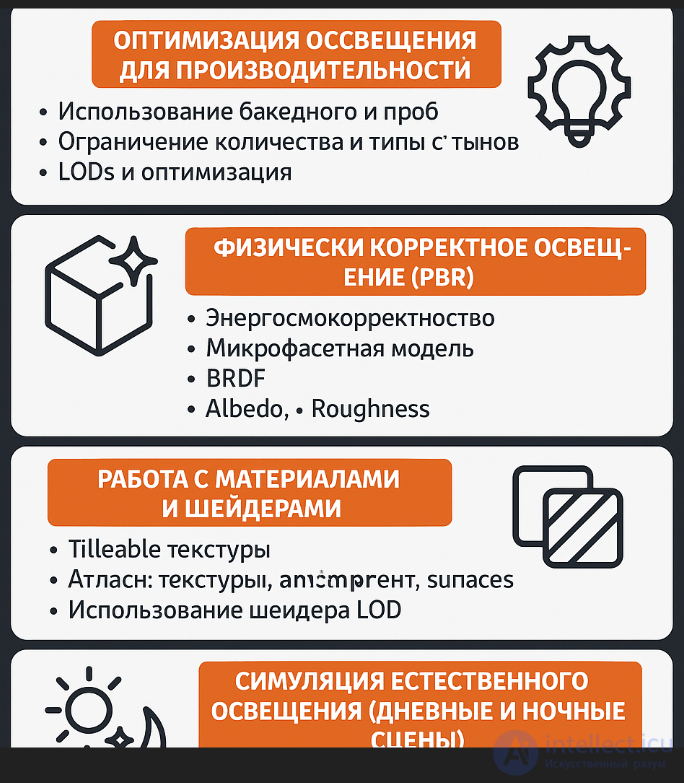
PBR is an approach to rendering in which materials and lighting are modeled based on the physical properties of the real world.
Energy conservation: Light cannot reflect more strongly than it arrives.
Microfacet model: A surface consists of microscopic facets that reflect light differently.
BRDF (Bidirectional Reflectance Distribution Function): Describes how light is reflected from a surface.
Albedo (Base Color): The color of the material without lighting.
Metallic: A value from 0 (dielectric) to 1 (metal).
Roughness (or Smoothness): The smoothness of the surface. The higher the roughness, the more scattered the reflection.
Normal Map: Surface detail without increasing polygon count.
AO (Ambient Occlusion): Self-shadowing in corners and crevices.
The Standard Shader is used, which fully supports PBR.
You can work with HDRP (High Definition Render Pipeline) for more realistic lighting.
Materials in game engines are combinations of textures and parameters that determine how an object interacts with light.
Use tileable (seamless) textures.
Watch the resolution: 2K and 4K textures should be used only for key objects.
Combine textures into a single Texture Atlas for optimization.
A shader is a program that runs on the GPU and controls the rendering of pixels and vertices.
Types of shaders:
Vertex Shader — processes vertices.
Fragment (Pixel) Shader — processes pixels.
Surface Shader (Unity) — an abstraction over low-level shaders that simplifies the work.
Avoid complex mathematical operations in fragment shaders.
Profile performance (Unity Profiler, Frame Debugger).
Use shader levels of detail (Shader LOD).
The principle of writing a simple post-processing shader (image effect shader) in Unity that changes brightness, contrast, and saturation is based on manipulating the final image on screen.
Here is an example of such a simple shader plus a C# script that can be used as a camera effect:
| Stage | Purpose |
|---|---|
| Properties | Parameters visible in the inspector |
| SubShader / Pass | How to render the object (one or more passes) |
| Vertex Shader | Determines where vertices are located on screen |
| Fragment Shader | Determines the color of each pixel |
| Sampler2D / Textures | Retrieving color from a texture |
| Math / Lighting | Calculations of lighting, color, effects, etc. |
| Type | Example | Purpose |
|---|---|---|
| Surface Shader | #pragma surface surf Lambert | Simplified description of lit materials |
| Vertex/Fragment Shader | #pragma vertex vert | Full control over rendering |
| Post-processing Shader | OnRenderImage() | Effects applied to the camera image |
| Shader Graph (URP/HDRP) | Visually | Visual, code-free creation |
Define the task — what should the shader do? (change color, add glow, distortion, a water effect, etc.)
Choose the shader type — Surface, Fragment/Vertex, Shader Graph, or Post-Effect.
Describe the properties — for interaction with the inspector or scripts.
Write the logic — vertices (vert) and pixels (frag), working with textures, colors, lighting.
Compile and test — in the editor or in Play Mode.
Optimize — simplify calculations wherever possible, especially for mobile.
Create a new file SaturationContrastBrightness.shader:
Shader "Custom/SaturationContrastBrightness"
{
    Properties
    {
        _MainTex ("Texture", 2D) = "white" {}
        _Brightness ("Brightness", Range(-1, 1)) = 0
        _Contrast ("Contrast", Range(0, 2)) = 1
        _Saturation ("Saturation", Range(0, 2)) = 1
    }
    SubShader
    {
        Tags { "RenderType"="Opaque" }
        LOD 100

        Pass
        {
            ZTest Always Cull Off ZWrite Off

            CGPROGRAM
            #pragma vertex vert_img
            #pragma fragment frag

            #include "UnityCG.cginc"

            sampler2D _MainTex;
            float _Brightness;
            float _Contrast;
            float _Saturation;

            fixed4 frag(v2f_img i) : SV_Target
            {
                fixed4 col = tex2D(_MainTex, i.uv);

                // Brightness
                col.rgb += _Brightness;

                // Contrast (relative to 0.5)
                col.rgb = ((col.rgb - 0.5) * _Contrast) + 0.5;

                // Saturation
                float gray = dot(col.rgb, float3(0.299, 0.587, 0.114)); // Convert to grayscale
                col.rgb = lerp(gray.xxx, col.rgb, _Saturation);

                return col;
            }
            ENDCG
        }
    }
}
2. C# script for the camera
using UnityEngine;

[ExecuteInEditMode]
[RequireComponent(typeof(Camera))]
public class SCBEffect : MonoBehaviour
{
    public Shader shader;
    private Material _material;

    [Range(-1, 1)] public float brightness = 0;
    [Range(0, 2)] public float contrast = 1;
    [Range(0, 2)] public float saturation = 1;

    void Start()
    {
        if (shader == null)
            shader = Shader.Find("Custom/SaturationContrastBrightness");

        if (shader != null)
            _material = new Material(shader);
    }

    void OnRenderImage(RenderTexture source, RenderTexture destination)
    {
        if (_material != null)
        {
            _material.SetFloat("_Brightness", brightness);
            _material.SetFloat("_Contrast", contrast);
            _material.SetFloat("_Saturation", saturation);

            Graphics.Blit(source, destination, _material);
        }
        else
        {
            Graphics.Blit(source, destination);
        }
    }
}
Create the C# script SCBEffect.cs and attach it to the camera:
Attach SCBEffect.cs to the camera.
Specify or assign the created Custom/SaturationContrastBrightness shader in the inspector.
Adjust the brightness, contrast, and saturation parameters.
A single Directional Light for the sun.
Use a Skybox with a daytime sky image.
Shadows — soft, directional.
High Ambient Light value (Environment Lighting → Source: Skybox).
Add Bloom and SSAO for volume.
Directional Light at reduced intensity (or disabled entirely).
Use point light sources (Point/Spot) for lamps, windows, campfires.
Skybox — a starry or cloudy night sky.
Ambient Light → Color or Gradient, with a cool tint.
Effects: Fog, Lens Flares, Glow, Volumetric Light.
Implemented via a script that smoothly changes lighting, fog, and skybox parameters.
Animations or Shader Graph can be used for dynamics.
Technical literacy in lighting is the foundation of visual authenticity and high performance. Using PBR, properly managing shaders, and understanding scene conditions makes it possible to create scenes that not only look realistic but also run fast even on weak hardware.

Comments