Lecture
In this lesson:
- find out what is Uri and data attribute
- we cause system applications (browser, dialer, map)
 - video lesson version
We know that Intent has an action attribute. With this attribute, an indication of the action is usually given. For example, viewing or editing . But the action is usually done for a reason, and with something. So besides specifying an action, we must point to the object with which these actions need to be performed. For this intent has an attribute data .
One way to assign a value to this attribute is the setData (Uri data) method of the Intent object. The input to this method is the Uri object.
Uri is an object that takes a string , parses it into components and stores this information in itself. The string, of course, should not be any, but compiled in accordance with this RFC 2396 document. Uri has a bunch of methods that allow you to extract individual elements from the parsed string .
I will create a Uri object from a string, and in the log I will output the name of the method and (after a colon) the value it returns. For example, take this line - http address:
Uri uri = Uri.parse("http://developer.android.com/reference/android/net/Uri.html"); See what the methods return to us:
uri.getScheme (): http
uri.getSchemeSpecificPart (): //developer.android.com/reference/android/net/Uri.html
uri.getAuthority (): developer.android.com
uri.getHost (): developer.android.com
uri.getPath (): /reference/android/net/Uri.html
uri.getLastPathSegment (): Uri.html
The concepts Scheme, Authority, Host, Path, etc. — are taken from the RFC dock, the link to which I gave above. There you can find their full description, understand what they mean and check what Uri has returned to us.
Consider more examples:
FTP
Uri uri = Uri.parse("ftp:// bob@google.com:80/data/files"); ( The code written above is actually one line. There is a space here because of the peculiarities of the markup. )
uri.getScheme (): ftp
uri.getSchemeSpecificPart (): // bob@google.com: 80 / data / files
uri.getAuthority (): bob@google.com: 80
uri.getHost (): google.com
uri.getPort (): 80
uri.getPath (): / data / files
uri.getLastPathSegment (): files
uri.getUserInfo (): bob
Coordinates
Uri uri = Uri.parse("geo:55.754283,37.62002"); uri.getScheme (): geo
uri.getSchemeSpecificPart (): 55.754283,37.62002
Here we have already managed to select only Scheme and SchemeSpecificPart.
Phone number
Uri uri = Uri.parse("tel:12345"); uri.getScheme (): tel
uri.getSchemeSpecificPart (): 12345
Similarly, it turned out to select only two parts from the line.
Contact from the address book
Uri uri = Uri.parse("content://contacts/people/1"); uri.getScheme (): content
uri.getSchemeSpecificPart (): // contacts / people / 1
uri.getAuthority (): contacts
uri.getPath (): / people / 1
uri.getLastPathSegment (): 1
In this example, Scheme is equal to content . This is a special data type - Content Provider. It allows any program to give access to its data, and other programs to read and change this data. We will consider this topic later, and we will create this type of data ourselves.
Here you can see which standard Uri are supported.
Examples show that Uri can be created from completely different lines: http-address, ftp-address, coordinates, phone number, contact from the address book.
Content type can be determined by Scheme . And the same Scheme can be configured in the Intent Filter and filter out the Intent , only with the data type we need in Uri , for example, only http. We will deal with this later, but for now let's make a simple example in which we will form an Intent with action and data, send it and see what happens. Let's try to view the following: http-address, coordinates on the map and open the dialing window.
To view the coordinates on the map, you need the Google Maps application. It is not in the standard Android platforms. We need add-ons from Google. How to install them, I painted here. After the upgrade, the interface may change a little. Do not get lost)
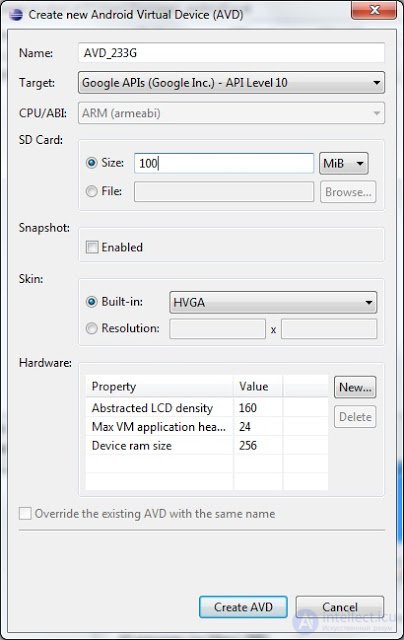
Create AVD on the Google APIs platform with API Level 10. Name it at your discretion.
Create a project. Pay attention, we use the platform Google APIs version 2.3.3
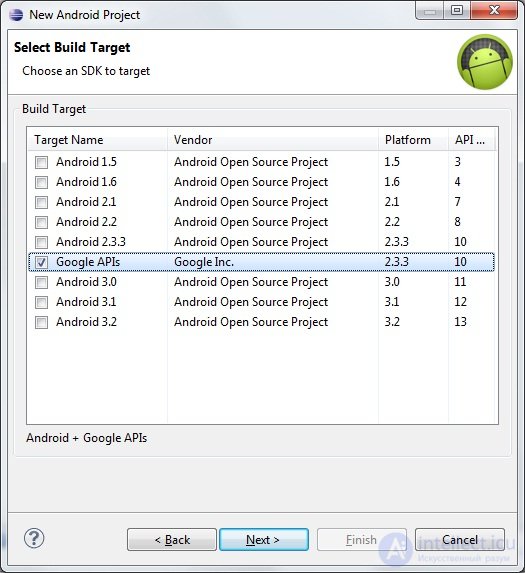
Project name : P0311_SimpleIntents
Build Target : Google APIs 2.3.3
Application name : SimpleIntents
Package name : ru.startandroid.develop.p0311simpleintents
Create Activity : MainActivity
If you failed to install Google APIs, then create a project as usual - with the Android 2.3.3 platform. The Google Maps challenge in this example just won't work.
Create the main.xml screen
<? xml version = "1.0" encoding = "utf-8"?>
<LinearLayout
xmlns: android = "http://schemas.android.com/apk/res/android"
android: layout_width = "fill_parent"
android: layout_height = "fill_parent"
android: orientation = "horizontal">
<Button
android: id = "@ + id / btnWeb"
android: layout_width = "match_parent"
android: layout_height = "wrap_content"
android: layout_margin = "10dp"
android: layout_weight = "1"
android: text = "Web">
</ Button>
<Button
android: id = "@ + id / btnMap"
android: layout_width = "match_parent"
android: layout_height = "wrap_content"
android: layout_margin = "10dp"
android: layout_weight = "1"
android: text = "Map">
</ Button>
<Button
android: id = "@ + id / btnCall"
android: layout_width = "match_parent"
android: layout_height = "wrap_content"
android: layout_margin = "10dp"
android: layout_weight = "1"
android: text = "Call">
</ Button>
</ LinearLayout>
There are three buttons on the screen. The first will open a web page, the second - the card, the third - the dialer.
We write the code in MainActivity.java :
package ru.startandroid.develop.p0311simpleintents;

 import android.app.Activity;
 import android.content.Intent;
 import android.net.Uri;
 import android.os.Bundle;
 import android.view.View;
 import android.view.View.OnClickListener;
 import android.widget.Button;

 public class MainActivity extends Activity implements OnClickListener {

 Button btnWeb;
 Button btnMap;
 Button btnCall;

 /** Called when the activity is first created. */
 @Override
 public void onCreate(Bundle savedInstanceState) {
 super.onCreate(savedInstanceState);
 setContentView(R.layout.main);

 btnWeb = (Button) findViewById(R.id.btnWeb);
 btnMap = (Button) findViewById(R.id.btnMap);
 btnCall = (Button) findViewById(R.id.btnCall);

 btnWeb.setOnClickListener(this);
 btnMap.setOnClickListener(this);
 btnCall.setOnClickListener(this);
 }

 @Override
 public void onClick(View v) {
 Intent intent;
 switch (v.getId()) {
 case R.id.btnWeb:
 intent = new Intent(Intent.ACTION_VIEW, Uri.parse("http://developer.android.com"));
 startActivity(intent);
 break;
 case R.id.btnMap:
 intent = new Intent();
 intent.setAction(Intent.ACTION_VIEW);
 intent.setData(Uri.parse("geo:55.754283,37.62002"));
 startActivity(intent);
 break;
 case R.id.btnCall:
 intent = new Intent(Intent.ACTION_DIAL);
 intent.setData(Uri.parse("tel:12345"));
 startActivity(intent);
 break;
 }
 }
 }
I used three different ways to create an Intent and set its attributes.
In the case of btnWeb, I used the Intent constructor (String action, Uri uri). He creates an intent and immediately accepts action and data as input. We use the standard system action - ACTION_VIEW. This is a constant in the class Intent - means that we want to view something. As data, we serve the Uri object created from the web link: http://developer.android.com. And if you try to describe our code in words, it will turn out like this: this Intent means that we want to look at the contents of this link and are looking for an Activity that could help us.
In the case of btnMap , the Intent () constructor was used. It simply creates an intent . And in the next lines we already assign the action and data attributes to it. action - again ACTION_VIEW, and as data we create Uri from a pair of coordinates - 55.754283,37.62002 . This intent means that we want to see the coordinates on the map.
In the case of btnCall, use the Intent constructor (String action). At the entrance it immediately receives an action , and data is specified later. action in this case –ACTION_DIAL - opens the dialer and dials the number specified in the data , but does not start the call. In the data - put the Uri , created from the phone number 12345 .
These three methods lead to the same result - Intent with the completed attributes action and data . Which one to use is up to you, depending on the situation.
Because our application will need the Internet to open the link and see the map, it is necessary that the Internet be on your computer.
Also in the application manifest file, on the Permission tab, add the Uses Permission element and in the Name field on the right, select android.permission.INTERNET . This will give the application access to the Internet. True, for some reason, even without this, everything works ... Until I understood why.
All save and run the application
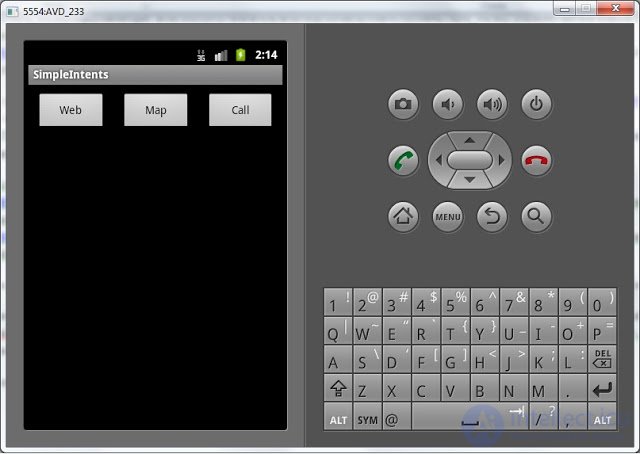
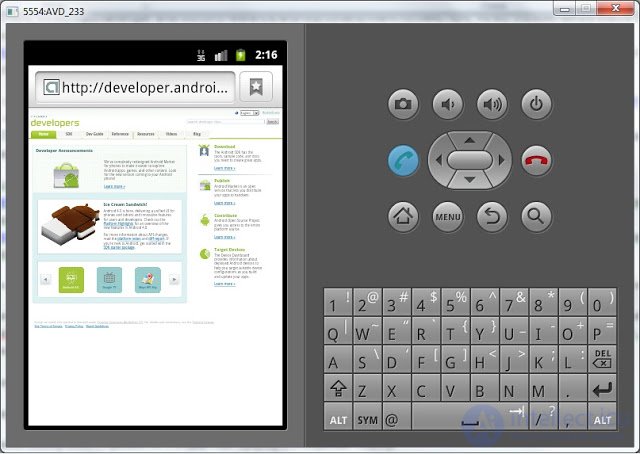
Click the Web button,
opens a standard browser and displays the contents of the page by reference
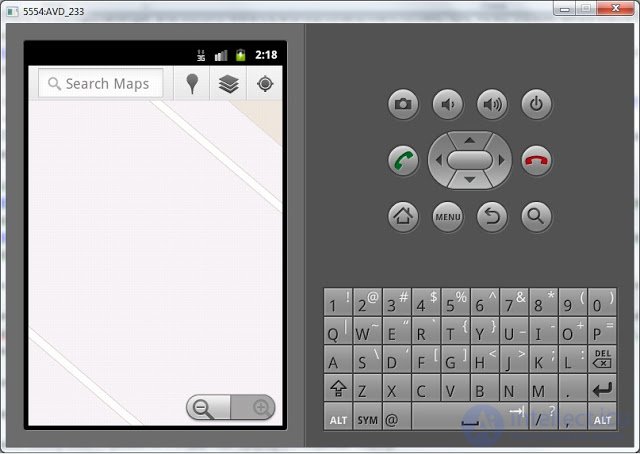
We return, we press Map. Map is displayed. Zoom out to see where I used the coordinates in the example)
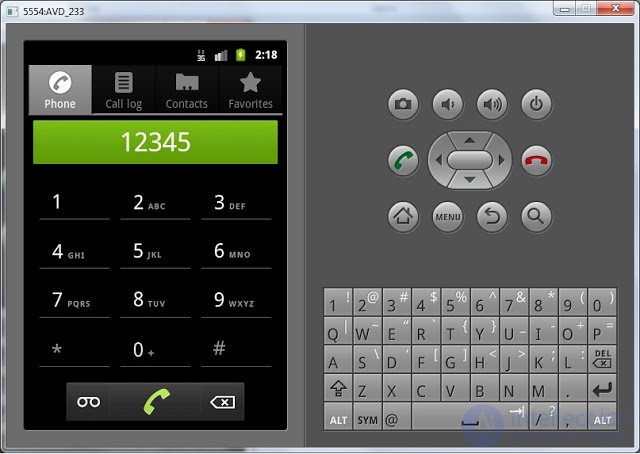
We return, we press Call. The standard dialing screen is displayed and we can see that the number we specified in data has already been dialed. We just have to press the bell button.
Most likely, now there are many questions like "What will happen if ...". I can immediately answer some of them and invite you to experiment in the current application:
1) What will happen if you specify the coordinates without the geo prefix:
The system curses that it did not find a suitable Activity (see logs). Because In the Activity card, an Intent Filter is configured, which (as I think) is configured for data with Schema = geo .
Similarly, the dialer will not work if you specify a number without the prefix tel .
2) What will happen if geo is left in the coordinates, but coordinates indicate curves?
If we try to see, for example, such geo coordinates : a, b , then the map will start, but it will tell us Unable to load the URL . Those. The data came up on Schema, but it turned out to be incorrect.
3) What will happen if the coordinates are correct, but the action is not to use ACTION_VIEW, but ACTION_EDIT.
It turns out that we want to edit the place on the map specified by these coordinates. But the system tells us that it did not find such an Activity. Because the Google Maps application expects an Intent with action = ACTION_VIEW and it can show us this place on the map. And it was not signed for editing)
It is necessary to understand that all applications in the system are sharpened for specific actions with specific data types. And if you try to call the site address, or open a phone number on the card, then the system simply will not find an application capable of that.
In the next lesson:
- we write a simple browser
Comments
To leave a comment
Mobile Programming (Android IOs)
Terms: Mobile Programming (Android IOs)