Lecture
In order to test the applications, we need an Android Virtual Device (AVD). This is an Android smartphone emulator, on which we will be able to install the applications we have created, and run them there. Let's create it.
Lesson updated 02/02/2015
In the last lesson we set up the development environment and the SDK. During installation, we registered the paths:
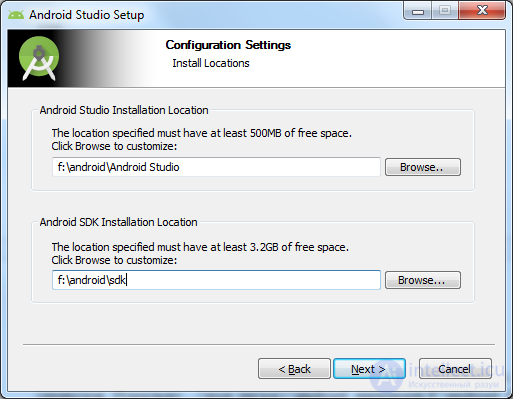
Open the folder in which you installed the Android SDK. In my case, this is F: / android / sdk
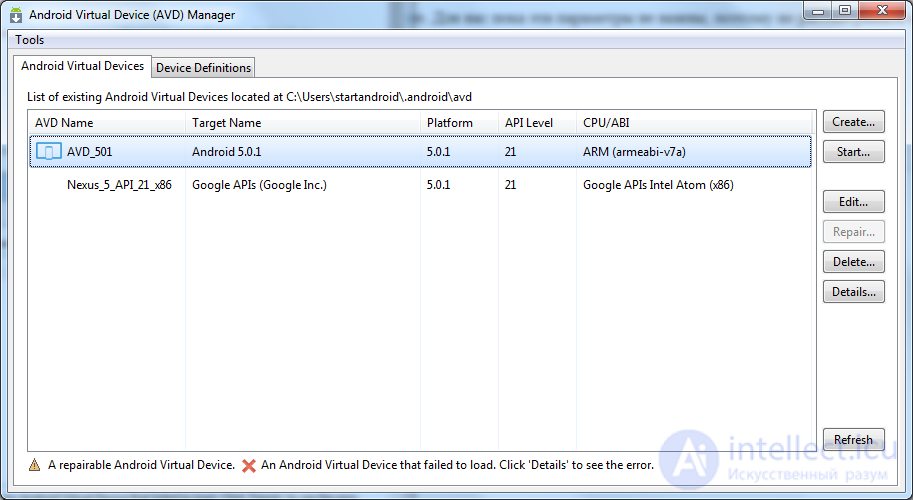
This folder should be AVD Manager
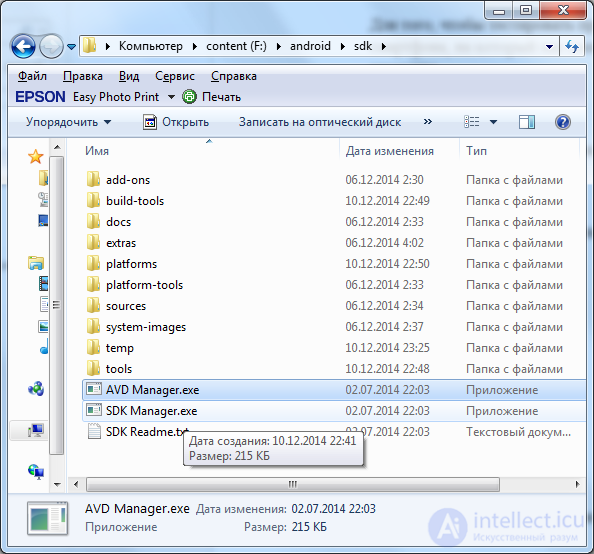
Run it
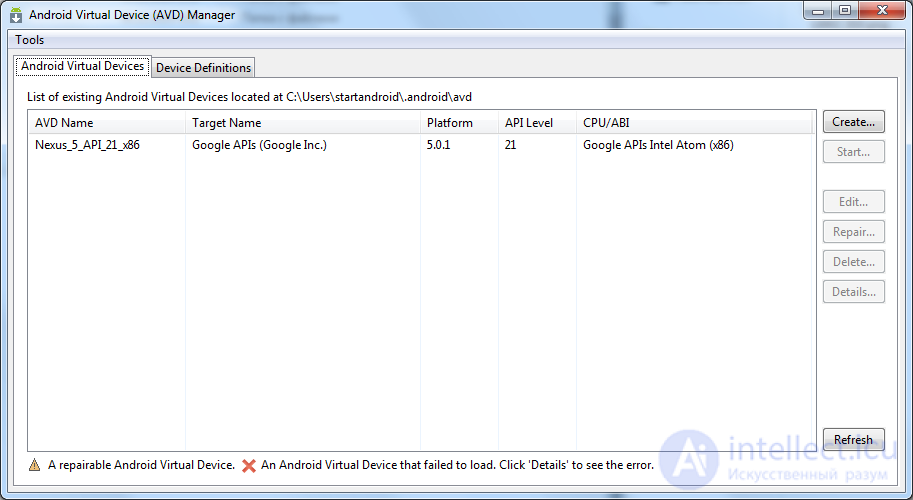
We see that one AVD has already been created.
But let's create one more to learn how to create them yourself. Click the Create button and fill in the parameters of the new AVD.
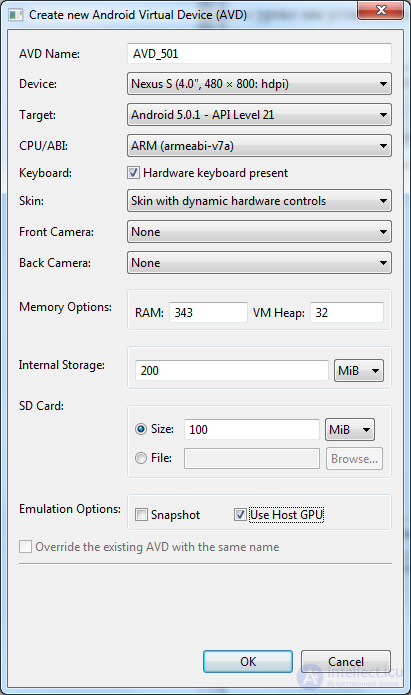
Name indicate in accordance with the version of Android: AVD_501.
In the Device list you choose the screen characteristics: diagonal, resolution and dpi. I recommend choosing a not very high resolution, because the higher it is, the more there will be brakes in the work of the emulator.
Remember, in the last lesson we downloaded two items for Android 5.0.1: SDK Platform and ARM EABI v7a System Image? Here we will choose them now.
The Target list includes the Android platform, i.e. SDK Platform. Choose Android 5.0.1 - API Level 21.
In CPU / ABI , the system image for this version should automatically be selected, i.e. ARM EABI v7a System Image.
Accordingly, if you download the platform and image for the other Android version in the SDK Manager, you can select them here. And your emulator will have the version of Android you need.
Next, fill in everything as in the screenshot. For us, while these parameters are not important, therefore we do not consider them in detail.
Click OK , the newly created emulator AVD_501 appears in the list.
Close the AVD Manager. Further, this emulator will be used by us to run a test application.
Now, finally, we can create our first application and see how it works.
To create an application, we need to create a project in Android Studio. When creating a project, a module is created in it. In this module, we draw the application screens and write the code. And when you run this module, we get the finished application. Therefore, the module is essentially an application. A project is a container for a module.
Those. in the simplest case, the project structure is as follows:
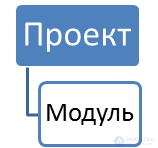
There is a project, and there is a module in it. When the project starts, the module is launched and we get an Android application that is created in this module.
In this case: one project = one Android application (one module).
But in one project there can be several modules. Yes, and you can create multiple projects.
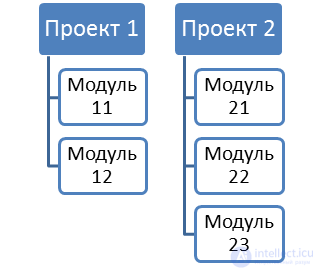
Here, two modules are created in the first project, and three modules in the second project.
When you run a project, you will need to specify which module you want to run. And each module is a separate Android application.
Those. in this case: one project = several Android applications (several modules).
Until we go into details, which of the proposed schemes is better and more convenient. To pass lessons, you can create one project and create modules for each lesson in it. Or you can create a separate project, for example, for every 10 lessons. You can even create a separate project for each lesson.
I think we will start with the option: one project for all lessons. And over time, as you get comfortable, decide for yourself which option is more convenient for you.
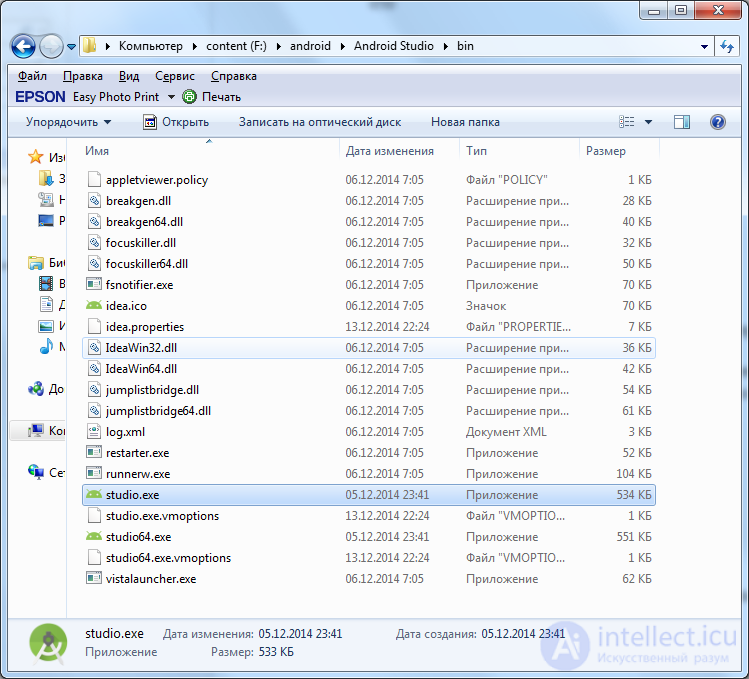
Let's create a project. Open Android Studio. The launch shortcut should be in the start menu. Or you can open the folder where you installed Android Studio in the last lesson. In the bin subfolder there must be an .exe file.
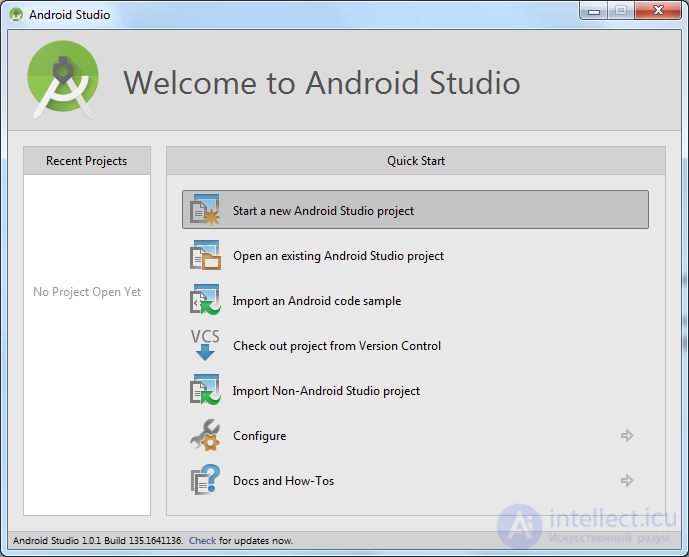
Opened development environment. Click Start a new Android Studio project .
A project creation window has appeared. Let's fill.
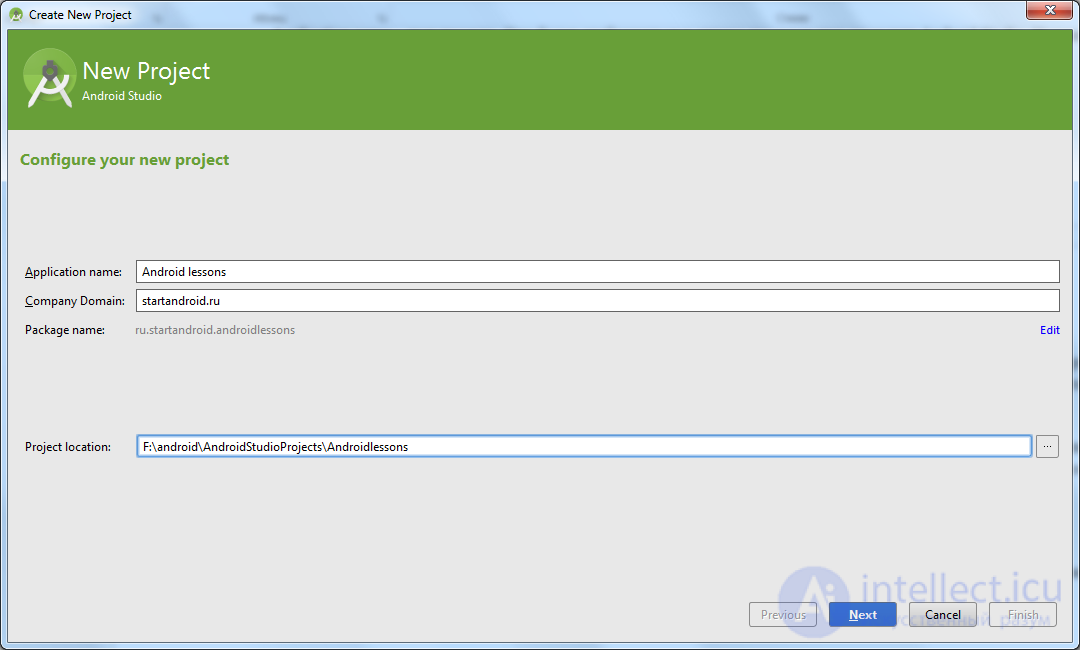
Application name - the name of the project. It will be displayed in the list of projects when you open Android Studio. We’ll write here Android lessons (i.e. Android lessons).
Company Domain - the name of the site, we write startandroid.ru.
Package name is a concept from Java, can be found in detail here (http://java-course.ru/begin/packages/). In short, it is a prefix for the name of the classes of our application. As you can see, the package is automatically composed of the site name and the project name. It can always be edited manually by clicking the edit link on the right.
Project location is a folder on a computer where all project files will be located. In the last lesson we created the android folder, where we installed Android Studio and the SDK. In the same place, create a folder AndroidStudioProjects - in this folder we will store all the projects of Android Studio. And in it, create an Androidlessons folder for our current project.
Most likely now nothing is clear. This is normal, do not worry. In each lesson I will suggest what to fill in these fields, and with time, understanding will come.
Click Next
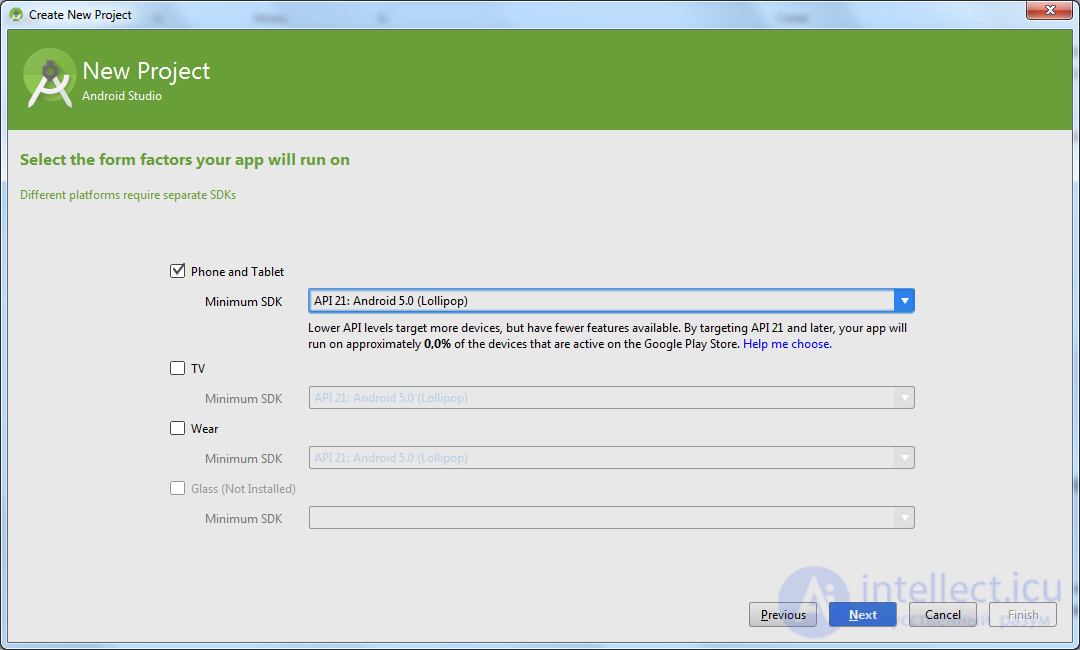
The wizard asks for the SDK version. This is the minimum version of Android on which you can run the application. Choose API 21. If you need to run the application on devices / emulators with an older version of Android, then select the minimum version you need here.
Next, select Blank Activity .
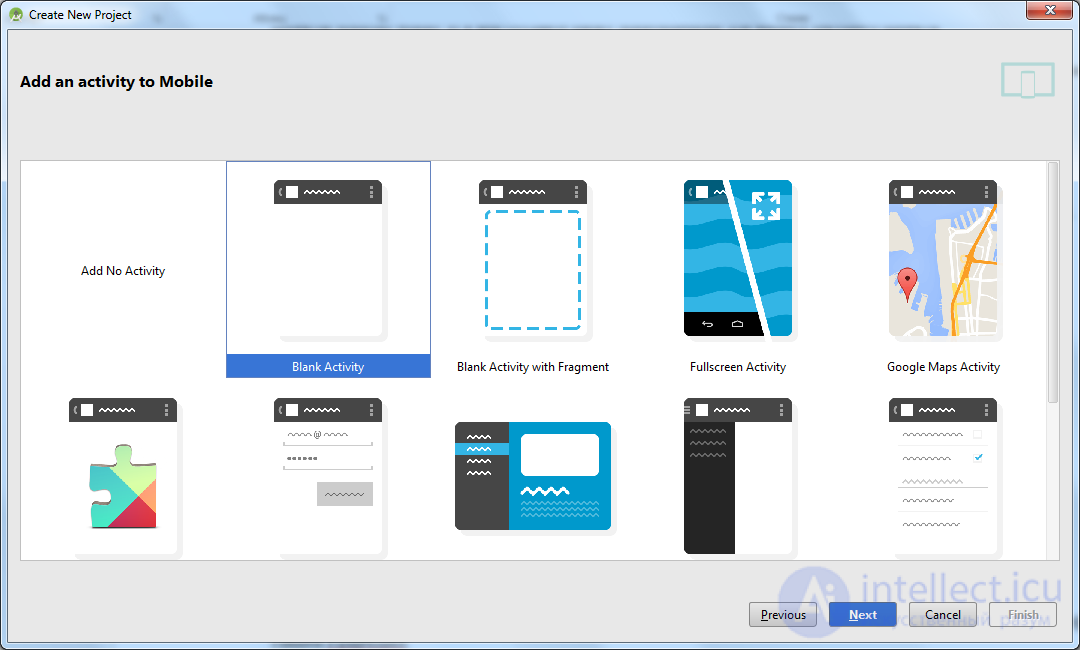
We do not change anything here

Click Finish . Project is being created

As a result, the project opened.
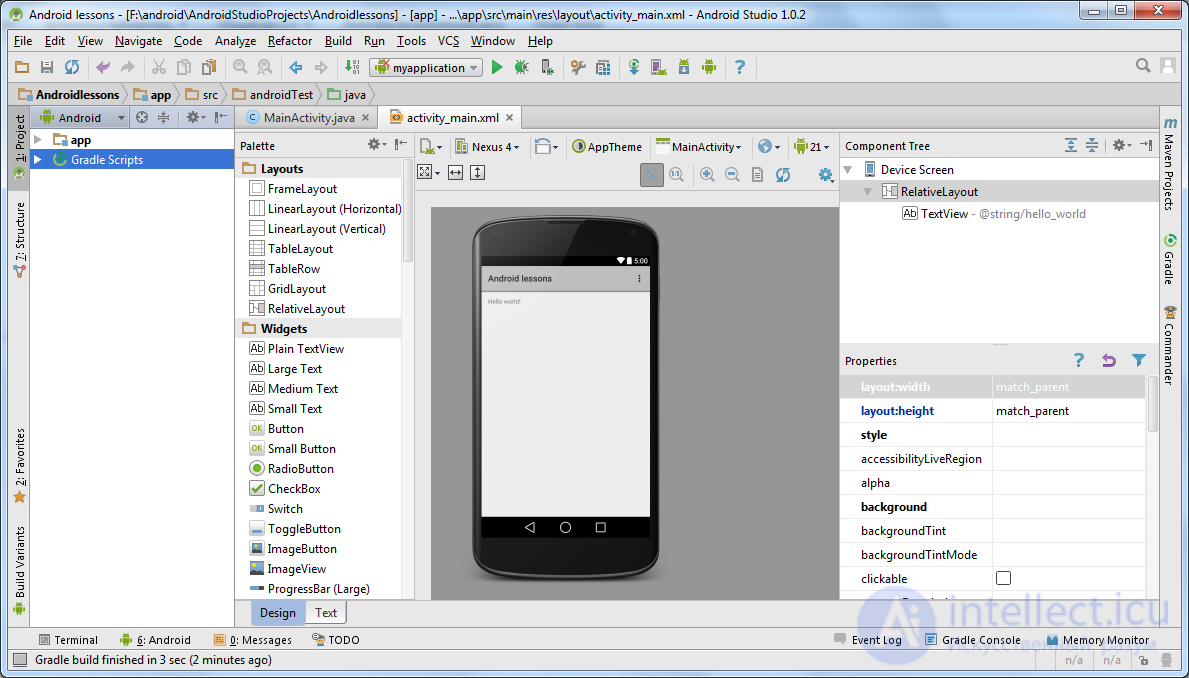
And we are immediately open for editing some files. In them, we will not change anything, this is not necessary.
In the left part we see the word app - this is a module. By default, when creating a project, an app module is created. It is not interesting to us, because we will create our own modules. But let it remain, I do not advise you to delete it. The wizard that we just went through when creating the project mainly concerned this module.
So, the project is created. Now we will create our own module in the project. I repeat that for almost every lesson we will create a module in this project. Now we will create a module (application) for this current lesson. This procedure will be partially similar to the creation of the project, but with a few differences.
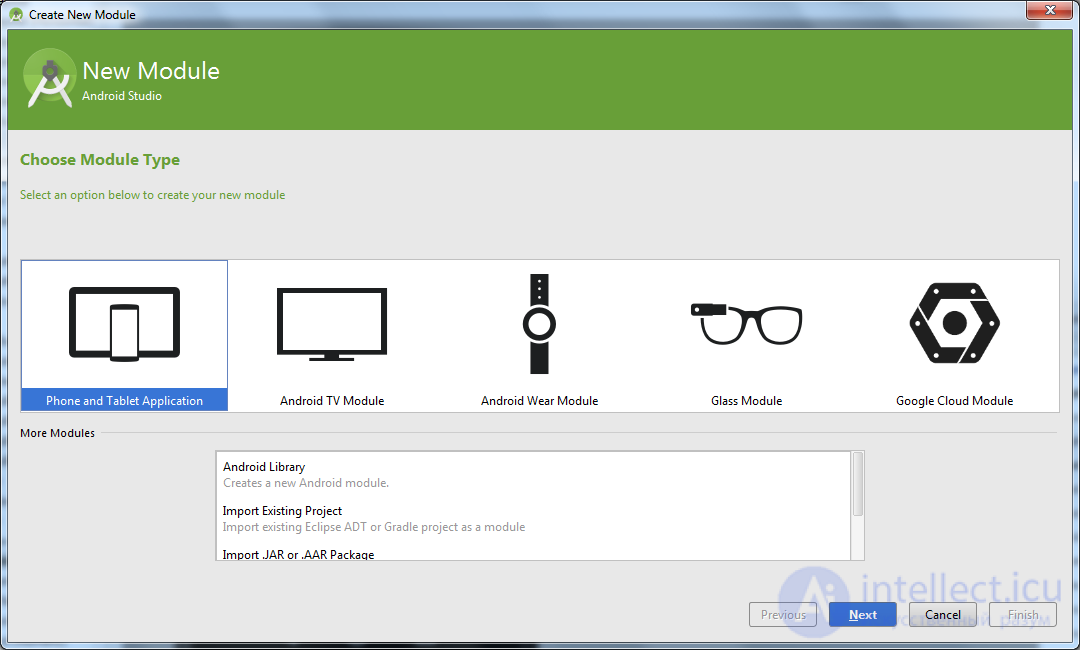
To create a module - select File -> New module in the menu.
Module type choose Phone and Tablet Application
Next
Fill in the fields
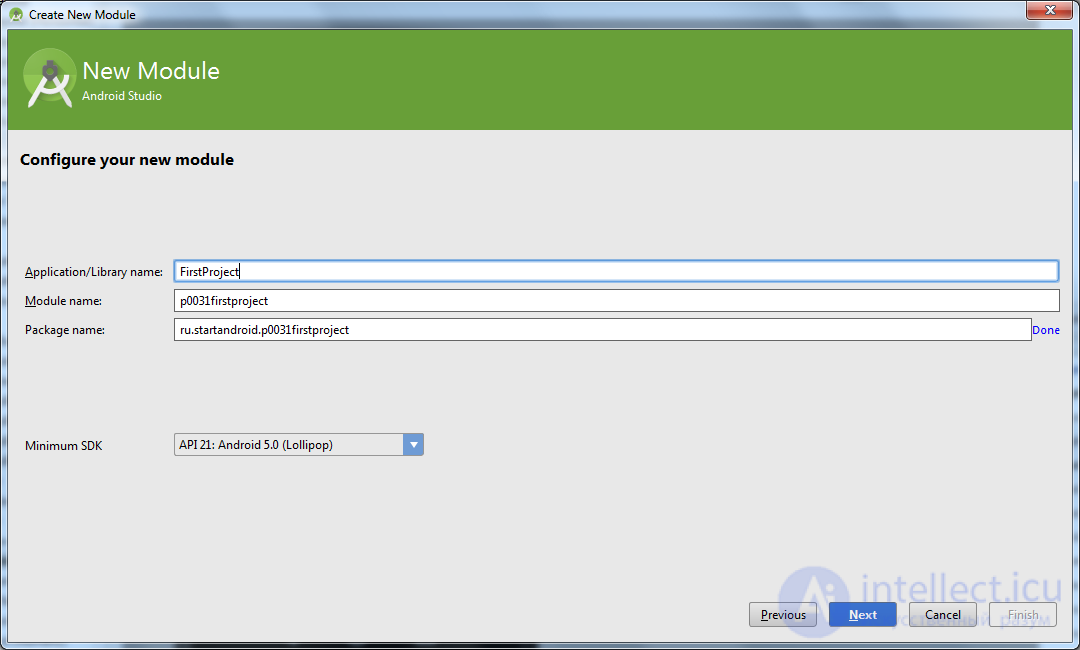
Application / Library name - the name of the application itself, which will be displayed in the list of applications in the smartphone. We write here FirstProject.
Module name is the name of the module. Those. this name will be displayed on the left in the list of modules, where there is an app now. Let's think of a template for the name of the modules.
For example: p <lesson number (000)> <project number in lesson (0)>.
We will allocate three numbers to the lesson number, and one number to the project number. Also, we will add the name of the application - FirstProject. And we will write all this in small letters and without spaces. You get this module name: p0031firstproject.
Package name - edit the package name manually by clicking edit on the right. Leave the ru.startandroid there and add a period and the name of the module.
In the Minimum SDK, select API 21.
Next, select Blank Activity .
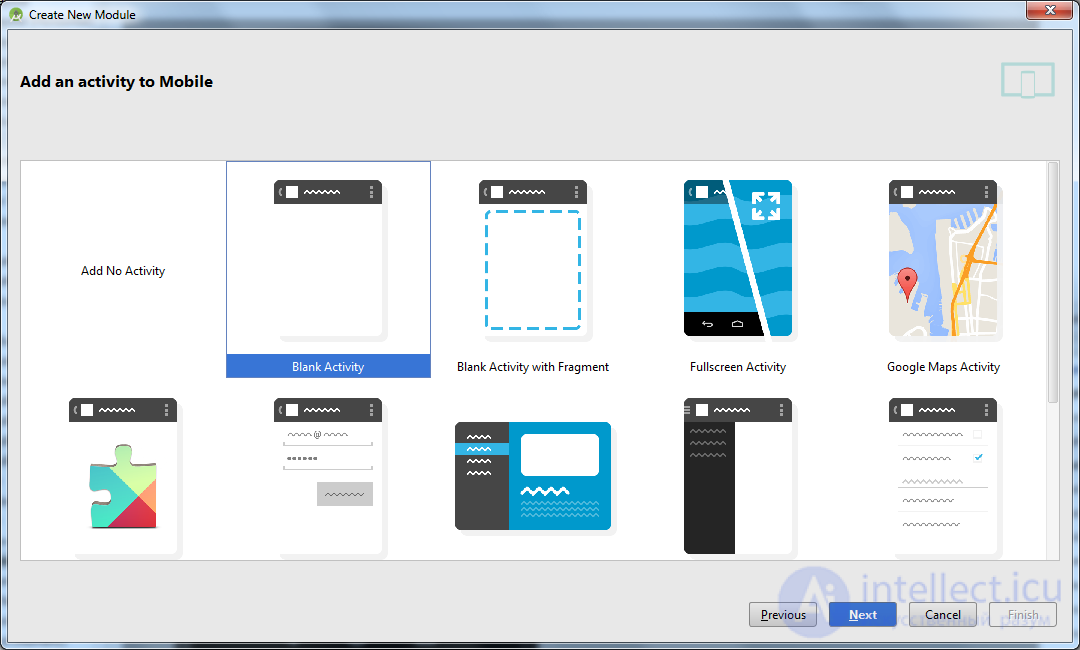
We do not change anything here
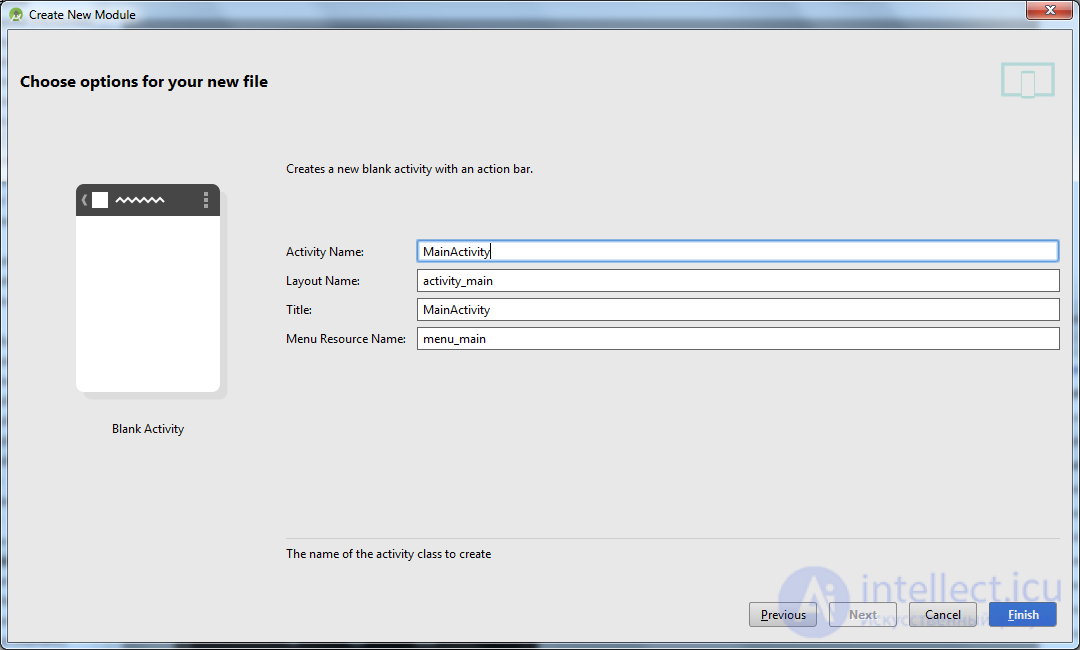
Click Finish and wait. After some time, the module will be created and we will see it in the list on the left. This is p0031firstproject - the value we specified in the Module name field.
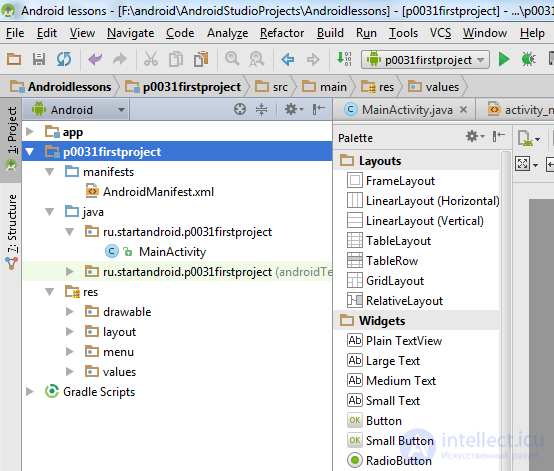
You can open this module and see its contents. Briefly walk through the elements that interest us.
AndroidManifest.xml file - application manifest or config file
In the java folder and its subfolders will be all written by us application code
The res folder is used for resource files of various types.
All this we will continue to use, and it will become clearer what is needed and why.
Let's finally launch our first app! To do this, select the corresponding module in the drop-down list above.
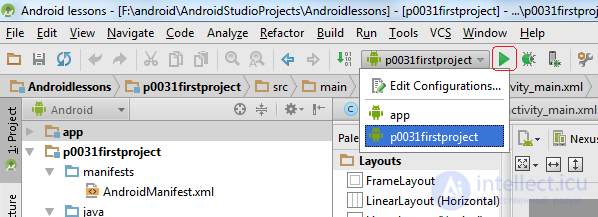
And click (slightly to the right of the list) a button with a green triangle (or a combination of Shift + F10).
To run the application, you need a thread of a real Android device or emulator. We are offered to run the AVD_501 emulator, which we created at the beginning of this lesson. If you are offered another, select AVD_501 in the list.
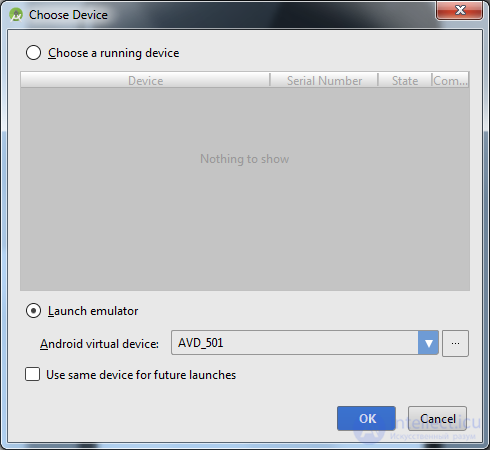
Click OK .
After some time (up to a couple of minutes) the emulator will appear and start loading.
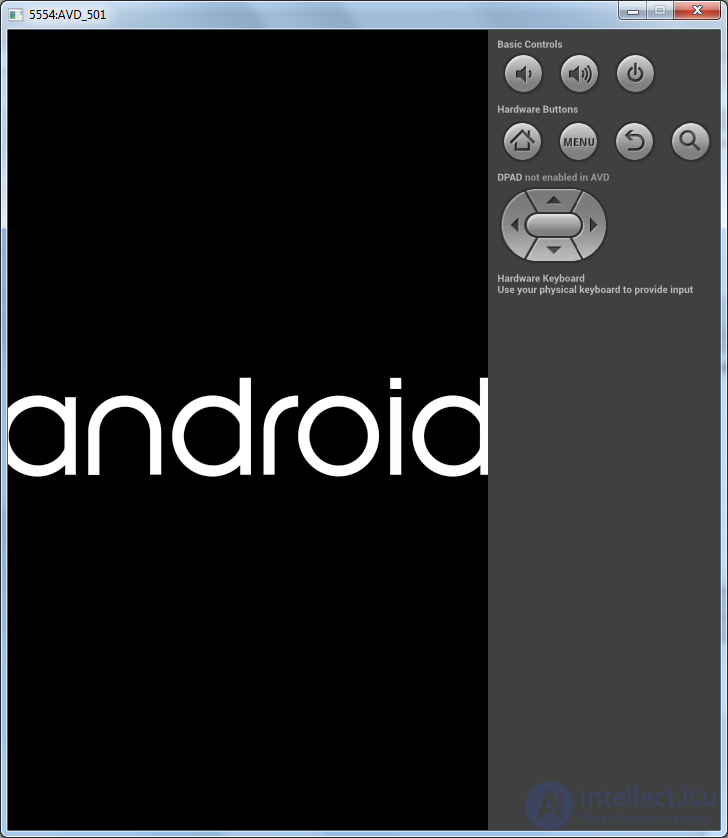
I advise you not to touch anything at this time and not to press it, because This is a buggy and capricious thing. Full launch time can easily take 5-7 minutes.
As a result, the emulator should earn and we get to the lock screen.
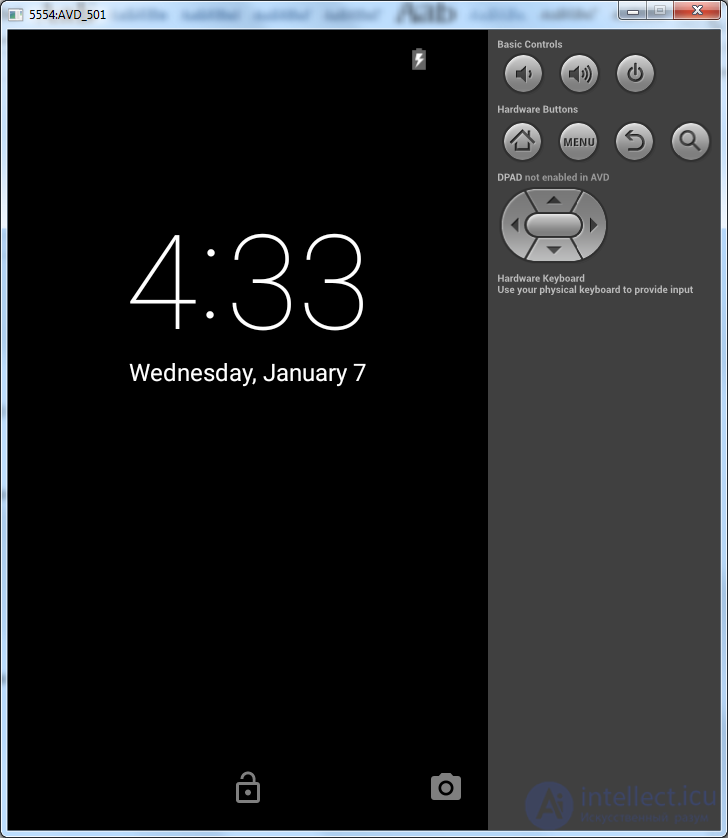
Remove the lock and see our application, which we called FirstProject (field Application name).
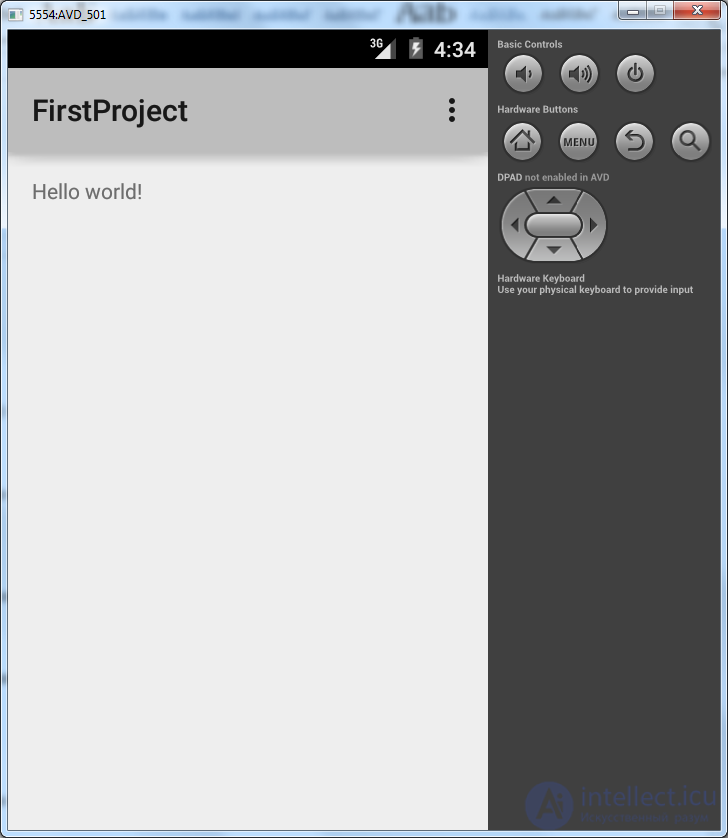
Those. You created and launched your first application, and congratulate you on it) There are hundreds of such applications and launches ahead.
If the emulator has not shown your application, then make sure that Android Studio "sees" this emulator. To do this, click the Android tab at the bottom left.
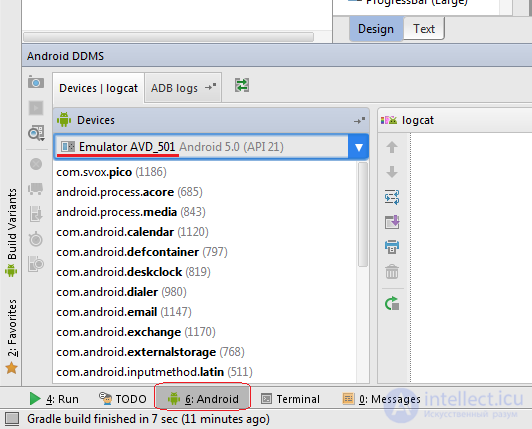
And in the list of devices, the AVD_501 emulator should be visible a little higher .
If the emulator is in the list, then try running the application again by pressing the green triangle (Shift + F10).
If the emulator is not listed, then close the emulator and try running the application again.
At once I will say that standard emulators are sufficiently brake creatures. But there are worthy replacements for them, for example Genymotion. Highly recommend using it. And do not forget that the emulator should be no lower than the version in your project specified in the Minimum SDK field.
This lesson was updated in February 2015. And many of the following lessons were written in 2011-2012. Therefore, the screenshots in them may differ from yours. This is normal.
Also, I must warn you that I did and tested the first lessons for Android version 2.3.3. This is indicated at the beginning of the lesson. But this does not mean at all that the lessons are already hopelessly outdated and there is no sense to read them. The code under 2.3.3 and 5.0.1 in most cases is absolutely the same. In new versions of Android, new components are added, and the past ones usually remain unchanged and rarely change or are declared obsolete.
PS
If you have a project open and want to see the Android Studio start window again, choose File > Close Project from the menu.
You will see the start window, on the left will be a list of your projects.
Pss
If you have a username in Russian letters, problems may arise. How to solve them, you can read on the forum in the thread of this lesson.
If the line above did not help, then try another such solution.
In the next lesson we will add various elements to our application and change their properties.

Comments