
Practice
Creating a self-signed trusted certificate for development is a process that lets you establish a secure connection between your web server and a browser, although the browser will not trust your certificate as a root certificate. This is useful for developers when testing and developing websites. However, keep in mind that a self-signed certificate will not have the green address bar indicator that certificates issued by certificate authorities, such as Let's Encrypt or other paid services, have. But this can be achieved by adding it to the root certificates through the browser.
Here is how you can create a self-signed certificate:
Generating a Private Key:
openssl genpkey -algorithm RSA -out private-key-intellect.icu.pemWhere private-key-intellect.icu.pem is the private key file.
Creating a Self-Signed Certificate:
[req]
distinguished_name = req_distinguished_name
x509_extensions = v3_req
prompt = no
[req_distinguished_name]
C = YOUR_COUNTRY_CODE
ST = YOUR_STATE
L = YOUR_LOCALITY
O = YOUR_ORGANIZATION
OU = YOUR_ORGANIZATIONAL_UNIT
CN = YOUR_COMMON_NAME
[v3_req]
keyUsage = keyEncipherment, dataEncipherment
extendedKeyUsage = serverAuth
subjectAltName = @alt_names
[alt_names]
DNS.1 = intellect.icu
openssl req -new -x509 -newkey rsa:4096 -sha256 -days 365 -key private-key-intellect.icu.pem -out certificate.pem -config cert.conf
Using the certificate on your web server:
After completing these steps, you will be able to use the self-signed certificate for developing and testing your website. However, keep in mind that in real production it is recommended to use trusted certificates from certificate authorities to ensure security and trust for your users.
You can make your self-signed certificate more trusted by the browser by adding it to the list of root certificates. This will allow the browser to trust your certificate, and it will not warn the user about the site being untrusted.
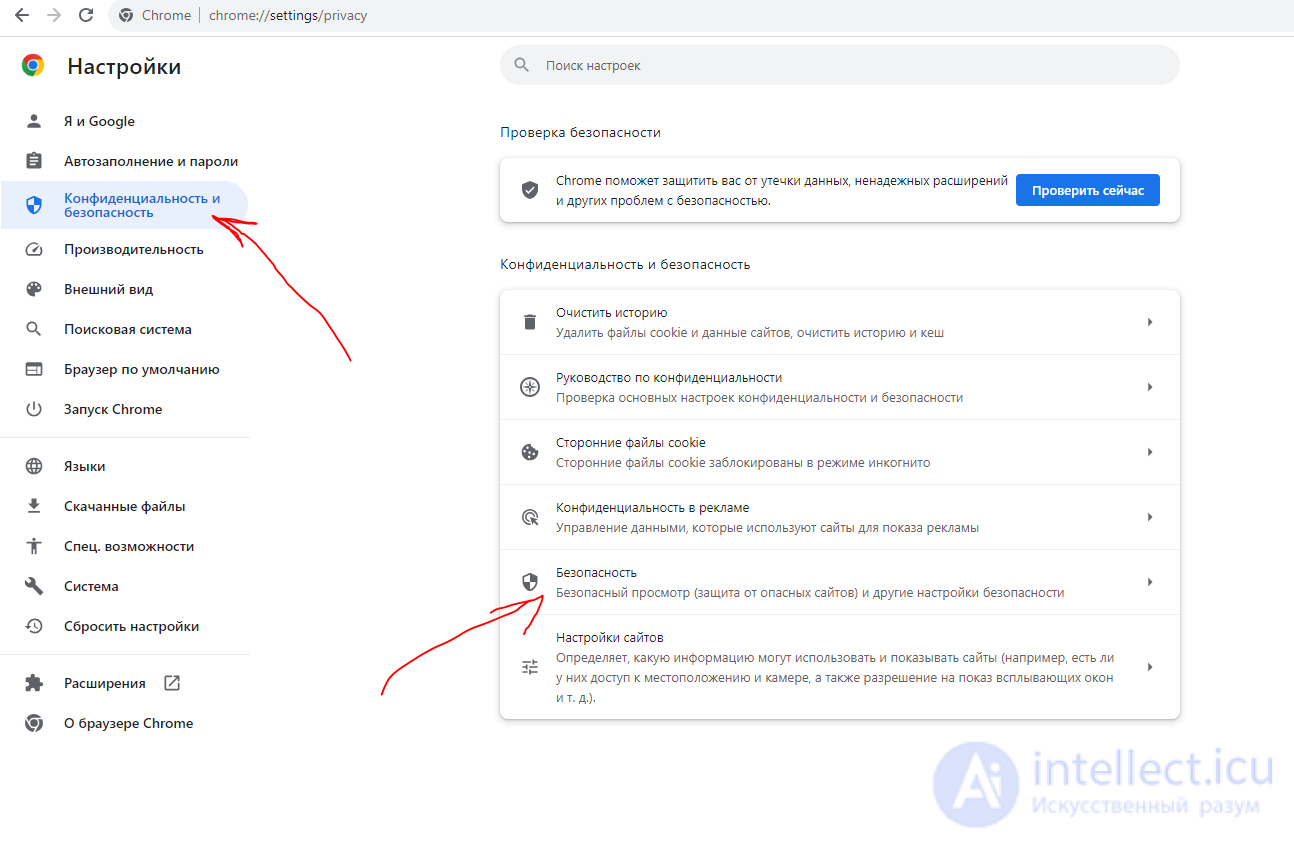
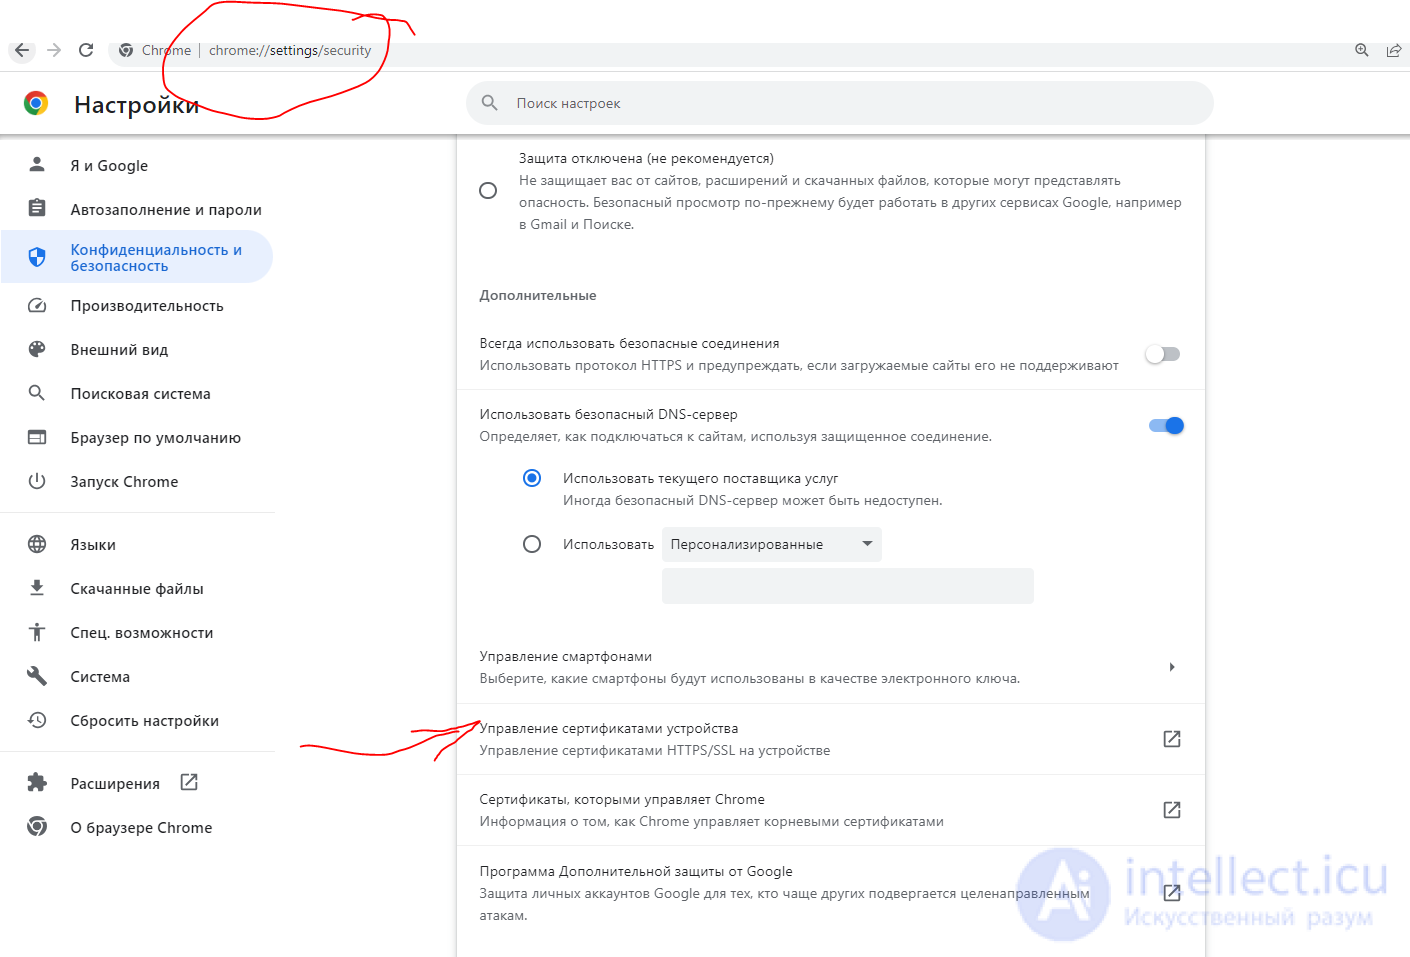
To add a self-signed certificate to the root certificates in the browser, follow these steps (instructions may vary depending on the browser):
Export the self-signed certificate:
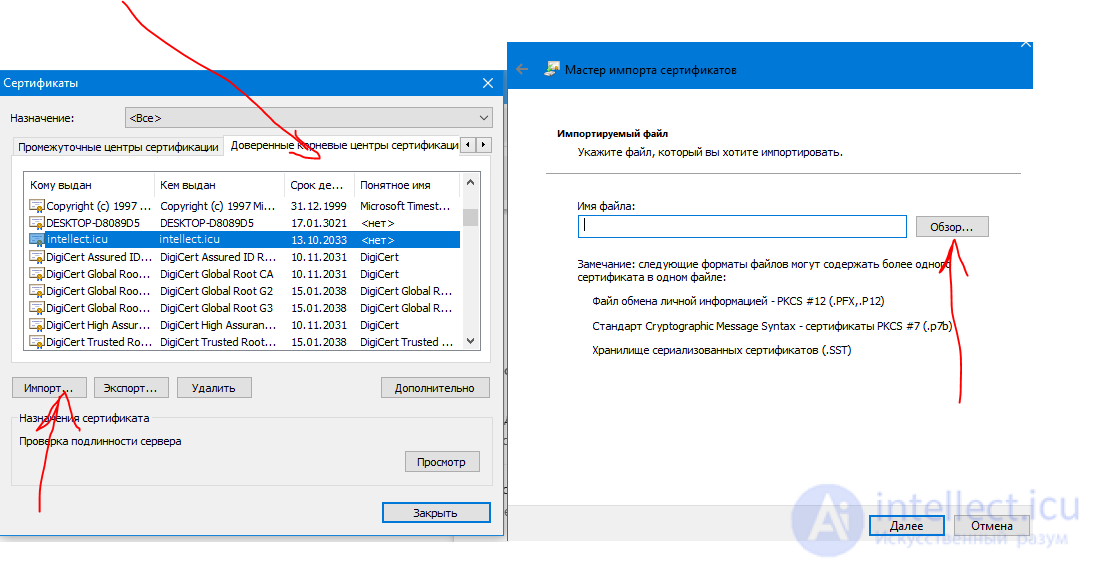
Import the certificate into the root certificates:
Restart the browser:
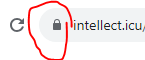
After completing these steps, your browser should trust your self-signed certificate, and the green address bar indicator will be shown when accessing your site.
However, keep in mind that this method only applies to you and those who have imported your certificate into their browser. For public websites, it is recommended to use trusted certificates from certificate authorities.
The openssl dhparam command is used to generate Diffie-Hellman key exchange parameters in OpenSSL. These parameters can be used to ensure a secure key exchange when establishing an SSL/TLS connection, ensuring data confidentiality and integrity.
After running this command, the dhparam.pem file contains the Diffie-Hellman parameters, which can be used in your web server configuration to secure key exchange when establishing an SSL/TLS connection.
Note that generating Diffie-Hellman parameters can be resource-intensive, especially for large key lengths, so it may take some time. However, Diffie-Hellman parameters are usually generated once and then used in the web server settings for many SSL/TLS connections.
To make a ready-made script for Nginx Docker, change it to your domain and run
#cert.pem (leaf certificate),
#chain.pem (chain of trust from the root certificate, not including the leaf - optional),
#fullchain.pem (the full chain we need, including the leaf certificate, essentially the sum of cert.pem + chain.pem),
#privkey.pem (your private key, which must never be shown or sent to anyone).

openssl req -x509 -out cert.pem -keyout privkey.pem \
  -newkey rsa:2048 -nodes -sha256 \
  -subj '/CN=dev.intellect.icu' -extensions EXT -config <( \
   printf "[dn]\nCN=dev.intellect.icu\n[req]\ndistinguished_name = dn\n[EXT]\nsubjectAltName=DNS:dev.intellect.icu\nkeyUsage=digitalSignature\nextendedKeyUsage=serverAuth")

#cat privkey.pem > fullchain.pem
cat cert.pem > fullchain.pem

#Diffie-Hellman parameters
openssl dhparam -out dhparam.pem 2048
Nginx config
server {
    listen       443 ssl;
    server_name  X.X.X.X;
    root         ${APP_PUBLIC};
    index        index.php;
    autoindex    off;


    ssl_certificate            /etc/ssl/fullchain.pem;
    ssl_certificate_key        /etc/ssl/privkey.pem;
    ssl_client_certificate     /etc/ssl/cert.pem;

    # Diffie-Hellman parameter for DHE ciphersuites, recommended 2048 bits
    ssl_dhparam                /etc/ssl/dhparam.pem;

   resolver 8.8.8.8 8.8.4.4;

...

Comments