Lecture
Protecting the site with the Apache server itself is one of the simplest and at the same time reasonably reliable ways. In this case, you do not need to thoroughly think over the security strategy, to carry out its design and implementation in the code. In addition, in order to create a good protection system, one must have sufficient qualifications in this matter. Using the built-in Apache WEB-server protection, you significantly simplify your task - all you have to do is to perform a simple sequence of actions and your site will be sufficiently protected. This article will detail the steps and actions you need to take. And at the end of the article will be given examples of .htaccess .
This article will discuss the easiest and most affordable method of protection - basic authentication.
Why Basic? Because there is still not only basic, but also digest and other types. But we will not touch them here, but we will touch upon the simplest type of authentication that can be implemented using Apache server tools.
Authentication is the process by which it is verified that someone is exactly who he claims to be. Typically, verification includes entering a name and password.
Consider how basic authentication works.
When a visitor contacts a protected directory, the Apache server sends a header with the code 401 (401 authentication required header) in response to the request. The visitor's browser accepts a header with code 401 and displays a window with fields for entering a username and password. After entering the name and password, this data is sent back to the server, which checks the username to find out in a special list, and the password for correctness. If everything is correct, the visitor gets access to the resource. Together with the header a special name is sent to the browser, called the scope. The browser caches not only the name and password to transmit them with each request, but also the scope. Due to this, the input of the name and password in the protected directory is carried out only once. Otherwise, they would need to be entered for each request to the protected directory. Caching authentication parameters (name, password, scope), usually takes place only within one session.
With basic authentication, the username and password are transmitted to the network in clear text during the entire session, when the visitor is working with a protected directory. A hacker can intercept this information using a network packet analyzer. This type of authentication should not be used where real protection of commercially valuable information is needed.
Apache web server supports another type of protection - digest authentication. With digest authentication, the password is not transmitted in the clear, but in the form of a hash code calculated by the MD5 algorithm. Therefore, the password cannot be intercepted while scanning traffic. But, unfortunately, to use digest authentication, you need to install a special module on the server - mod_auth_digest. And this is only in the competence of the server administration. Also, until recently, digest authentication was not supported by all types of browsers.
In order to protect the site, you need to perform the following sequence of actions:
create a password file, rewrite it to the server,
create the .htaccess file and also copy it to the server.
For the organization of protection will be required.
.htpaccess files and organize protection using them. htpasswd.exe (wimdows ) htpasswd (linux) password generation utility htpasswd.exe (wimdows ) htpasswd (linux) In order to check whether you have the right to organize protection using .htaccess create a text file with the name .htaccess (the first character is a period, the extension is missing).
AuthType Basic
 AuthName admin
 require valid-user
Then, transfer the .htaccess file to the site, in the directory that you want to protect.
The effect of .htaccess files extends not only to the directory where the file is located, but also to all subdirectories lying one level below.
Further through the browser, refer to this directory. If you are protecting the admin directory and have copied the .htaccess file there, then you should check the following URL in your browser’s address bar: http: //www.site.com/admin/.
If after this you are prompted to enter your login and password, as in the figure below, then the test was successful and you can continue to protect the directory.
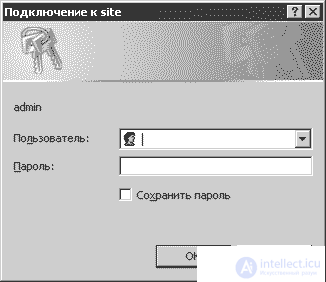
Fig. Login window and password
If you did everything correctly, but the password entry window did not appear, this means that server settings prevent you from using .htaccess to protect directories. To resolve this issue, you should contact the server administration, or use another type of protection.
After it has been found that the .htaccess are working, you should delete the test file just written from the site.
If for some reason you cannot delete the .htaccess file, then create an empty .htaccess file and replace it with the file on the server.
The password file is created by the htpasswd.exe utility. If you have an Apache WEB server installed on your machine, then this utility is located in the directory with Apache installed in the bin subdirectory.
If you do not have Apache installed, then you can download the htpasswd.exe utility from the link: http://www.softtime.ru/files/htpasswd.zip.
You have moved to the Apache2 directory.
Now you need to give the command to create a file with a password. Enter the following in the command line:
windows : htpasswd -cm .htpasswd adminlogin
linux: # htpasswd -c /home/var/www/.htpasswd adminlogin
In response, you should be prompted to enter a password and repeat it. If everything is correct, then in the end a message will appear:
Adding password for user admin.
And in the current directory there will be a .htpasswd file, which will contain a string with the user name and the hash code of his password. In order to add another user to the same .htpasswd file, remove the -c option from the htpasswd.exe utility launch command.
для windows htpasswd -m .htpasswd admin
To add or change the password for the Newadmin user, enter the following command:
для linux # htpasswd /home/pwww/.htpasswd-users newadmin
If the password file was not created, then perhaps some utility keys are not supported in your operating system. For example, the m key is sometimes not supported. In this case, you need to enter htpasswd -c .htpasswd admin
To view the keys and parameters of the utility
enter windows htpasswd.exe /?
linux htpasswd --man or htpasswd --help
You will be given a description of the interface.
So, the password file has been created. Now you need to rewrite it to the server. Files with passwords are very desirable to put above the root directory of the site - wherever there is no access for visitors.
If this is not possible, then files with passwords should be protected. This can be done using .htaccess files. To protect files with passwords, create a file with the lines shown in the following listing.
<Files .htpasswd>
 deny from all
 </Files>
And put it in the directory where your password file is located. Now site visitors will not be able to access it.
The file with the password is created and protected from unauthorized access. Now you need to create a .htaccess file that will be used in the protected directory.
The following directives can be used to protect the directory:
AuthType Basic
 AuthName "Private zone. Only for administrator!"
 AuthGroupFile /usr/host/mysite/group
 AuthUserFile  /usr/host/mysite/.htpasswd
 require group admins
The AuthUserFile and AuthGroupFile directives should be described in more detail. They contain absolute paths to the corresponding files from the root of the server.
Relative paths will not work!
You can find out the path from the root of the server by asking the server administration, or you can try to figure it out yourself. To do this, run the phpinfo () function. A purple table will be displayed on the screen. The value of the absolute path from the server root can be viewed in the variables: doc_root, open_basedir, DOCUMENT_ROOT.
The Require directive defines who is allowed access to a restricted area. For example,
If a large group of people should have access to the protected area of the site, then it is convenient to unite people into groups, and allow access, determining whether the visitor belongs to the group.
The group file format is very simple. This is a text file, each line, which describes a separate group. The first in the line should be the name of the group with a colon. And then a space is used to list the visitors included in the group.
Admins: admin newadmin Ira
 Users: guest user Sanya
Admins group includes visitors with the names admin, newadmin, Ira.
And the Users group includes visitors with the names guest, user, Sanya.
AuthType Basic
 AuthName "Please login.!"
 AuthUserFile  /var/www/site/.htpasswd
 require valid-user
AuthType Basic
 AuthName "Please login.!"
 AuthUserFile  /var/www/site/.htpasswd
 require user admin root
AuthType Basic
 AuthName "Please login.!"
 AuthUserFile  /var/www/site/.htpasswd
 AuthGroupFile /var/www/site/group
 require group admins
<Files private.zip>
 AuthType Basic
 AuthName "Please login.!"
 AuthUserFile  /var/www/site/.htpasswd
 require valid-user
 </Files>
If changes are made to the main apache config file, you can set a password to the URL
<location / protected_url>
AuthType Basic
AuthName "Please login."
AuthUserFile "/var/www/site.com/.htpasswd"
</ location>
it should be installed AllowOverride All.
If you need to exclude a single URL from basic authentication in htaccess, then
If you are using Apache 2.4, SetEnvIf and mod_rewrite, workarounds are no longer needed, then :
AuthType Basic AuthName "Please login." AuthUserFile "/var/www/.htpasswd" Require expr "%{REQUEST_URI} =~ m#^/protected_url/.*#" Require valid-user Apache 2.4 handles Require directives that are not grouped by, <RequireAll> as if they were in <RequireAny> , which behaves like an "or" ad.
Here is a more complex example that demonstrates matching both a URI request and a query string together, and turning off the login and password requirements:
AuthType Basic AuthName "Please login." AuthUserFile "/var/www/.htpasswd" <RequireAny> <RequireAll> # I'm using the alternate matching form here so I don't have # to escape the /'s in the URL. Require expr "%{REQUEST_URI} =~ m#^/protected_url/.*#" # You can also match on the query string, which is more # convenient than SetEnvIf. #Require expr "%{QUERY_STRING} = 'secret_var=42'" </RequireAll> Require valid-user </RequireAny> This example will provide access to /protected_url/foo?secret_var=42
but you must enter a username and password to access /protected_url/foo .
Remember that if you do not use <RequireAll> , Apache will try to check <RequireAll> rule ,
to indicate which conditions you want to be met first use Require
The link for Require directives is here: https://httpd.apache.org/docs/2.4/mod/mod_authz_core.html#require
And the expr link is here: https://httpd.apache.org/docs/2.4/expr.htm
The code of the function, which is authorized at the specified address with the specified login password and returns the site content available after authorization:
  <?
	 function do_authorize ($ host, $ uri, $ user, $ pwd) {
		 $ out = "GET $ uri HTTP / 1.1 \ r \ n";
		 $ out. = "Host:". $ host. "\ r \ n";
		 $ out. = "Connection: Close \ r \ n";
		 $ out. = 'Authorization: Basic' .base64_encode ($ user. ':'. $ pwd). "\ r \ n";
		 $ out. = "\ r \ n";

		 if (! $ sock = @fsockopen ($ host, 80, $ errno, $ errstr, 10)) {
			 return 0;
		 }
		 fwrite ($ sock, $ out);
		 $ data = '';
		 while (! feof ($ sock)) {
			 $ data. = fgets ($ sock);
		 }
		 fclose ($ sock);
		 return $ data;
	 }

	 if ($ source = do_authorize ('localhost', '/ test.php', 'novice', 'novice')) {
		 echo $ source;
	 } else {
		 echo "I can't connect!";
	 }
?> Consider creating HTTP authorization using PHP, which will allow you to close any section of the site, for example, the administrative part.
For authentication, HTTP provides a simple challenge-response mechanism, which can be used by the server to challenge a client request, and the client to provide authentication information. The most common authorization scheme is the Basic Authentication Scheme.
The "basic" authentication scheme is based on the fact that the user agent (browser) must authenticate itself with a user ID (user name) and a password for each protected area (realm). The server will service the request in case it can verify the validity of the user ID and password for this protected area. There are no additional identification parameters in this scheme.
After receiving an authentication request, the server responds with a challenge, similar to the following:
WWW-Authenticate: Basic realm=" Please login" HTTP / 1.1 401 Unauthorized Here "Restricted Area" is the string assigned by the server that identifies the protected area of the requested URI (Request-URI). In simple terms - the name of the protected area.
Further, in order to obtain the access rights, the user agent (browser) sends to the server a user ID (user name) and password separated by a single colon character (":"), inside the base64-encoded recommendation string (credentials):
basic-credentials = "Basic" basic-cookie Please note that both the username and password are case sensitive. That is, for example, User and user are two different user names.
You may have already had to use the Basic authorization scheme with PHP and you know that the essence of the method is to get the PHP_AUTH_USER and PHP_AUTH_PW variables from the web server, which determine the username and password, respectively, and somehow process them inside PHP -script But note that this method is effective only when PHP functions as an Apache web server module. On our hosting PHP runs in CGI / FastCGI mode and the method described above will not work, because the variables PHP_AUTH_USER and PHP_AUTH_PW will not be passed inside the script.
However, there is a way to bypass this restriction and pass the username and password values that the user enters into a PHP script. For these purposes, the mod_rewrite tools are used - the Apache web server module. The rules we will use are as follows:
RewriteCond %{HTTP:Authorization} ^Basic.* RewriteRule (.*) index.php?authorization=%{HTTP:Authorization} [QSA,L] When requesting via HTTP to the file sitename.ru/www/index.php, this rule will send a GET request the contents of the non-empty Authorization field to the authorization parameter. If we use PHP tools to look at the contents of the $ _GET ['authorization'] variable, then we will see just described above basic-credentials - a line of the form:
"Basic dXdfgdfgfzd29yZA==" Next, we need to decrypt this line in order to subsequently subsequently somehow process the entered username and password. You can do this as follows:
preg_match('/^Basic\s+(.*)$/i', $_GET['authorization'], $user_pass); list($user,$pass)=explode(':',base64_decode($user_pass[1])); Thus, we get two variables, $ user and $ pass, containing the username and password respectively. Now, as mentioned above, they need only be processed in some way - for example, compare with similar variables from a database or from a file with user accounts.
The considered method will work successfully wherever PHP is running in CGI / FastCGI mode and Apache + mod_rewrite is used as a web server.
<IfModule mod_rewrite.c> RewriteEngine on RewriteBase / RewriteCond %{HTTP:Authorization} ^Basic.* RewriteRule (.*) index.php?authorization=%{HTTP:Authorization} [QSA,L] </IfModule> $authenticated=0; if(isset($_GET['authorization'])) { if(preg_match('/^Basic\s+(.*)$/i', $_GET['authorization'], $user_pass)) { list($user,$pass)=explode(':',base64_decode($user_pass[1])); // Проверка введенных логина и пароля if($user=="user" && $pass=="password") { $authenticated=1; } } } if($authenticated) { // Авторизация успешно пройдена echo("user: ".$user."<br>pass: ".$pass); } else { header('WWW-Authenticate: Basic realm="Please login"'); header('HTTP/1.1 401 Unauthorized'); echo("Access denied."); } 
Comments
To leave a comment
Information security, Malicious, and information security
Terms: Information security, Malicious, and information security